-
1. Escolha um gradiente / linear/ angle 0 /repeats 1
-
-
2- Abra uma imagem de 600 x 480 e preencha com o gradiente
-
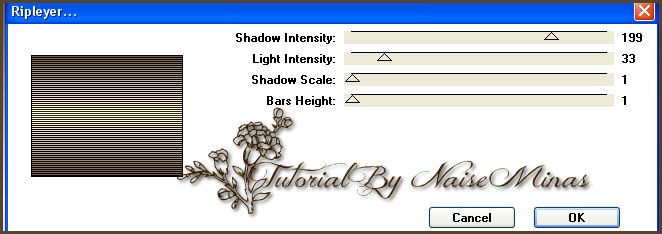
3- Aplicar o plugin / Roshack Filter * Riphier*
-
-
-
4-Layers / New raster Layer
5- Selections / Loads selection from disk / Aplicar selections *naise_fragmentos*
6_Aplicar a mesma cor preenchida no item 2
7_Repetir o item 3/Selections / select nome
8_Fechar a Raster 1 e trabalhar na Raster 2
9_Effects / Texture Weave / 10/12/100/cor preto
select nome
-
10_User defined Filter / emboss 3
-
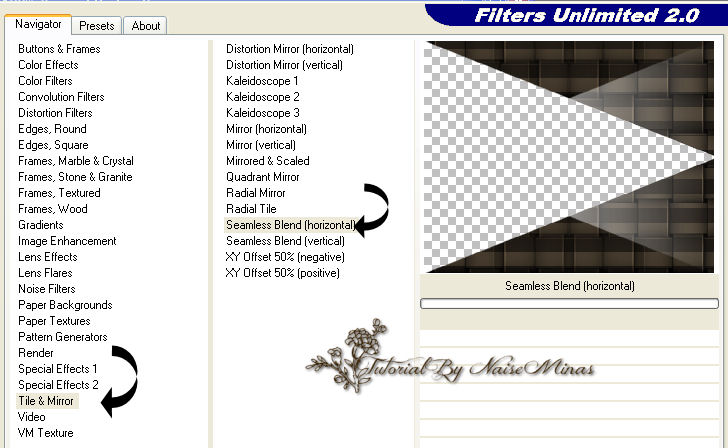
- 11_Aplicar o Plugins / Unlimited 2.0
-
-
-
- 12_Layers / duplicat
-
13_Image / Mirror
/ layer merge Visible
-
-
14_Valtar a visibilidade da raster 1
15_ Select all / Edit copy na sua imagem de fundo
16_Selections / selec all/past into/ select nome
17_Visibilidade na Raste 2 até 50
18_Layer /Merge Visible
19_New raste Layer / aplicar o mesmo gradiente
20_ Repetir o item 3
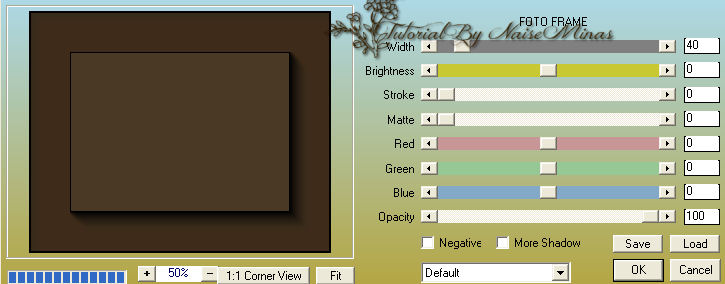
21_Layer new raster layer/ Aplicar o Plugins / Foto Frame
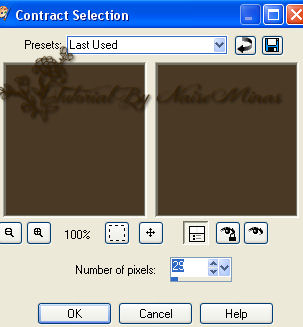
22_Selections select all / modifi / contract
23_Selections / Invert
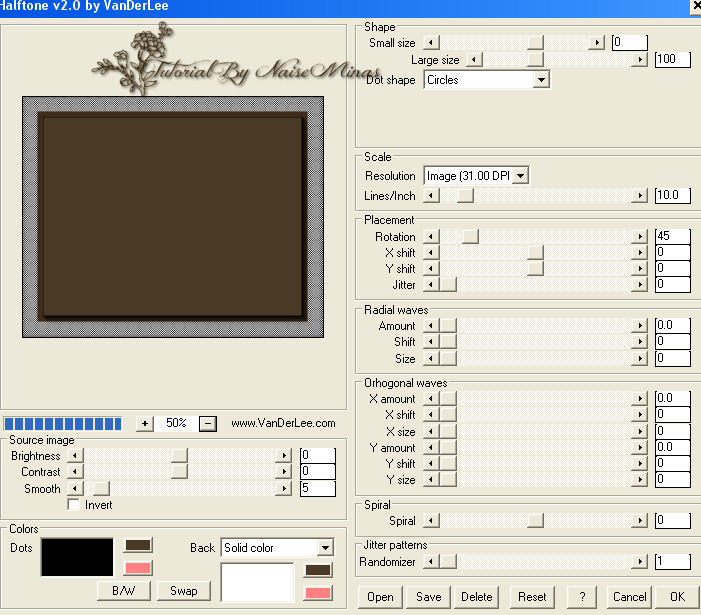
24_ Aplicar o Plugins/ VanDerLee / Halftone v2.0
25_Adjust / Hue and saturation / colorize * a cor que desejar*
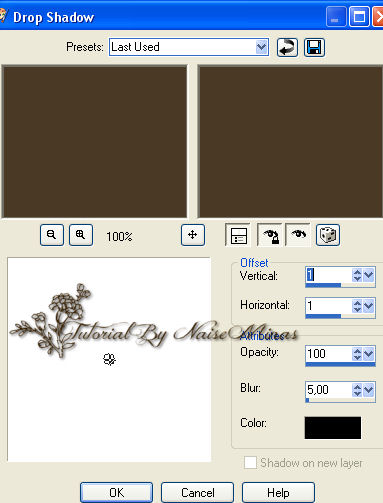
26_Effects /3D Drop Shadow 3D / negativo e positivo/
Select nome
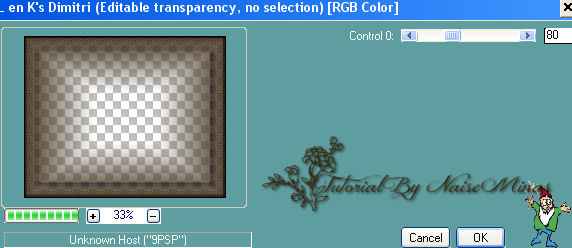
27__Aplicar o Plugins L en K's * Dimitri*
28_ Aplicar seu tube
29_Layer merge all
30_ Assine
-
Outro Modelo