|
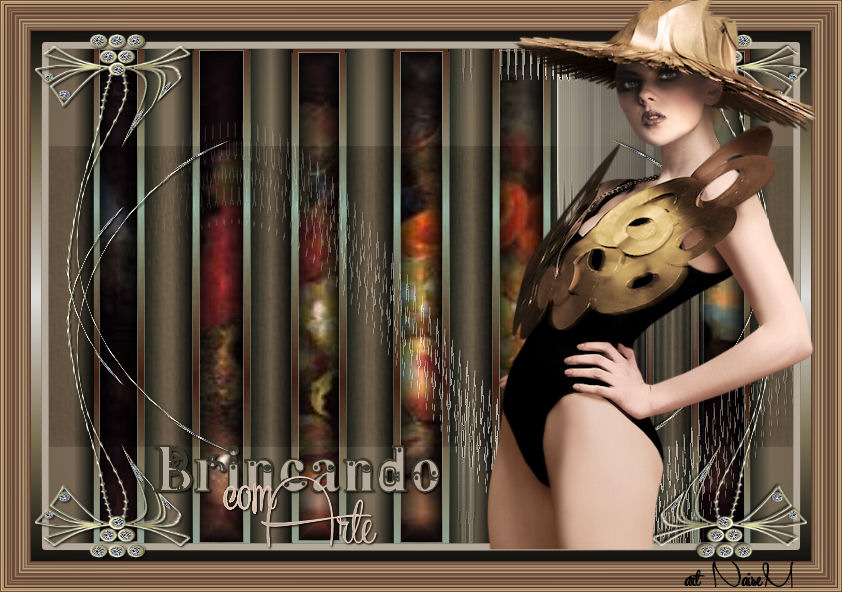 |
 Tag Playing with Art Tag Playing with Art
Let's play with effects on top of our creations?
You can, and should, play around with my tutorial.
The selections are attached, and so is the mask.
|

1 Tube
1 Mask
- 1 image
PSP Effects
2 Selections
Textura
Plugin Unlimited 2.0
Instructions
 |
Use the arrow to mark your line
Click with the mouse to move it
|
1_. Open a new transparent image of 750 x 500 px.
2_. Fill with a solid color.
3_. Layers → New Raster Layer.
4_. Selections → Load/Save Selection → Load Selection From Disk: art_vidade_selection_01.
Fill the selected parts with the color of your choice. Mine looked like this:
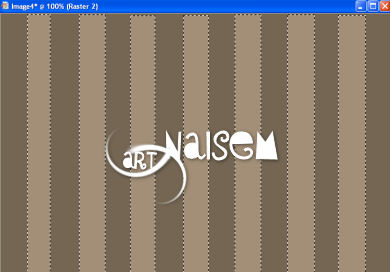
5_. Selections → Modify → Select Selection Borders, as shown below:
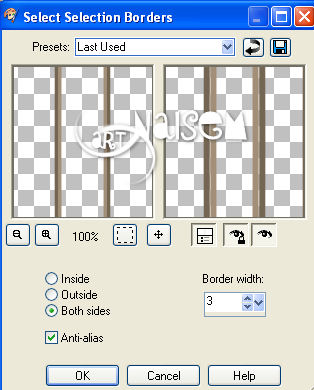
6_. Selections → Invert and press the Delete key.
Selections → Select None.
7_. Choose an image and apply Edit → Copy to it.
.jpg)
8_. Select the inside of all the rectangles: hold down the Shift key and select the parts of the selection one by one.
9_. Edit → Paste Into Selection.
Effects → 3D Effects → Inner Bevel.
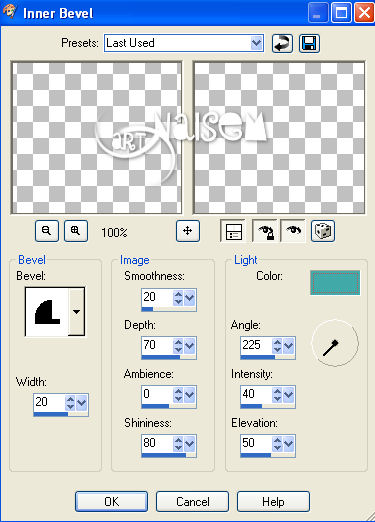
Selections → Invert and apply Effects → 3D Effects → Drop Shadow: 0 / 0 / 100 / 80.
Selections → Select None.
10_. Layers → New Raster Layer.
11_. Selections → Load/Save Selection → Load Selection From Disk: art_vidade_selection_02.
12_. Fill with a gradient of your choice. I applied this one:
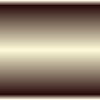
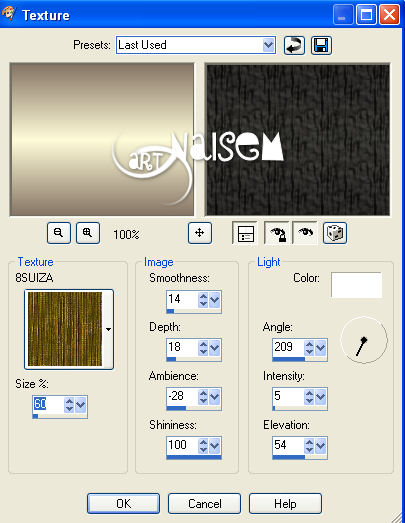
13_. Effects → Texture Effects → Texture: 8SUIZA, with the settings below:
14_. Layers → Properties → Opacity: 65%.
15_. Layers → Properties → Blend Mode: Soft Light.
16_. Effects → Edge Effects → Enhance.
Selections → Select None.
17_. Image → Add Borders → Symmetric checked:
1 px - black color
45 px - color of your choice
18_. Select this border with the Magic Wand tool and apply the same gradient.
19_. Effects → Plugins → Filters Unlimited 2.0 → Buttons & Frames → Gradient Frame: double-click and another window will open.
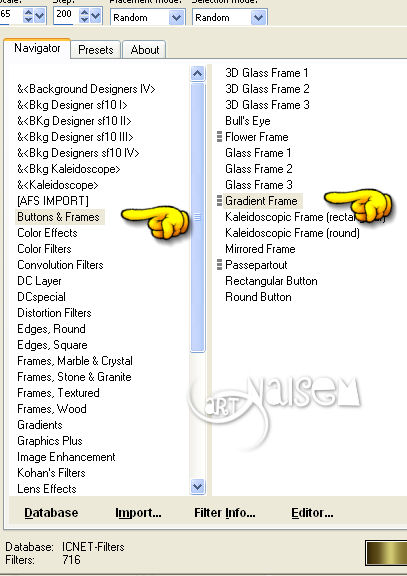
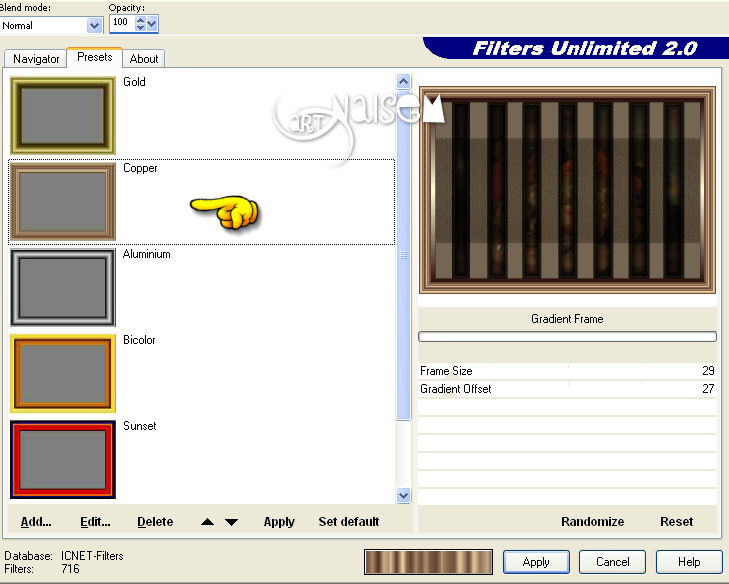
I chose the Copper preset with these settings: Frame Size 29 / Gradient Offset 27.
20_. Still selected: Selections → Modify → Select Selection Borders, as in step 5.
Select the smaller selection, inside the frame, and fill with a light, solid color.
Effects → Edge Effects → Enhance More.
Selections → Select None.
21_. Layers → New Raster Layer.
22_. Layers → Load/Save Mask → Load Mask From Disk: art_vidade_masks_01.
Layers → Merge → Merge Group.
Effects → 3D Effects → Drop Shadow: 1 / 1 / 100 / 3.
23_. Apply a decor of your choice.
24_. I applied Effects → Distortion Effects → Twirl to the decor but, depending on your decor, you can use other effects.
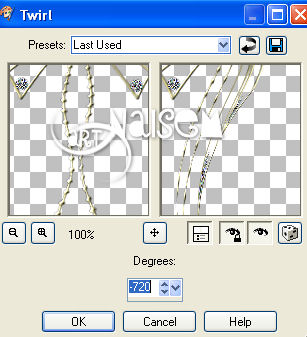
25_. I duplicated it and applied Image → Flip; I duplicated again and applied Image → Mirror.
26_. Sign your work.
27_. Save as JPG.
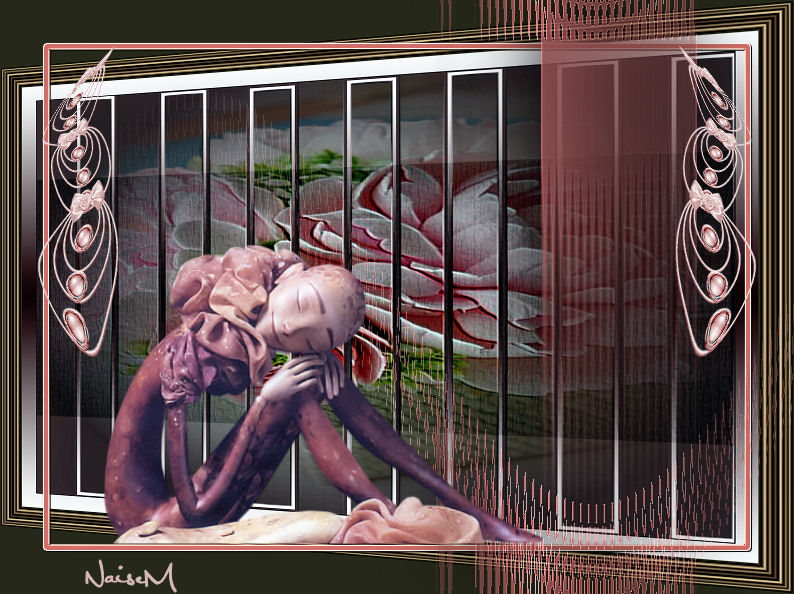
In this tag, with the layers still open, I went back to the back layer and applied the Perspective Horizontal effect
a different decor with effects from the tool
Credits
-
- ** Tutorial created by
NaiseM
**
- Tubes: 1746 - LB Tubes
- Image: acquired from the web
- Selections: NaiseM
-
- 16/04/2016
-
- All rights reserved
- Prohibited: sharing in whole or in part, copies, alterations
- publication on sites or blogs, without the author's authorization.
-
-
|