 |
Use the arrow to mark your line
Click with the mouse to move it
|
Walkthrough
1_. Open a new transparent image of 800 x 600 px.
2_. Fill with a Radial gradient: Angle 45 / Repeats 1 / Center Point: Horizontal 100 / Vertical 51.

3_. Layers → Duplicate.
Image → Mirror.
Layers → Properties → Opacity: 50%.
4_. Layers → Merge → Merge Visible.
Effects → Edge Effects → Enhance More.
5_. Layers → Duplicate and, on the copy, apply:
6_. Effects → Distortion Effects → Twirl: 156.
7_. Apply the mask Narah_mask_0474.
Layers → Merge → Merge Group.
Effects → Edge Effects → Enhance More.
8_. Go back to the Merged layer.
9_. Choose an image, Edit → Copy.
Edit → Paste Into Selection.
Layers → Merge → Merge Visible.
10_. Edit → Copy.
11_. Image → Add Borders → Symmetric checked: 59 px.
12_. With the Magic Wand tool, select the border.
Edit → Paste Into Selection.
13_. Effects → Plugins → AAA Frames → Foto Frame.
Note: Width 10; the rest is up to you.
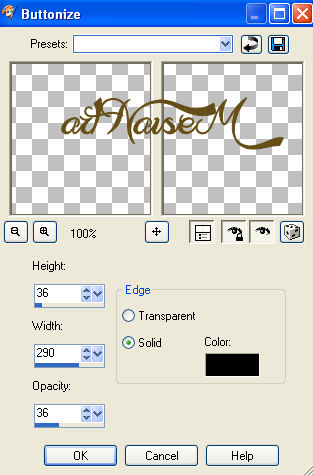
14_. Effects → 3D Effects → Buttonize.
15_. Selections → Invert.
Effects → 3D Effects → Drop Shadow: 0 / 0 / 100 / 60.
16_. Selections → Select None.
17_. Apply your tube.
18_. Choose a frame with a maximum width of 250 px.
Duplicate this frame.
19_. Apply frame 1 to your work.
20_. On the 2nd frame, with the Freehand Selection tool, select the part of the frame you want and then, action.
Note:
This Freehand tool does not exist in PSP 9; I found it in Corel X7 and, in the other versions, I do not know where it is.
21_. Image → Resize on this 2nd frame down to 150 px and place it wherever you like.
22_. Sign your work.
23_. Save as JPG.