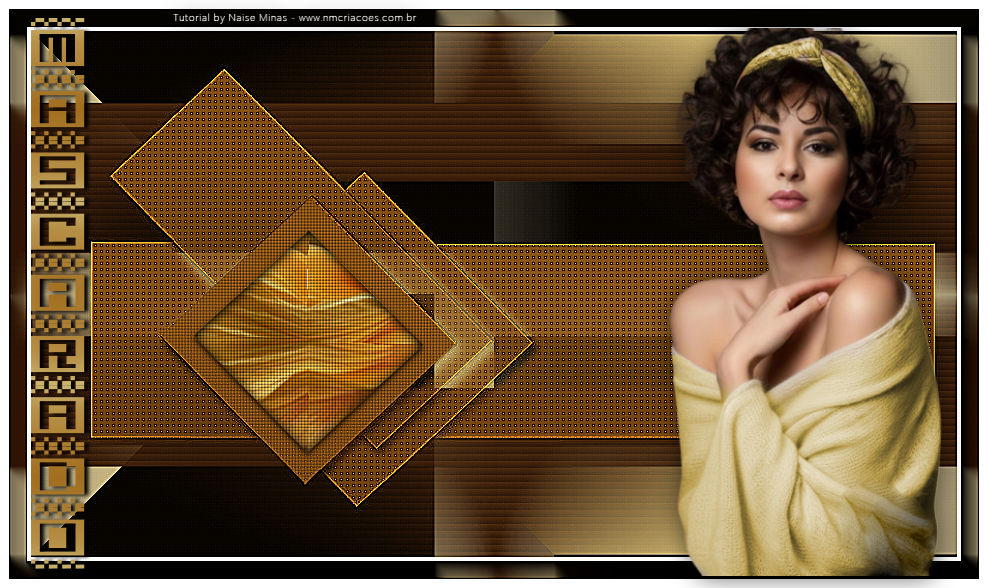
|
Tutorial created using PSP 2022
Ultimate
This tutorial was
created by me; any resemblance to others is purely
coincidental.
My thanks to all the translators.
Materials
To the creators of the masks: thank you for allowing
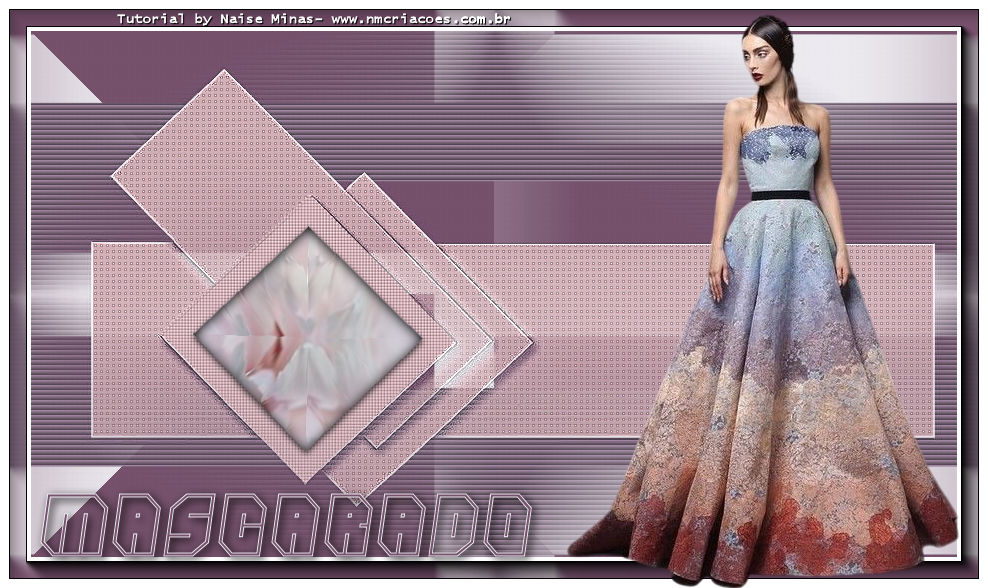
their use; without you, creating the "Mascarado"
tutorial would not have been possible.
Font: Scale
Tubes and misteds created by me

Plug-ins
Caroline And
Sensibility - CS LDots
Unlimited 2.0 -Simple - Pizza Slice Mirror
AAA Frames -
Foto Frame

Instructions...
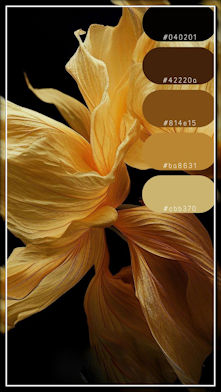
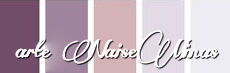
The color palette you choose must have 5 shades, as
shown in the example below:
1:#040201 2:#42220b
3:#814e15 4:#ba8632 5: #cbb470
Preparation.....
Choose your color palette first and open it in PSP.
I have included some saved palettes in the folder in case you wish to use them.
Choose a misted tube that matches your palette.
Choose a font you like for the text "Mascarado
1_.
Open a transparent image sized 970 x 570.
2_. Click on the 1st color of your palette and apply it
to the transparent image.
3_. Apply the mask "femmeubaine" – merge group.
4_. Layers - New Raster Layer.
5_. Apply the 2nd color from the palette.
Apply the mask "masccameron" (author unknown).
Rename to "Group-Raster 2".
6_. Layers - New Raster Layer.
7_. Apply the 3rd color from the palette.
Apply the mask "masccal 1".
Rename to "Group - Raster 3".
8_. Selections - Load/Save Selections - Apply selection
#mascarado1
Selections - Promote selection to layer
9_. Selections - Modify - Contract - 23 pixels
10_. Layer - New Raster Layer
Apply the 4th color
11_. Open your misted image - Edit > Copy and paste it
into your work
Apply the "Glass-#mascarado" preset from Eye Candy
Impact
Selections - Select None
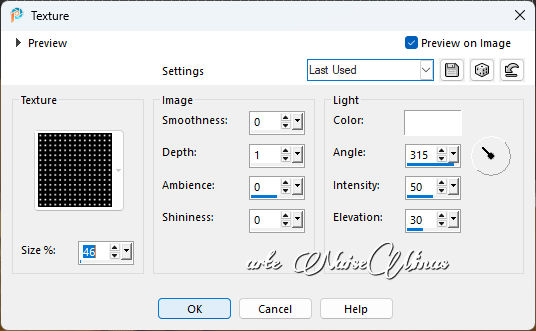
12_. Effects - Texture Effects - Texture
13_. Make Group - Raster 3 visible
Plug-in: Caroline and Sensibility - CS LDots
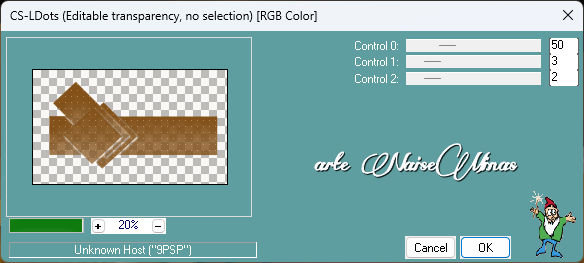
Enhance More
14_. Make Group - Raster 2 visible
Effects - Texture - Blinds
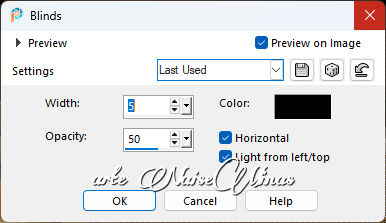
15_. Make Group - Raster 1 visible
Filter - Unlimited 2.0 - Simple - Pizza Slice Mirro
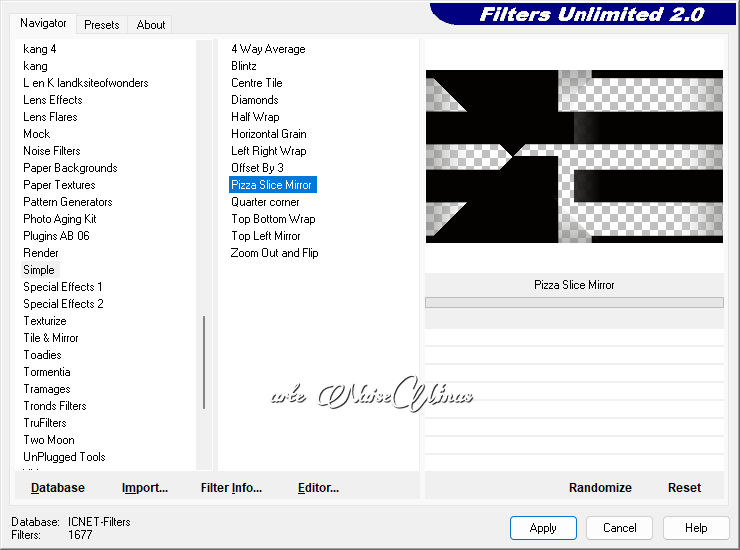
16_. Layer - Merge Visible
17_. Layer - New Raster Layer
Apply the 5th color from your palette
Layer - Arrange - Move Down
Merge All (Flatten)
18_. Plug-in: AAA Frames - Photo Frame
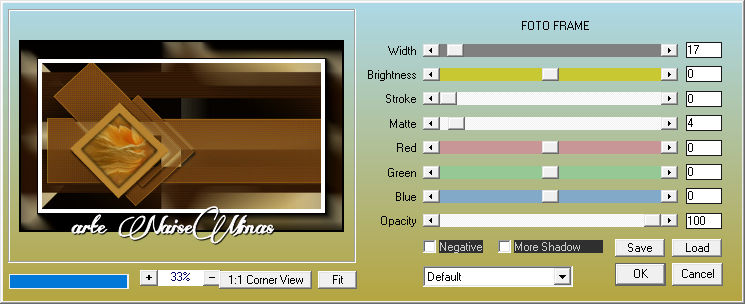
19_. Image - Add Borders (Symmetric
checked)
Size 9, #ffffff
20_. Choose two colors from your palette and set them as
foreground and background
Choose your font and type **Mascarado** (I used the
"Font Scale" setting for the main tag)
It can be vertical or horizontal (your choice)
21_. Apply your tube
22_. Add your signature
23_. Export as JPG
Template and palette 2
16-01-26
|