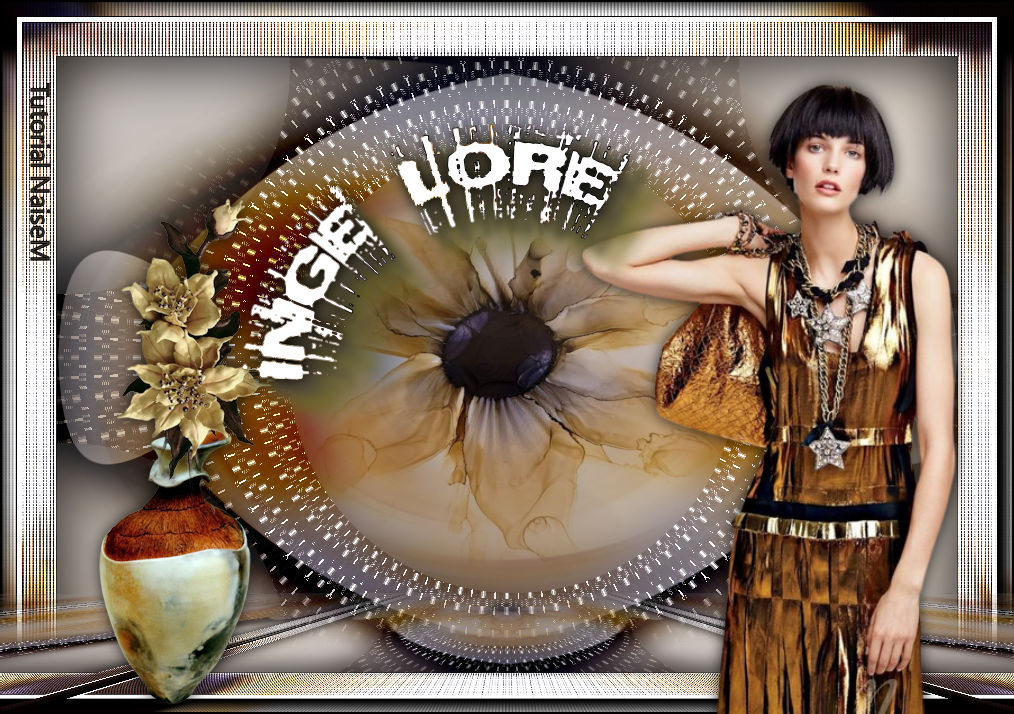
Inge Lore
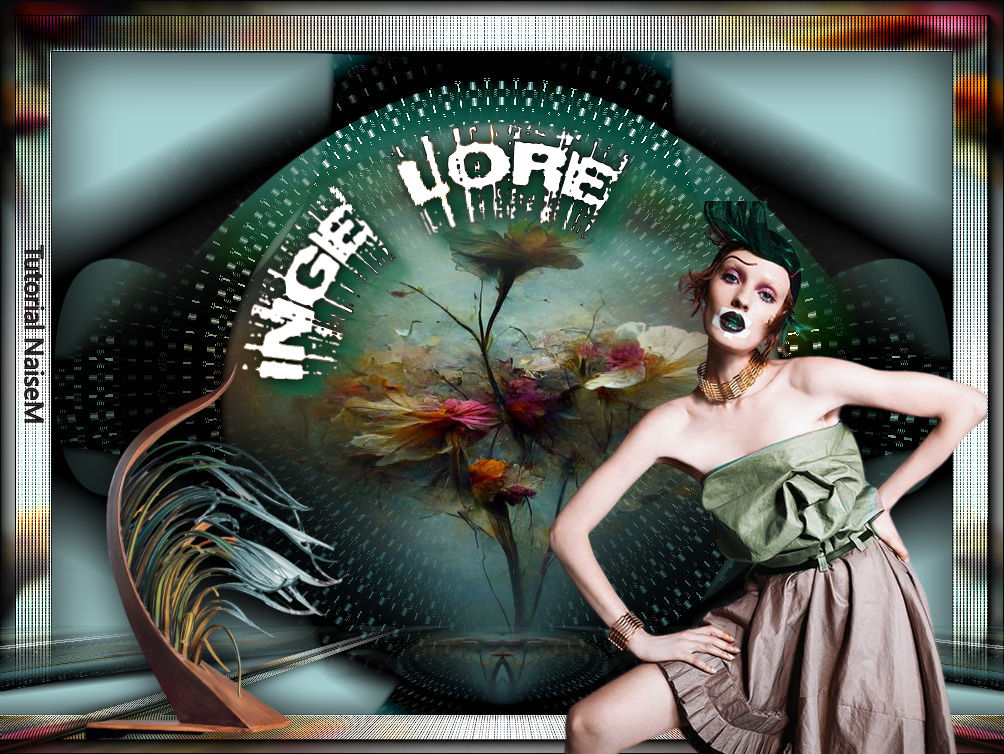
Um mimo para nossa querida Inge-Lore
Tutorial elaborado no PSP.
Todos os tutoriais são pessoais.
Qualquer semelhança é mera coincidência. |
MATERIAL

Tube mulher: minha autoria
Imagem: adquirida na internet
Misted: minha autoria
Vaso: minha autoria
Flor: CallyTubes (agradeço)
Seleção: #selecao_IngeLore
Título
PLUGINS
Filters Unlimited 2.0 → Kang 1 → Some Snowflake Star Thing
AAA Frames → Foto Frame
MuRa's Filter Meister → Perspective Tiling

 |
Use a seta para marcar a sua linha
Clique no mouse para movê-la
|
Roteiro
1_. Escolha uma imagem: Edit → Copy.
Abra uma nova imagem transparente de 900 x 650 px.
2_. Selections → Select All.
Edit → Paste Into Selection.
3_. Adjust → Blur → Radial Blur.
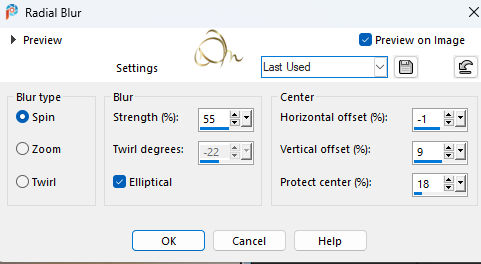
4_. Layers → Duplicate.
5_. Selections → Load/Save Selection → Load Selection From Disk: #selecao_IngeLore.
6_. Pressione a tecla Delete.
7_. Effects → 3D Effects → Chisel.
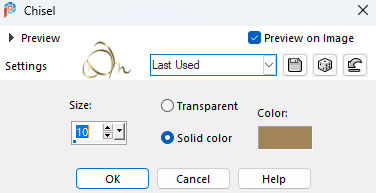
Selections → Select None.
8_. Effects → Image Effects → Seamless Tiling: Default.
9_. Effects → Plugins → Filters Unlimited 2.0 → Kang 1 → Some Snowflake Star Thing.
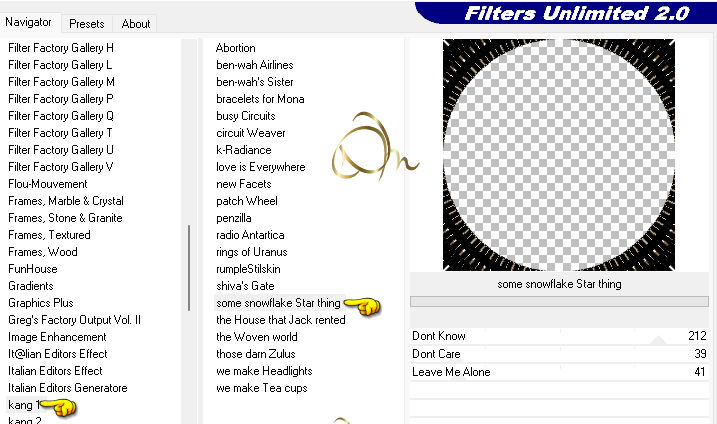
10_. Layers → Properties → Blend Mode: Overlay ou o que desejar.
11_. Ative a layer Raster 1.
12_. Layers → Duplicate.
13_. Effects → Image Effects → Page Curl nos 4 lados.
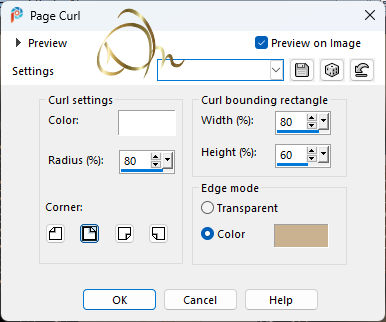
14_. Abra o seu misted: Edit → Copy.
15_. Selections → Load/Save Selection → Load Selection From Disk: aplique a seleção novamente.
Edit → Paste Into Selection.
Selections → Select None.
16_. Ative a layer Copy of Raster 1.
Effects → 3D Effects → Drop Shadow: 0 / 0 / 100 / 12.
17_. Image → Add Borders → Symmetric marcado:
1 px - cor #000000
55 px - cor #ffffff
1 px - cor #000000
18_. Com a ferramenta Magic Wand, selecione a parte branca.
19_. Abra o seu misted e aplique Effects → Image Effects → Seamless Tiling: Default.
Edit → Copy.
Edit → Paste Into Selection nesta barra branca.
20_. Ainda selecionado, aplique Adjust → Blur → Gaussian Blur: Radius 4.
21_. Effects → Texture Effects → Texture: Grid.
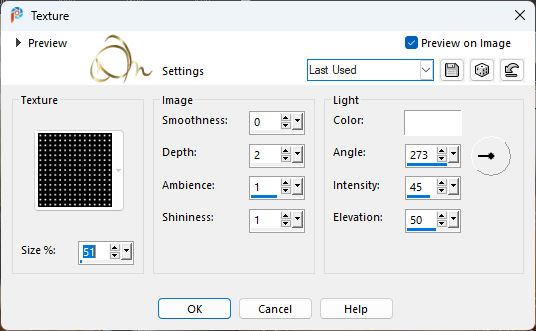
Effects → Edge Effects → Enhance.
22_. Effects → Plugins → AAA Frames → Foto Frame.
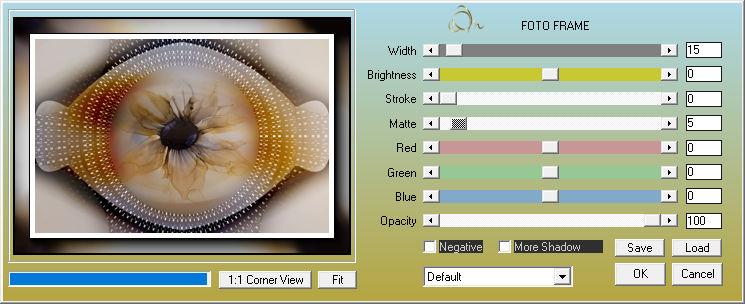
23_. Effects → 3D Effects → Drop Shadow: 0 / 0 / 100 / 100.
Selections → Select None.
24_. Layers → Duplicate.
25_. Effects → Plugins → MuRa's Filter Meister → Perspective Tiling.
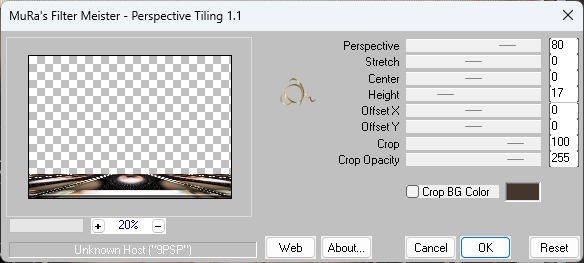
26_. Effects → Reflection Effects → Rotating Mirror.
27_. Com a ferramenta Magic Wand, selecione com as configurações abaixo:

Pressione a tecla Delete 3 vezes.
Selections → Select None.
28_. Aplique o título "Inge Lore" e dê um Colorize a gosto.
Com a ferramenta Pick Tool, posicione em X: 109 / Y: 228.
29_. Aplique o seu tube principal e o floral.
30_. Image → Add Borders → Symmetric marcado: 1 px - cor #000000.
31_. Assine e salve em JPG.
OUTRO MODELO
Créditos:
Criação, arte e formatação: Naise Minas
Flor: CallyTubes
Tutorial criado por Naise Minas - NM Criações
em 05/10/2023.
Copyright ©2012/2026 - Web Design - Naise Minas