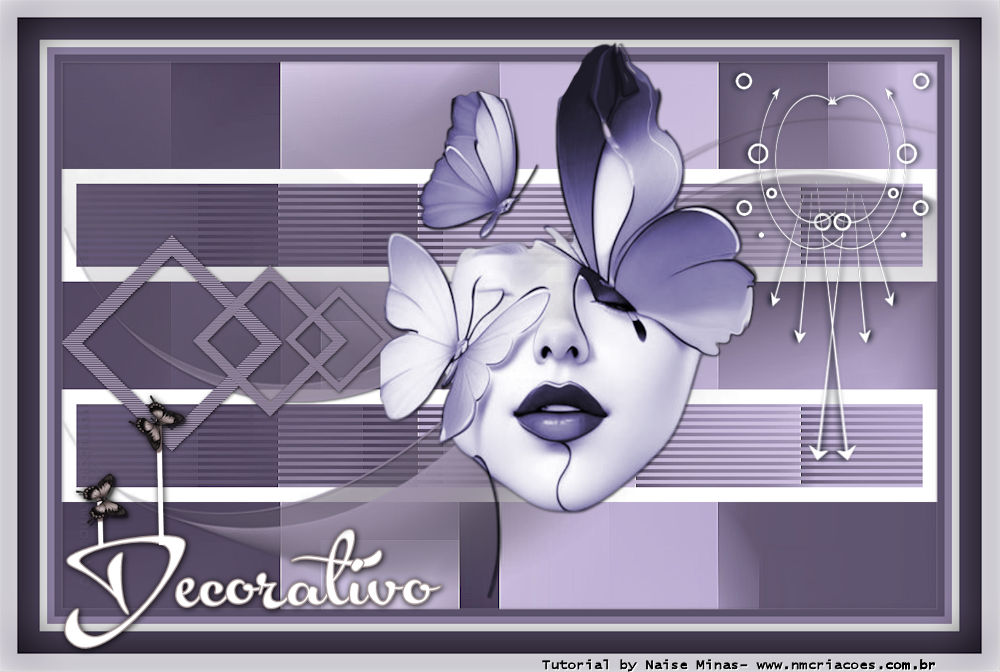
Decorativo
Tutorial elaborado no PSP 2020, mas executável em qualquer versão.
Todos os tutoriais são pessoais.
Qualquer semelhança é mera coincidência. |
MATERIAL

Alpha: alpha_decorativo
Back: back
Tube: rosto_decorativo
Mask: Narah_Mask_1091 (agradeço à Narah)
Deco: deco_decorativo
Título: titulo
PLUGINS
Mehdi → Sorting Tiles
Carolaine and Sensibility → CS-Linear-H
Carolaine and Sensibility → CS-Texture
 |
Use a seta para marcar a sua linha
Clique no mouse para movê-la
|
Roteiro
1_. Abra o back.
Dê um Colorize a gosto.
Edit → Copy.
2_. Abra a sua seleção alpha (alpha_decorativo).
Layers → New Raster Layer.
Selections → Select All.
Edit → Paste Into Selection.
Selections → Select None.
3_. Effects → Plugins → Mehdi → Sorting Tiles, nas configurações abaixo:
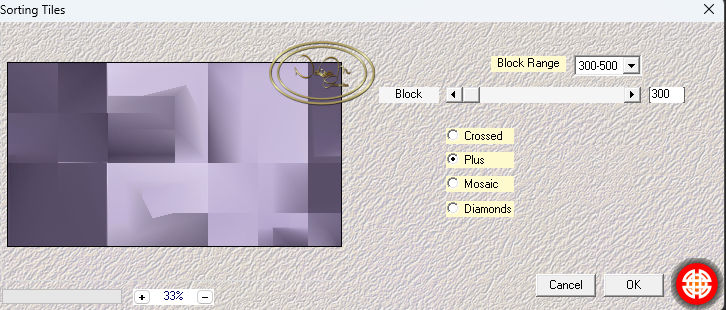
4_. Layers → New Raster Layer.
5_. Selections → Load/Save Selection → Load Selection From Alpha Channel: alpha1.
Pinte com a cor #ffffff (branco).
6_. Selections → Modify → Contract:
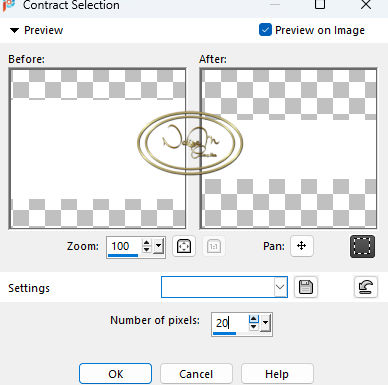
Edit → Cut.
7_. Ative a layer Raster 1.
Selections → Promote Selection to Layer.
8_. Effects → Plugins → Carolaine and Sensibility → CS-Linear-H:
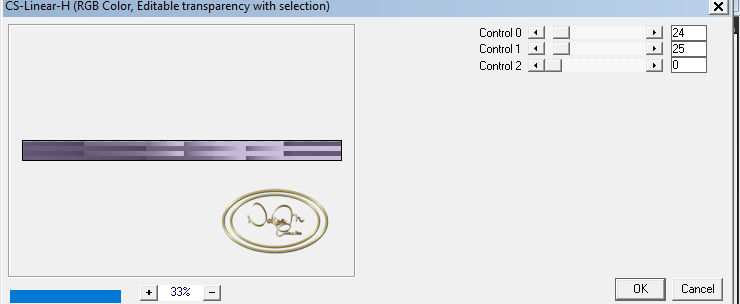
9_. Ative a layer Raster 1.
Layers → Merge → Merge Down.
Selections → Select None.
10_. Layers → Duplicate.
Image → Mirror → Mirror Vertical.
Layers → Merge → Merge Down.
11_. Layers → New Raster Layer.
Pinte com a cor #a194ad.
12_. Layers → Load/Save Mask → Load Mask From Disk: Narah_Mask_1091.
Layers → Merge → Merge Group.
Effects → 3D Effects → Drop Shadow: 1 / 1 / 74 / 70,46.
13_. Layers → New Raster Layer.
Selections → Load/Save Selection → Load Selection From Alpha Channel: alpha 2.
Pinte com a cor #a194ad.
Selections → Modify → Contract:
Edit → Cut.
Selections → Select None.
14_. Effects → Plugins → Carolaine and Sensibility → CS-Texture:
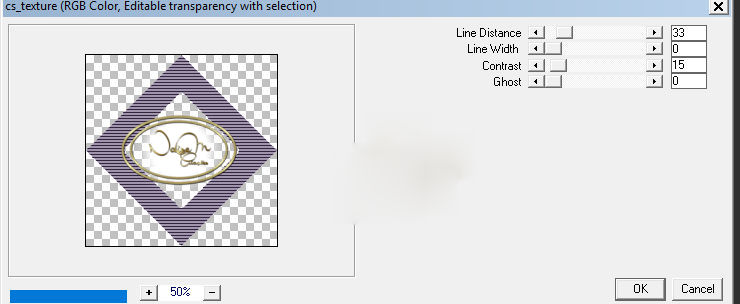
Selections → Select None.
15_. Objects → Align → Left.
16_. Layers → Duplicate.
Image → Resize: 70%.
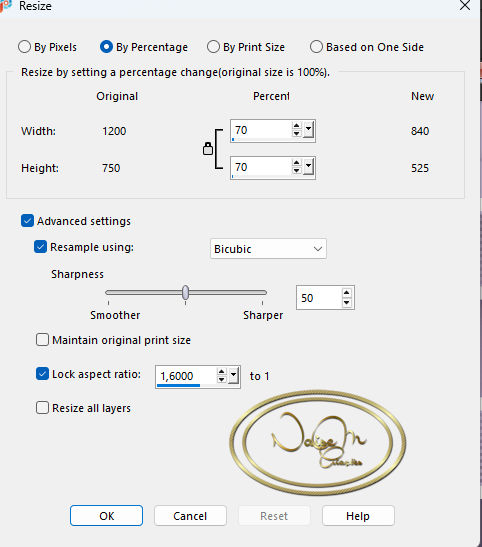
Layers → Duplicate novamente.
Image → Resize: 70%.
Layers → Merge → Merge Down (2 vezes).
17_. Effects → 3D Effects → Drop Shadow: 1 / 1 / 70 / 7,24.
18_. Image → Add Borders → Symmetric marcado:
10 px - cor #5d536e
10 px - cor #9285a7
10 px - cor #f1f1f2
55 px - cor #534962
19_. Selections → Select All.
Selections → Modify → Select Selection Borders:
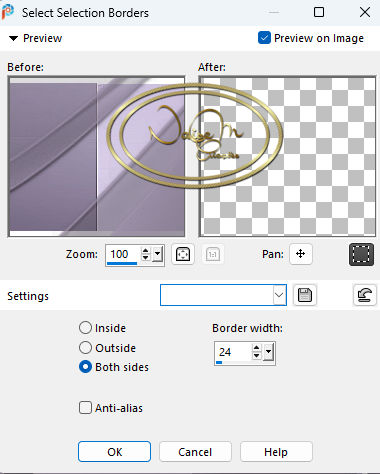
20_. Ainda selecionado: Effects → 3D Effects → Cutout.
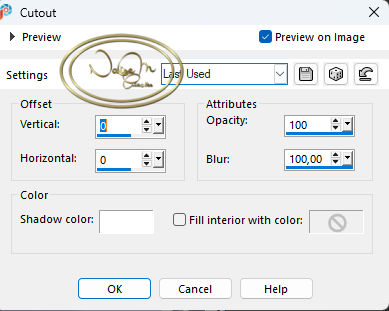
21_. Ainda selecionado: Effects → 3D Effects → Drop Shadow: 1 / 1 / 100 / 100.
Selections → Select None.
22_. Abra o deco_decorativo: Edit → Copy.
Edit → Paste As New Layer.
Com a ferramenta Pick Tool, posicione em X: 995 / Y: 90.
23_. Abra o titulo: Edit → Copy.
Edit → Paste As New Layer.
Com a ferramenta Pick Tool, posicione em X: 115 / Y: 78.
Effects → 3D Effects → Drop Shadow: 1 / 1 / 90 / 9,00.
24_. Abra o seu tube rosto_decorativo: Edit → Copy.
Edit → Paste As New Layer.
Com a ferramenta Pick Tool, posicione em X: 521 / Y: 57.
Effects → 3D Effects → Drop Shadow: 1 / 1 / 90 / 4,35.
25_. Image → Resize: 1000 px.
26_. Assine.
27_. Exporte em JPG.
Créditos:
Criação, arte e formatação: Naise Minas
Mask: Narah
Tutorial criado por Naise Minas - NM Criações
em 16/10/2025.
Copyright ©2012/2026 - Web Design - Naise Minas