|
|
|
|
|
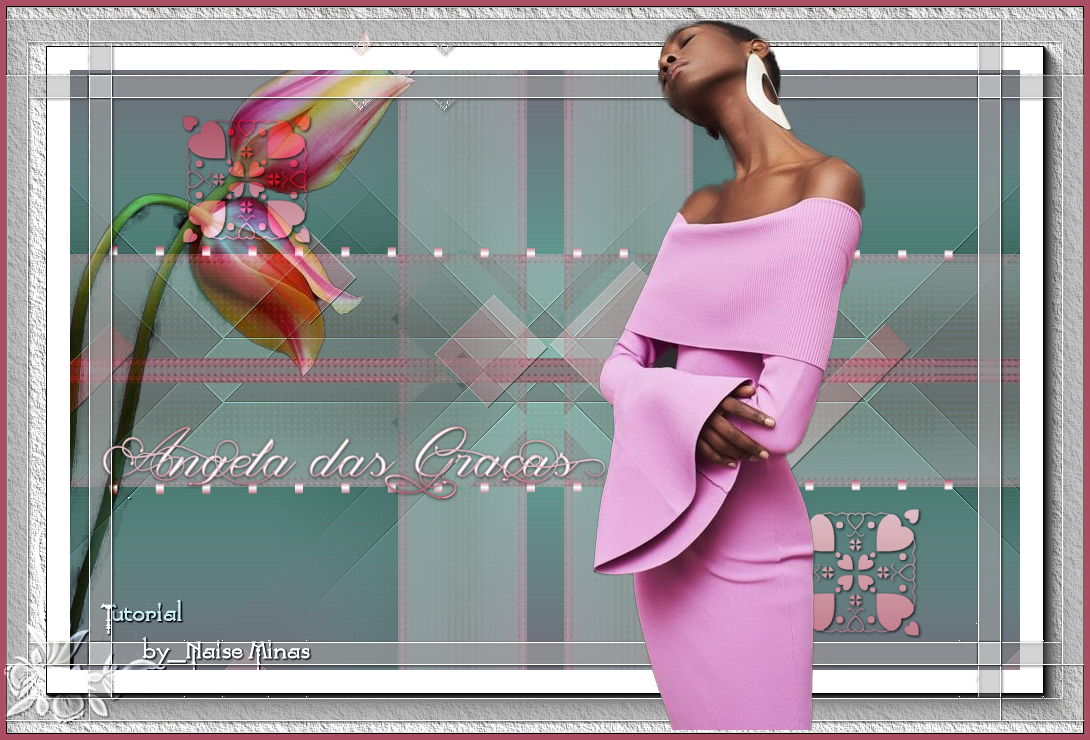
Un obsequio para Angela das Graças
Materiales Tube de mujer Tube de flor Preset (guardar en la carpeta) Degradado Decos Brush (guardar en la carpeta) Nombre
Plug-ins Toadies / Simple (importar a Unlimited 2.0) AAA Frame / Texture
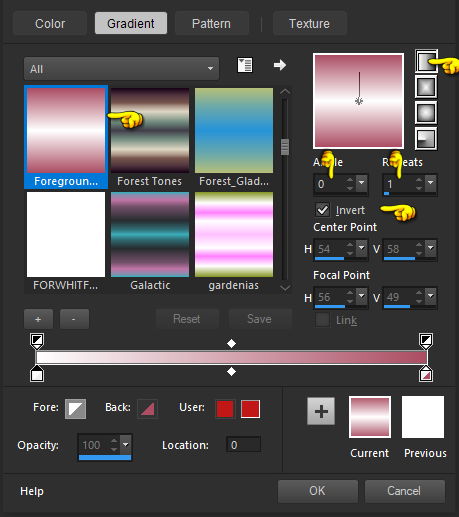
Guion 1_. Abra una nueva imagen transparente de 950 x 600 px. Forme un degradado Linear: foreground #FFFFFF / background #ab4e63 - Angle 0 / Repeats 1 / Invert marcado.
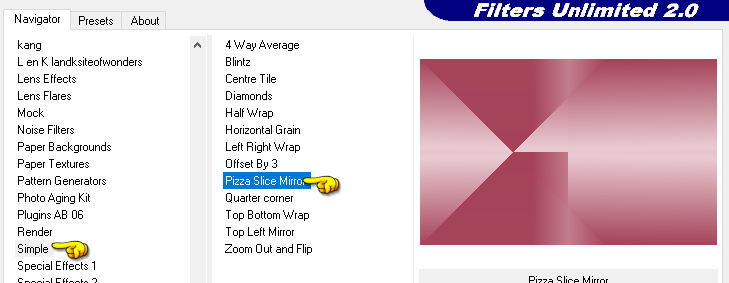
Pinte la imagen con el degradado. Effects → Plugins → Filters Unlimited 2.0 → Simple → Pizza Slice Mirror.
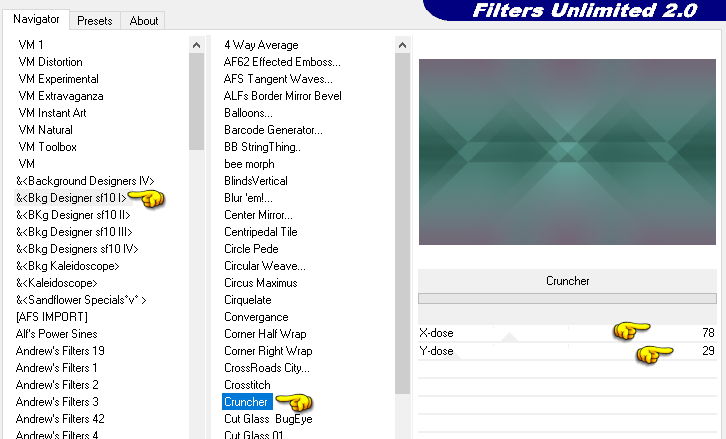
Layers → Duplicate. Image → Mirror → Mirror Horizontal. Layers → Properties → Blend Mode: Exclusion. Layers → Merge → Merge Visible. 2_. Effects → Plugins → Filters Unlimited 2.0 → &<Bkg Designer sf10 I> → Cruncher: X-dose 78 / Y-dose 29.
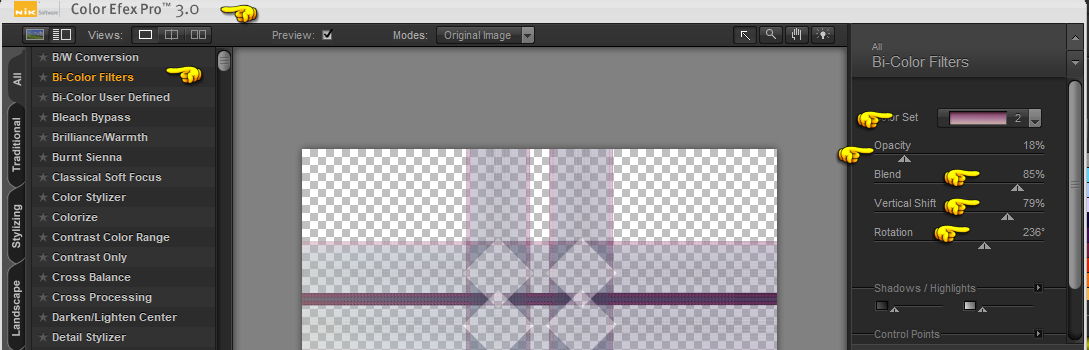
Effects → Edge Effects → Enhance More. 3_. Abra el deco-1 y, si lo desea, aplique Effects → Plugins → Nik Software → Color Efex Pro 3.0 → Bi-Color Filters.
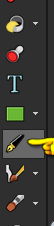
Edit → Copy. Edit → Paste As New Layer. 4_. Active la herramienta Pen.
Configure la línea con *Current Styled Line*, con estos ajustes:
Layers → New Raster Layer. Usando el mismo degradado, con la misma configuración, haga un trazo.
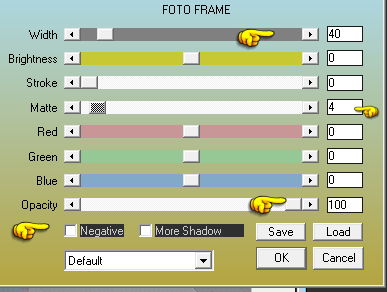
Layers → Duplicate. Image → Mirror → Mirror Vertical. 5_. Abra el deco-2 y coloréelo a su gusto. Edit → Copy. Edit → Paste As New Layer. Layers → Properties → Blend Mode: Hard Light. 6_. Image → Add Borders → Symmetric marcado: 64 px - color #FFFFFF. Effects → Plugins → AAA Frames → Foto Frame: Width 40 / Matte 4 / Opacity 100.
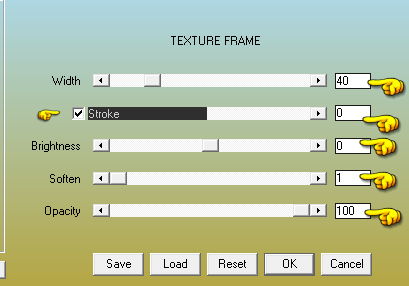
A continuación, con la selección todavía activa, aplique Effects → Plugins → AAA Frames → Texture Frame: Width 40 / Stroke 0 / Brightness 0 / Soften 1 / Opacity 100.
Selections → Select None. 7_. Con la herramienta Magic Wand, seleccione el blanco de dentro.
Selections → Promote Selection to Layer. Selections → Select None. Effects → Plugins → Filters Unlimited 2.0 → &<Bkg Designer sf10 I> → Cruncher, con la misma configuración.
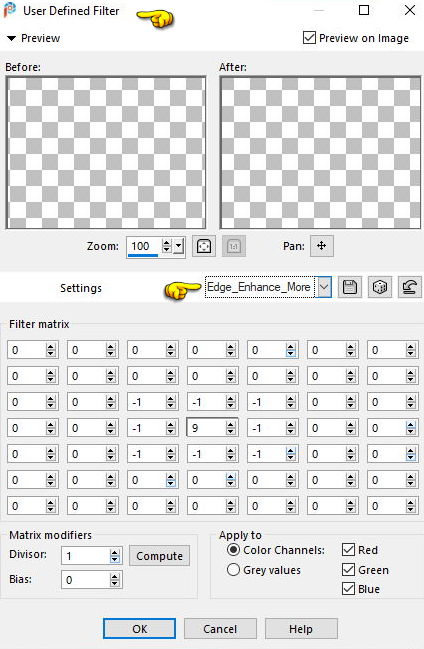
Effects → User Defined Filter → Edge_Enhance_More.
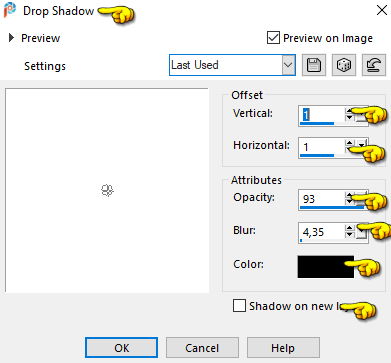
Effects → 3D Effects → Drop Shadow: 1 / 1 / 93 / 4,35 - color #000000.
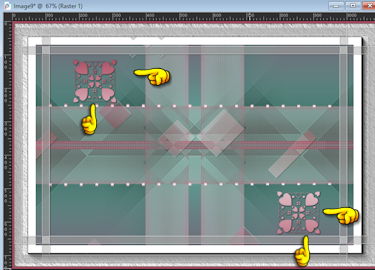
8_. Image → Add Borders → Symmetric marcado: 6 px - color #ab4e63. 9_. Layers → New Raster Layer. Con la herramienta Paint Brush, aplique el brush con el mismo degradado.
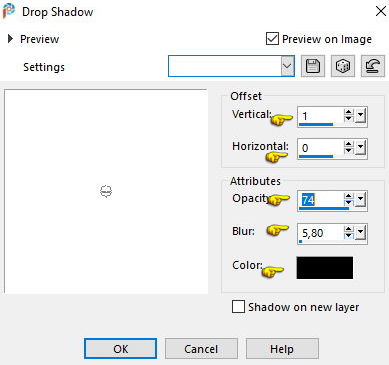
Effects → 3D Effects → Drop Shadow: 1 / 0 / 74 / 5,80 - color #000000.
10_. Aplique su tube principal. 11_. Aplique el nombre. 12_. Aplique su tube de flores - Layers → Properties → Blend Mode: Overlay, o a su gusto. 13_. Image → Resize: 1000 px. 14_. Firme su trabajo. 15_. Guarde en JPG.
|