|
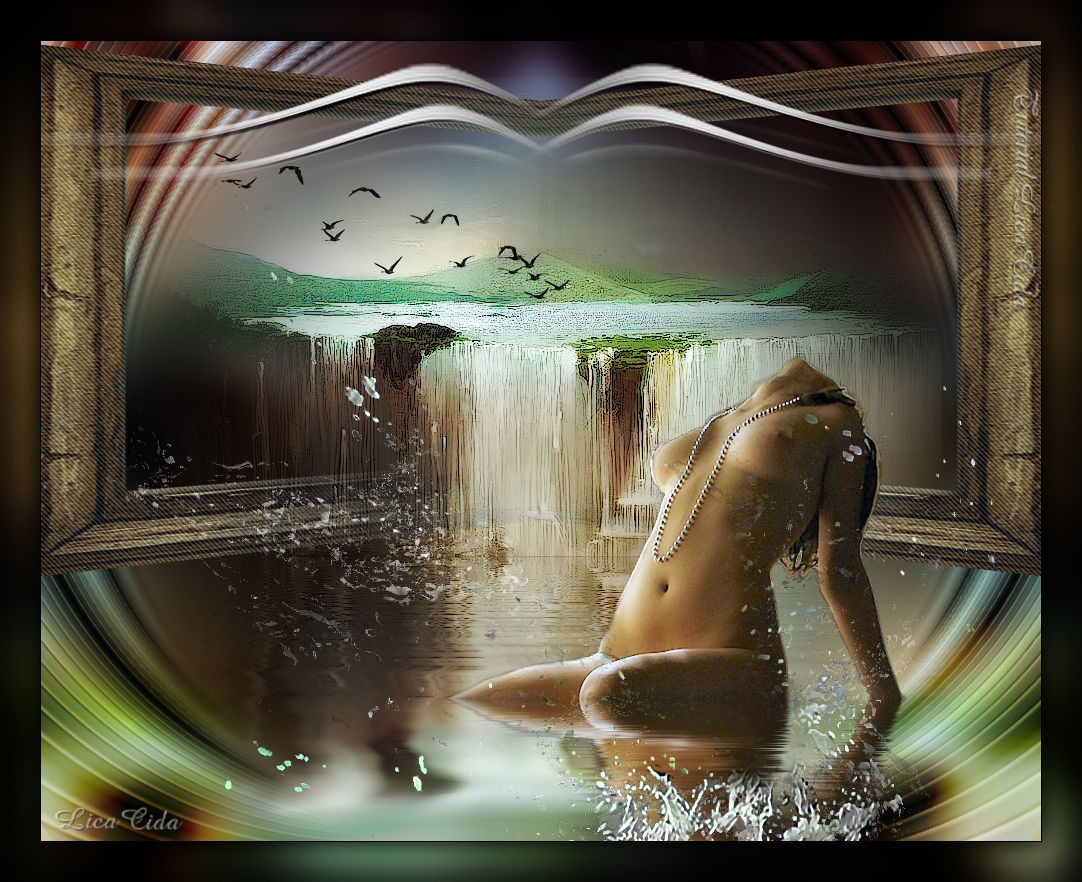
Wild Sexy
TRADUÇÕES

MATERIAL

Tubes: aabibichescery001a
PSPCYBERTUBES-tube2011-498 (respingos d'água)
DWpspcybertubesnudes4-007
Moldura: JHanna_528 background
Textura: grainfine
Brush: bird_brushes_II_by_lpdragonfly_5
Elemento: elementoscriptlc1
Marca-d'água.
Efeitos do PSP.
Versão usada: PSP X7.
PLUGINS
Plugin Carolaine and Sensibility → CS_DLines
Plugin Flaming Pear → Flood
Plugin FFG → G → Panel Stripes
Plugin MuRa's Meister → Perspective Tiling
Plugin MuRa's Meister → Pole Transform
Plugin Nik Software → Color Efex Pro 3.0 → Bi-Color Filters
Plugin AAA Filters → Custom
TUTORIAL

|
Esta seta marca sua linha
Clique e arraste para movê-la
|
|
1_.
Abra uma nova imagem transparente de 1000 x 800 px.
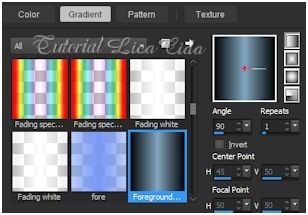
Pinte com o gradiente formado pelas cores #030709 e #82a6be.
Configure: Style: Linear — Angle: 90 — Repeats: 1 — Invert desmarcado.
2_.
Edit → Copy na moldura JHanna_528 background (Raster 1)
Edit → Paste As New Layer.
3_.
Effects → Geometric Effects → Perspective - Horizontal: 40 — Transparent.
Effects → Image Effects → Offset: H: -150 / V: 70 — Custom e Transparent marcados.
4_.
Effects → Reflection Effects → Rotating Mirror: 0 / 180 — Reflect.
Effects → Image Effects → Offset: H: 0 / V: 60 — Custom e Transparent marcados.
5_.
Plugin Carolaine and Sensibility → CS_DLines — Default (40 / 5).
Ative a Raster 1.
6_.
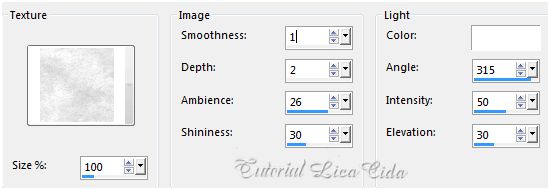
Effects → Texture Effects → Texture.
Layers → Duplicate.
Ative a Raster 2.
7_.
Edit → Copy no tube paisagem aabibichescery001a
Edit → Paste As New Layer.
Effects → Image Effects → Offset: H: 0 / V: 60 — Custom e Transparent marcados.
8_.
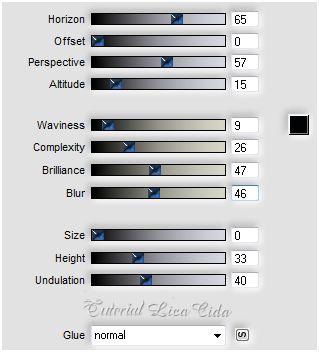
Plugin Flaming Pear → Flood.
Ative a Copy of Raster 1.
9_.
Plugin FFG → G → Panel Stripes: 27 / 132 / 70.
10_.
Plugin MuRa's Meister → Perspective Tiling.
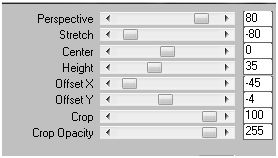
Com a ferramenta Magic Wand — Feather: 80, clique na parte transparente.
Veja a configuração:

Pressione a tecla Delete (de quatro a seis vezes).
Selections → Select None.
11_.
Plugin MuRa's Meister → Pole Transform — Default.
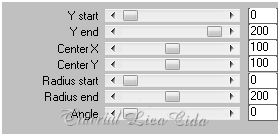
Ative a Raster 1.
12_.
Selections → Select All.
Edit → Paste Into Selection (o tube paisagem aabibichescery001a deverá estar na memória).
Selections → Select None.
Effects → Image Effects → Seamless Tiling — Default.
Adjust → Blur → Gaussian Blur — Radius: 20,00.
13_.
Edit → Copy nos respingos d'água do tube PSPCYBERTUBES-tube2011-498 (Raster 3)
Edit → Paste As New Layer.
Layers → Arrange → Bring to Top.
Ative a Raster 3.
14_.
Edit → Copy no tube DWpspcybertubesnudes4-007
Edit → Paste As New Layer.
Redimensione e posicione.
15_.
Plugin Flaming Pear → Flood, mudando o primeiro valor (Horizon) para 83.
16_.
Edit → Copy no brush bird_brushes_II_by_lpdragonfly_5
Edit → Paste As New Layer.
Use a gosto.
Ative a Raster 2.
17_.
Edit → Copy no elementoscriptlc1
Edit → Paste As New Layer.
Effects → Image Effects → Offset: H: 0 / V: 280 — Custom e Transparent marcados.
Ative a Raster 3.
18_.
Plugin AAA Filters → Custom.
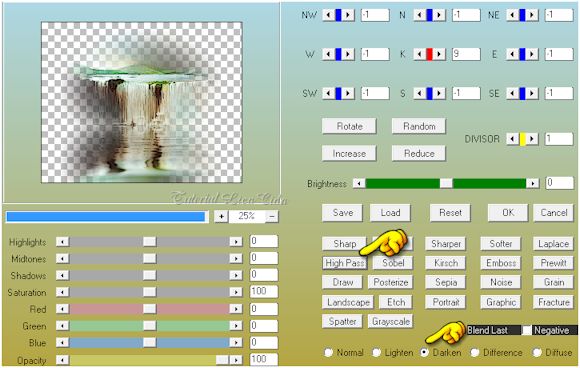
Duplique a Raster 1 (Layers → Duplicate).
19_.
Plugin Nik Software → Color Efex Pro 3.0 → Bi-Color Filters — Color Set: Violet/Pink 4.
Altere os Blend Modes e a Opacity das layers.
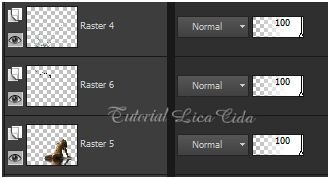
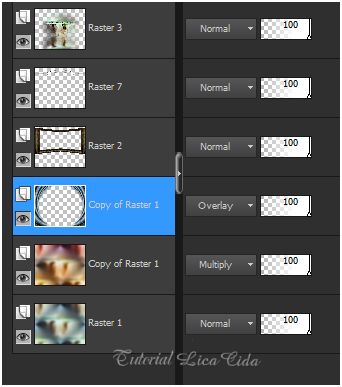
20_.
Image → Add Borders: 1 px, Symmetric marcado — Color: #000000.
Faça o acabamento a gosto.
Aplique a marca-d'água.
Assine e salve.
Espero que gostem.
Aparecida / LicaCida, abril de 2015.
Rio de Janeiro - Brasil.


VOLTAR
Copyright ©2026 - Web Design - Naise Minas
|


