|
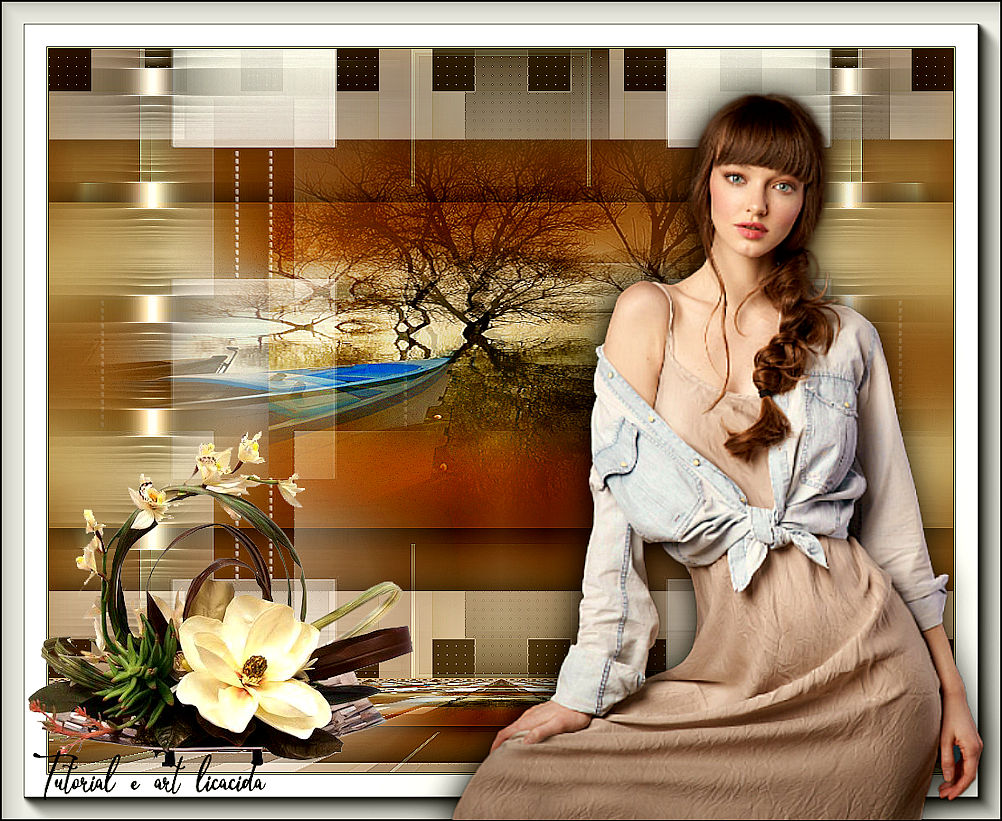
Whispers
TRADUÇÕES

MATERIAL

Preset: Preset_LightenDarken_iluminacentrodw --
Salvar na pasta Presets do PSP.
Elemento: backinicial_lc
Tubes: 39_Femmes_Page9_Animabelle
45_paysage_p4_animabelle
Mask: Narah_Mask_1123
Decos: Callitubes-03flores
deco-arquivo
Marca-d'água.
Efeitos do PSP.
Versão usada: PSP X9.
PLUGINS
Plugin Filters Unlimited 2.0 → &<Bkg Designer sf10 I> → Cut Glass BugEye
Plugin Mehdi → Sorting Tiles
Plugin Simple → Top Left Mirror
Plugin Alien Skin Eye Candy 5: Impact → Perspective Shadow
Plugin AP [Lines] → Lines - SilverLining
Plugin MuRa's Seamless → Emboss at Alpha
Plugin Nik Software → Color Efex Pro 3.0 → Bi-Color User Defined
Plugin MuRa's Meister → Perspective Tiling
Plugin AAA Frames → Foto Frame
TUTORIAL
|
Esta seta marca sua linha
Clique e arraste para movê-la
|
|
1_.
Abra o backinicial_lc e renomeie a layer para Raster 1.
2_.
Effects → Image Effects → Seamless Tiling: Default.
3_.
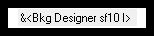
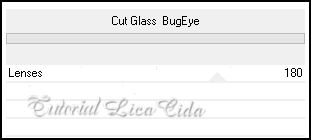
Plugin Filters Unlimited 2.0 → &<Bkg Designer sf10 I> → Cut Glass BugEye.
4_.
Plugin Mehdi → Sorting Tiles.
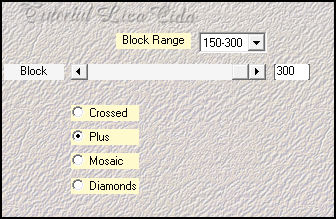
Effects → Reflection Effects → Rotating Mirror: 0 / 0 — Reflect.
Effects → Edge Effects → Enhance.
5_.
Plugin Simple → Top Left Mirror.
6_.
Ative a ferramenta Selection Tool (tecla S) → Custom Selection.
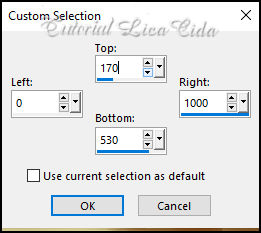
Selections → Promote Selection to Layer.
Adjust → Blur → Gaussian Blur — Radius: 30,00.
7_.
Edit → Copy no tube 45_paysage_p4_animabelle
Edit → Paste Into Selection.
Selections → Select None.
8_.
Plugin Alien Skin Eye Candy 5: Impact → Perspective Shadow.
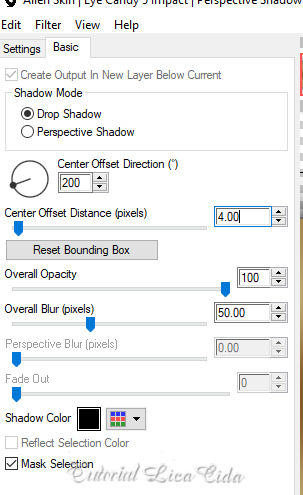
9_.
Ative a ferramenta Lighten/Darken e selecione o preset iluminacentrodw (está no material).
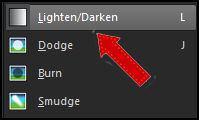
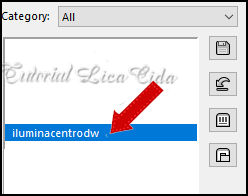

Aplique suavemente nos pontos que quiser clarear. Use a gosto.
Adjust → Sharpness → Sharpen.
10_.
Volte à Raster 1.
Ative a ferramenta Selection Tool (tecla S) → Custom Selection.
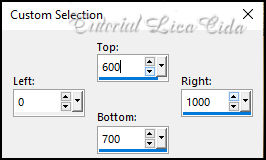
11_.
Layers → New Raster Layer.
Com a ferramenta Flood Fill — Opacity: 50%, pinte essa layer com a cor #ffffff.
12_.
Effects → Texture Effects → Weave: 47 / 59 / 36 — Weave color: #d9d39f — Gap color: #000000.
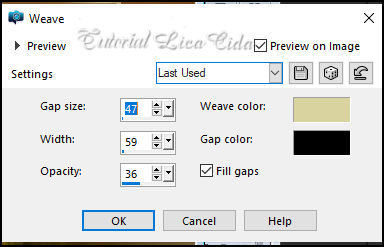
13_.
Repita:
Effects → Texture Effects → Weave: 150 / 160 / 100 — Weave color: #000000.
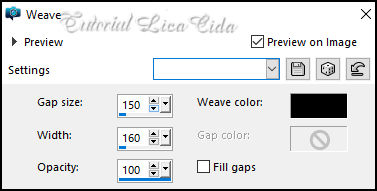
14_.
Plugin AP [Lines] → Lines - SilverLining — Dotty Grid.
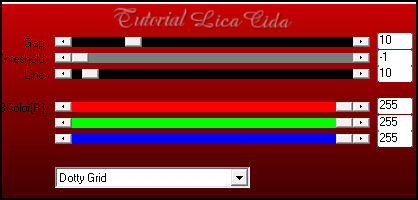
Effects → Edge Effects → Enhance.
Selections → Select None.
Layers → Duplicate.
Image → Mirror → Mirror Vertical.
Layers → Merge → Merge Down.
15_.
Plugin Alien Skin Eye Candy 5: Impact → Perspective Shadow (print do item 8).
16_.
Ative a layer superior.
Layers → New Raster Layer.
Com a ferramenta Flood Fill — Opacity: 70%, pinte essa layer com a cor #ffffff.
Layers → New Mask Layer → From Image: Narah_Mask_1123.
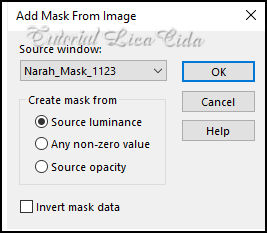
Effects → Edge Effects → Enhance.
Layers → Merge → Merge Group.
Plugin MuRa's Seamless → Emboss at Alpha — Default.
17_.
Plugin AP [Lines] → Lines - SilverLining — Dotty Grid (print do item 14).
18_.
Effects → Image Effects → Seamless Tiling.
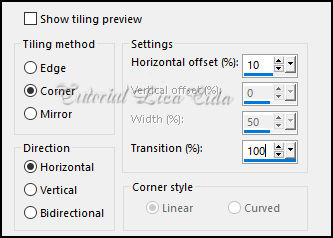
Layers → Duplicate.
Layers → Merge → Merge Down.
19_.
Plugin Alien Skin Eye Candy 5: Impact → Perspective Shadow (print do item 8).
Effects → Reflection Effects → Rotating Mirror: 0 / 0 — Reflect.
20_.
Ative a ferramenta Selection Tool (tecla S) → Custom Selection.
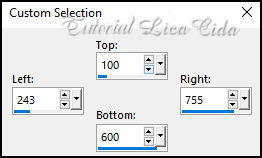
21_.
Edit → Copy no tube 45_paysage_p4_animabelle
Edit → Paste As New Layer.
Selections → Invert.
Pressione a tecla Delete.
Selections → Select None.
22_.
Plugin Alien Skin Eye Candy 5: Impact → Perspective Shadow (print do item 8).
Adjust → Sharpness → Sharpen.
Blend Mode: Soft Light.
23_.
Plugin Nik Software → Color Efex Pro 3.0 → Bi-Color User Defined — Default.
Opcional: repita o item 9.
24_.
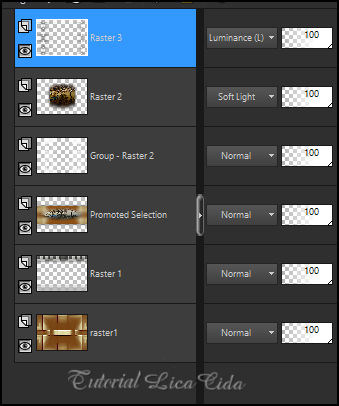
Edit → Copy no deco-arquivo
Edit → Paste As New Layer.
Com a ferramenta Pick Tool, acerte puxando as laterais.
Blend Mode: Luminance (L).
Effects → Edge Effects → Enhance.
Altere os Blend Modes e a Opacity das layers.
25_.
Image → Canvas Size: 1000 x 800 — Bottom: 100.
26_.
Edit → Copy Special → Copy Merged.
Edit → Paste As New Layer.
27_.
Plugin MuRa's Meister → Perspective Tiling.
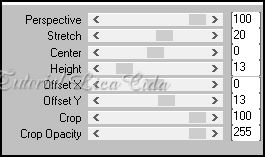
Effects → Reflection Effects → Rotating Mirror: 0 / 0 — Reflect.
Adjust → Sharpness → Sharpen More.
BORDAS
Image → Add Borders: 1 px, Symmetric marcado — Color: #000000.
Image → Add Borders: 1 px, Symmetric marcado — Color: #d9d39f.
Image → Add Borders: 1 px, Symmetric marcado — Color: #000000.
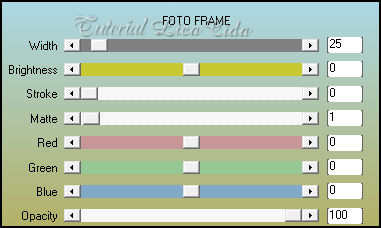
Image → Add Borders: 50 px, Symmetric marcado — Color: #ffffff.
Plugin AAA Frames → Foto Frame.
28_.
Edit → Copy no tube 39_Femmes_Page9_Animabelle
Edit → Paste As New Layer.
Posicione.
29_.
Edit → Copy no Callitubes-03flores
Edit → Paste As New Layer.
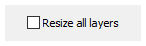
Image → Resize: 80% — Resize all layers desmarcado.
Posicione.
Image → Add Borders: 1 px, Symmetric marcado — Color: #000000.
Image → Resize: Width 1000 px.
Aplique a marca-d'água.
Assine e salve.
Espero que gostem.
Aparecida / LicaCida, janeiro de 2022.
Rio de Janeiro - Brasil.

VOLTAR
Copyright ©2026 - Web Design - Naise Minas
|


