|
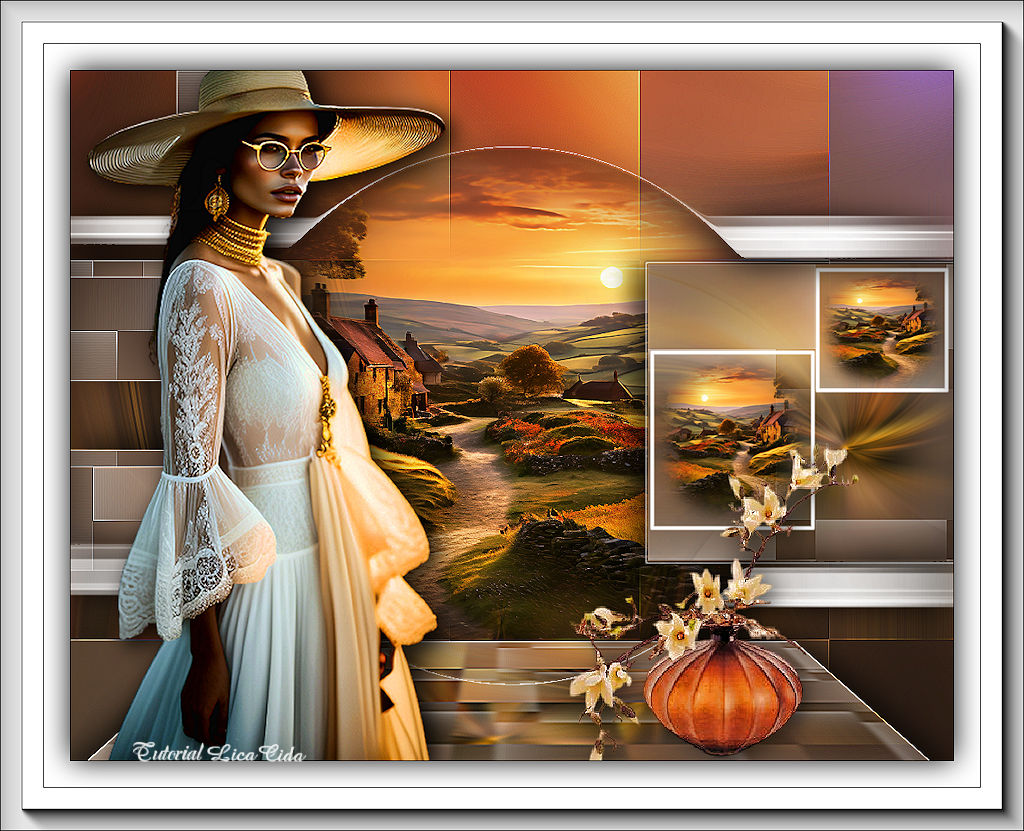
Way
ATENÇÃO
Vamos usar dois scripts. Tentem instalar para verem a graça do trabalho; caso não consigam, as imagens com os scripts rodados seguem no material.
TRADUÇÕES

MATERIAL

Alpha Channel: alpha-way --
Seleções (Selection #1 a #4) guardadas no Alpha Channel da imagem.
Scripts: movermara1
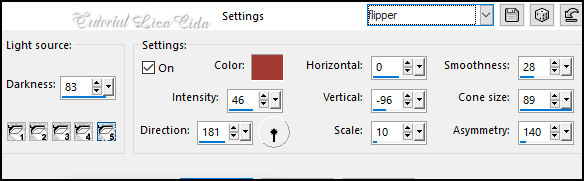
flipper --
Salvar na pasta Scripts-Restricted do PSP.
Caso os scripts não rodem, use as imagens do anexo scripts rodados (scriptmovermara1 e scriptflipper).
Preset: Illumination → Lights → Preset_Lights_flipper --
Salvar na pasta Presets do PSP.
Tubes: Callitubes-3267mulheres
mentali-misted3128
Callitubes-803flores
Marca-d'água.
Efeitos do PSP.
PLUGINS
Plugin Freeware Filters → Flipper
Plugin AAA Frames → Foto Frame
TUTORIAL
|
Esta seta marca sua linha
Clique e arraste para movê-la
|
|
1_.
Abra o material no PSP, duplique e feche o original.
Escolha duas cores para trabalhar: Foreground: #957964 — Background: #332017.
2_.
Abra o arquivo alpha-way.
Selections → Load/Save Selection → Load Selection From Alpha Channel → Selection #1.
3_.
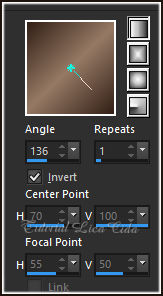
Pinte com o gradiente Linear formado pelas cores em uso.
4_.
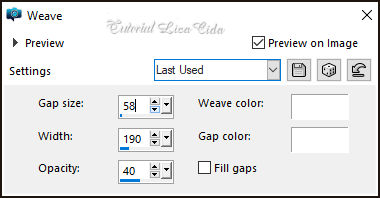
Effects → Texture Effects → Weave.
Selections → Select None.
5_.
Plugin Freeware Filters → Flipper.
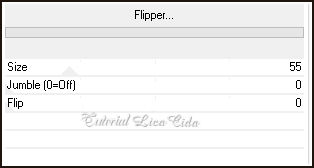
Effects → Edge Effects → Enhance More.
Layers → Duplicate.
Image → Mirror → Mirror Vertical.
Layers → Merge → Merge Down.
Effects → 3D Effects → Drop Shadow:
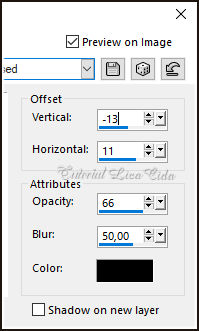
6_.
Layers → New Raster Layer.
Layers → Arrange → Send to Bottom.
Pinte com o gradiente em uso.
7_.
Selections → Load/Save Selection → Load Selection From Alpha Channel → Selection #2.
Selections → Promote Selection to Layer.
8_.
Edit → Copy no tube mentali-misted3128
Edit → Paste Into Selection.
9_.
Adjust → Blur → Radial Blur.
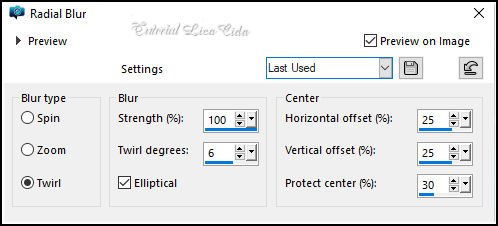
10_.
Repita: Effects → Texture Effects → Weave.
11_.
Effects → 3D Effects → Chisel.
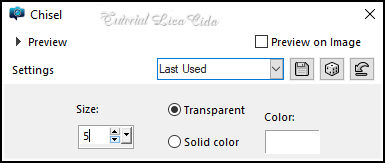
Selections → Select None.
Adjust → Sharpness → Sharpen More.
12_.
Selections → Load/Save Selection → Load Selection From Alpha Channel → Selection #3.
13_.
Edit → Paste Into Selection (o tube mentali-misted3128 deve estar na memória).
Adjust → Sharpness → Sharpen.
14_.
Selections → Modify → Select Selection Borders.
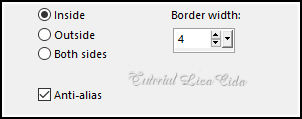
15_.
Layers → New Raster Layer.
Pinte com a cor #ffffff.
Selections → Select None.
Layers → Merge → Merge Down.
16_.
Selections → Load/Save Selection → Load Selection From Alpha Channel → Selection #4.
17_.
Edit → Paste Into Selection (o tube mentali-misted3128 deve estar na memória).
Adjust → Sharpness → Sharpen.
18_.
Repita: Selections → Modify → Select Selection Borders.
19_.
Layers → New Raster Layer.
Pinte com a cor #ffffff.
Selections → Select None.
Layers → Merge → Merge Down.
Effects → 3D Effects → Drop Shadow:
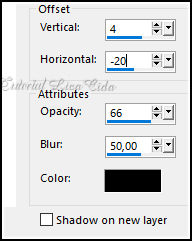
20_.
Ative a Raster 1 (fundo).
21_.
Selections → Select All.
Edit → Copy no tube mentali-misted3128
Edit → Paste Into Selection.
22_.
Repita: Adjust → Blur → Radial Blur.
Selections → Select None.
23_.
Repita, com os mesmos valores: Plugin Freeware Filters → Flipper.
Effects → Edge Effects → Enhance More.
24_.
Edit → Copy no tube mentali-misted3128
Edit → Paste As New Layer.
Image → Mirror → Mirror Horizontal.
Adjust → Sharpness → Sharpen.
25_.
Ative a Raster 1.
Layers → Duplicate.
Layers → Arrange → Bring to Top.
26_.
Repita, com os mesmos valores: Effects → Texture Effects → Weave.
27_.
Adjust → Blur → Gaussian Blur — Radius: 5,00.
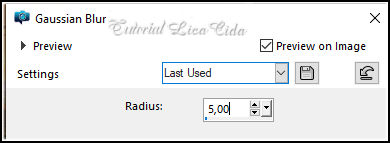
28_.
Rode o script movermara1.
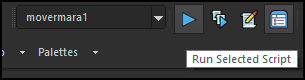
Procure o script movermara1 e clique em Run Selected Script para rodá-lo.
Use como modelo e observe o quadrado do efeito:
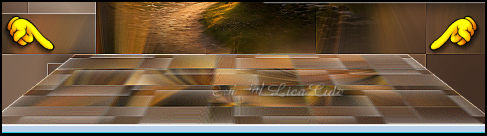
Effects → Edge Effects → Enhance More.
Effects → 3D Effects → Drop Shadow: 4 / -20 / 66,00 / 50 e, com valor positivo, 4 / 20 / 66,00 / 50 — Color: #000000.
29_.
Layers → New Raster Layer.
Rode o script flipper.
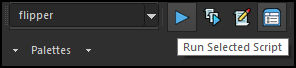
Procure o script flipper e clique em Run Selected Script para rodá-lo.
Effects → 3D Effects → Drop Shadow: 0 / 0 / 100,00 / 50 — Color: #000000.
30_.
Ative a layer Promoted Selection.
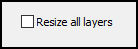
Image → Resize: 80% — Resize all layers desmarcado.
31_.
Com a ferramenta Pick Tool: Position X: 621,00 / Position Y: 195,00.
32_.
Ative a Raster 1 (layer do fundo).
Layers → Duplicate.
Na layer duplicada:
33_.
Effects → Illumination Effects → Lights → Preset_Lights_flipper.
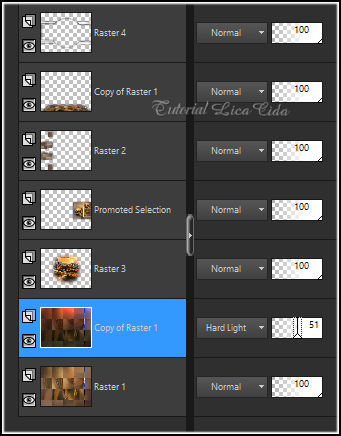
Blend Mode: Hard Light — Opacity: 51%.
LAYERS
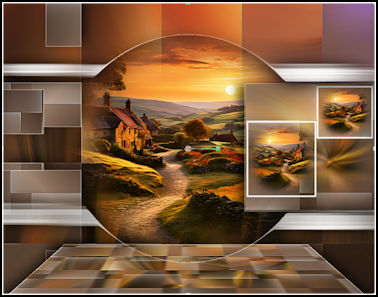
34_.
Ative a layer do topo.
Edit → Copy no tube Callitubes-3267mulheres
Edit → Paste As New Layer.
Use a gosto.
35_.
Edit → Copy no tube Callitubes-803flores
Edit → Paste As New Layer.
Use a gosto.
Image → Add Borders: 1 px, Symmetric marcado — Color: #000000.
Image → Add Borders: 30 px, Symmetric marcado — Color: #ffffff.
Image → Add Borders: 1 px, Symmetric marcado — Color: #000000.
Image → Add Borders: 50 px, Symmetric marcado — Color: #ffffff.
Plugin AAA Frames → Foto Frame — Width: 25, demais valores Default.
Selections → Select All.
Selections → Modify → Contract: 82.
Effects → 3D Effects → Drop Shadow: 0 / 0 / 100,00 / 50 — Color: #000000.
Selections → Select None.
Image → Resize: Width 1024 px.
Aplique a marca-d'água.
Assine e salve.
File → Export → JPEG Optimizer.
Aparecida / LicaCida.
Rio de Janeiro - Brasil.

VOLTAR
Copyright ©2026 - Web Design - Naise Minas
|


