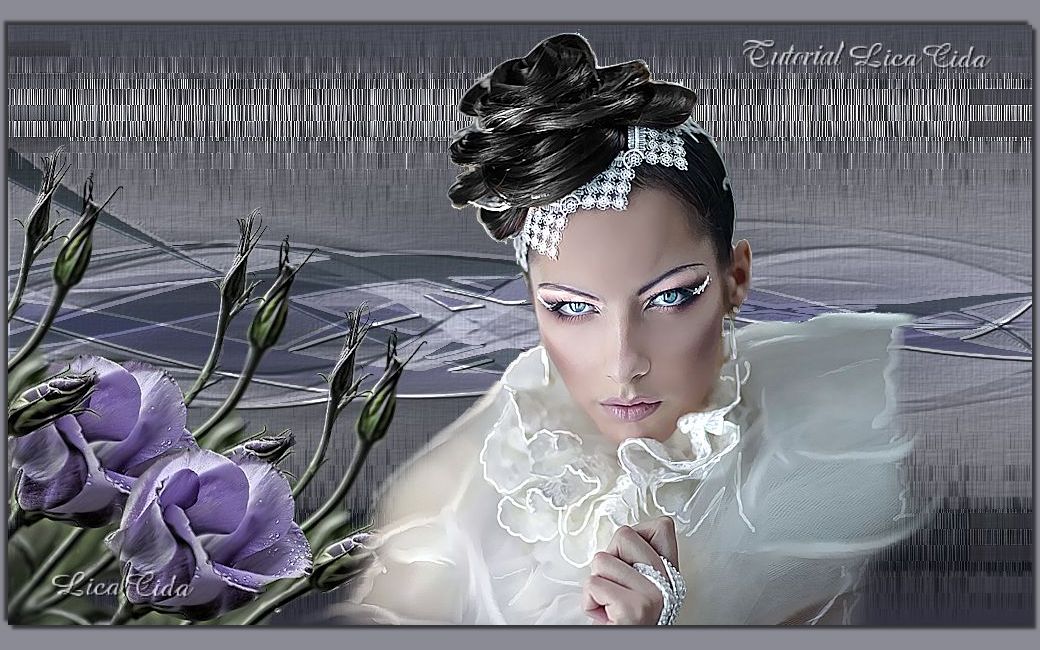
Verinha Ruiva

MATERIAL

Masks: Narah_mask_Abstract275
!!!!.mask.ket-fadesuave
Tubes: pspcybertubes-flores3--2010-002
2012PSPCYBERTUBES-086
Marca D'água.
Efeitos do PSP.
Versão PSP X5.
PLUGINS
Plugin dsb flux → Blast
Plugin dsb flux → Linear Transmission
Plugin Nik Software → Color Efex Pro 3.0
TUTORIAL

|
Esta seta marca sua linha
Clique e arraste para movê-la
|
1_.
Abra uma nova imagem transparente de 1024 x 600 px.
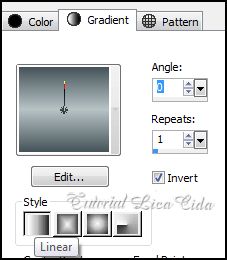
Pinte com o gradiente formado pelas cores #b7c3c5 e #46545a.
Configure: Style: Linear — Angle: 0 — Repeats: 1 — Invert marcado.
2_.
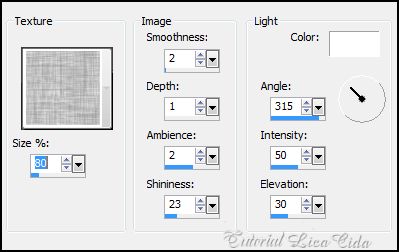
Effects → Texture Effects → Texture.
3_.
Layers → New Raster Layer.
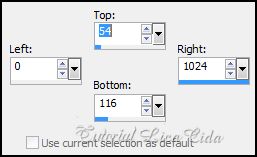
Ative a ferramenta Selection → Rectangle ou pressione a tecla S.
Em Custom Selection, configure: Top: 54 — Left: 0 — Right: 1024 — Bottom: 116.
Pinte com o mesmo gradiente do item 1.
Selections → Select None.
4_.
Plugin dsb flux → Blast.
Nas opções: Upwards e Downwards — Default.
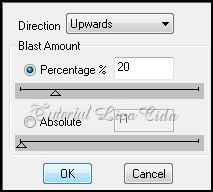
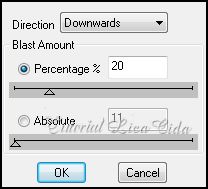
5_.
Plugin dsb flux → Linear Transmission → Default.
Observação: o efeito modifica os valores; ao fazer o tutorial, abriu assim:
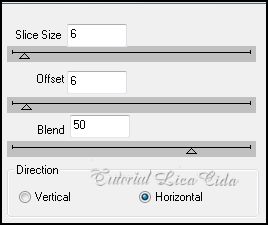
Effects → Edge Effects → Enhance.
6_.
Ative a Raster 1.
Aplique a Mask !!!!.mask.ket-fadesuave.
Layers → Merge → Merge Group.
Aplique duas vezes.
7_.
Layers → New Raster Layer.
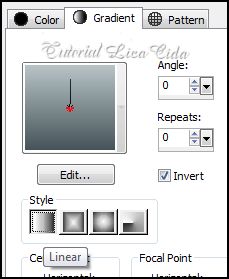
Pinte com o gradiente formado pelas mesmas cores do item 1.
Configure: Style: Linear — Angle: 0 — Repeats: 0 — Invert marcado.
8_.
Aplique a Mask Narah_mask_Abstract275.
Layers → Merge → Merge Group.
Effects → 3D Effects → Drop Shadow: 1 / 1 / 60 / 1 — Color: #000000.
9_.
Layers → Duplicate.
Image → Flip.
Effects → User Defined Filter → Emboss_3 nas duas layers: Group - Raster 1 e Copy of Group - Raster 1.
10_.
Layers → New Raster Layer.
Layers → Arrange → Send to Bottom.
Pinte com o gradiente do item 7.
Layers:
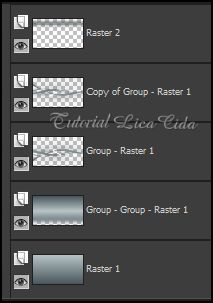
11_.
Layers → Duplicate.
Blend Mode: Saturation (Legacy).
12_.
Volte à Raster 1.
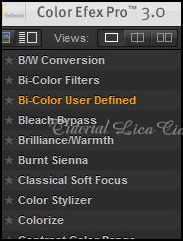
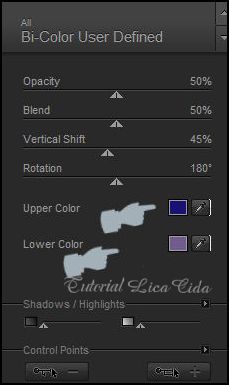
Plugin Nik Software → Color Efex Pro 3.0 → Bi-Color User Defined.
Cores: #1b1173 e #6f5d8f.
13_.
Ative a Raster 2.
Layers → Duplicate.
Image → Flip.
Blend Mode: Multiply.
Na Raster 2: Blend Mode: Luminance.
Nas demais layers, mude os Blend Modes e a Opacity.
14_.
Edit → Copy no tube pspcybertubes-flores3--2010-002
Edit → Paste As New Layer.
Use a gosto.
15_.
Edit → Copy no tube 2012PSPCYBERTUBES-086
Edit → Paste As New Layer.
Posicione.
Faça o acabamento do seu top.
Aplique a Marca D'água.
Assine e salve.
Espero que gostem.
Desafio de Novembro do Grupo Tutoriales PSP Aliciar.
Aparecida / LicaCida, em novembro de 2012.
Rio de Janeiro - Brasil.


VOLTAR
Copyright ©2020/2025 -
Web Design -
Liriani Silva®
|

