|
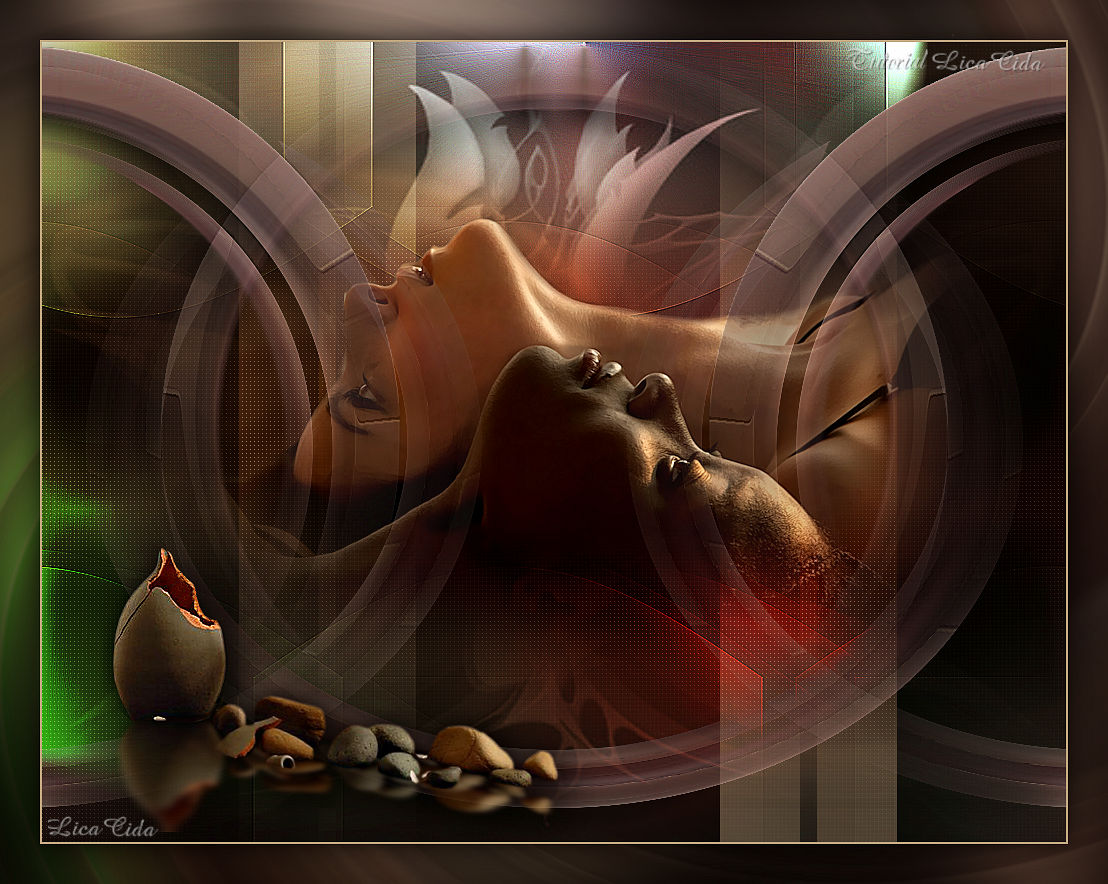
Twins
TRADUÇÕES

MATERIAL

Script: expand --
Salvar na pasta Scripts-Restricted do PSP.
Caso o script não rode, o efeito segue anexado (script).
Preset: Illumination → Lights → Preset_Lights_lc15 --
Salvar na pasta Presets do PSP.
Masks: 20-20
002 gradientedworisch
Tube: PSPCYBERTUBES-tube2011-548
Imagem: billed4
Deco: vase et roche (autor desconhecido)
Plugin Sapphire: Sapphire0201_300 (anexado)
Marca-d'água.
Efeitos do PSP.
Versão usada: PSP X9.
PLUGINS
Plugin Sapphire → SapphirePlugin_0290 (anexado ao material)
Plugin FFG → J → Drink To Me
Plugin FFG → B → Circulator
Plugin Toadies → What Are You?
Plugin Alien Skin Eye Candy 5: Impact → Perspective Shadow
Plugin Graphics Plus → Cross Shadow
Plugin AAA Filters → Custom
TUTORIAL
|
Esta seta marca sua linha
Clique e arraste para movê-la
|
|
1_.
Abra uma nova imagem transparente de 1024 x 800 px.
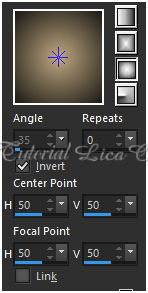
Pinte com o gradiente formado pelas cores #1a1814 (Foreground) e #bea780 (Background).
Configure: Style: Sunburst — Repeats: 0 — Invert marcado — Center Point: H: 50 / V: 50 — Focal Point: H: 50 / V: 50.
2_.
Selections → Select All.
Edit → Copy no tube PSPCYBERTUBES-tube2011-548
Edit → Paste Into Selection.
Selections → Select None.
Adjust → Blur → Gaussian Blur — Radius: 32,00.
3_.
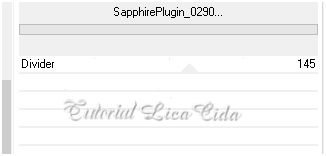
Plugin Sapphire → SapphirePlugin_0290.
4_.
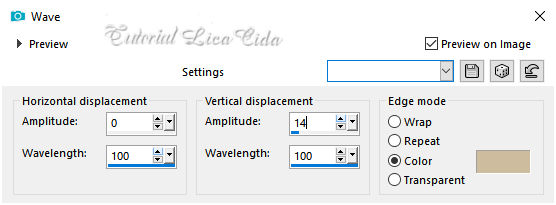
Effects → Distortion Effects → Wave — Color: #cdbc9e (mais clara que a cor do Background).
5_.
Plugin FFG → J → Drink To Me — Overdose: 105.
6_.
Effects → Image Effects → Seamless Tiling — Side by side.
Effects → Edge Effects → Enhance More.
Layers → Duplicate.
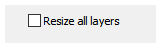
Image → Resize: 80% — Resize all layers desmarcado.
7_.
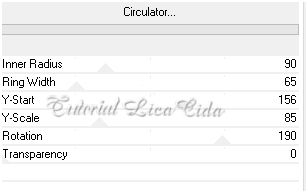
Plugin FFG → B → Circulator.
8_.
Volte à Raster 1.
Layers → Duplicate.
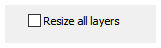
Image → Resize: 80% — Resize all layers desmarcado.
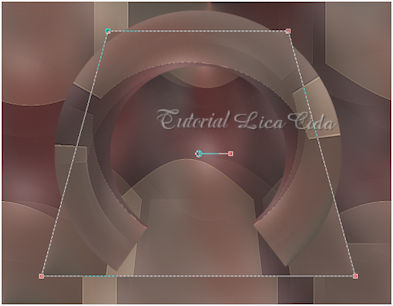
Com a ferramenta Pick Tool, Mode: Perspective, ajuste a imagem como no modelo.
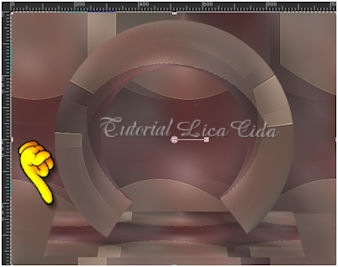
Com a ferramenta Pick Tool, Mode: Scale, desça a imagem como no modelo.
9_.
Effects → Distortion Effects → Polar Coordinates — Rectangular to polar — Transparent.
10_.
Volte à Raster 1.
Edit → Copy no tube PSPCYBERTUBES-tube2011-548
Edit → Paste As New Layer.
Não redimensione o tube; deixe-o no tamanho original.
Layers → Duplicate.
11_.
Na layer original (Raster 2):
Effects → Image Effects → Seamless Tiling — Side by side.
12_.
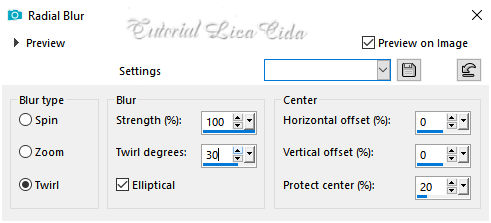
Adjust → Blur → Radial Blur.
13_.
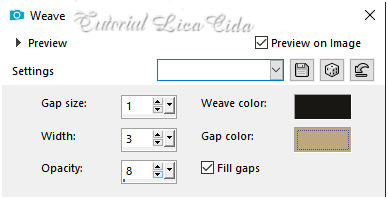
Effects → Texture Effects → Weave — Cores: Foreground e Background.
14_.
Ative a layer Copy of Raster 1 (a layer superior).
Rode o script expand:
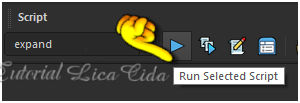
Procure o script expand e clique em Run Selected Script para rodá-lo.
Caso o script não rode, use o efeito anexado ao material (script).
No tube, aplique Image → Resize: 80% — Resize all layers desmarcado.
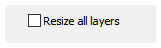
Adjust → Sharpness → Sharpen More.
15_.
Volte à Raster 1.
Ative a ferramenta Selection Tool (tecla S) → Custom Selection.
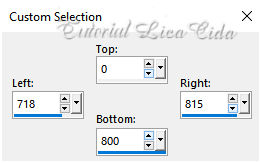
Layers → New Raster Layer.
Flood Fill — Opacity: 50% — pinte a seleção com o gradiente formado no item 1.
16_.
Selections → Modify → Select Selection Borders.
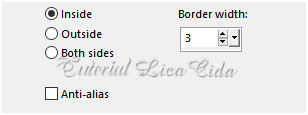
Layers → New Raster Layer.
Flood Fill — Opacity: 100% — pinte a borda com o gradiente formado no item 1.
Selections → Select None.
Layers → Merge → Merge Down.
17_.
Effects → Image Effects → Seamless Tiling — Side by side.
18_.
Plugin Toadies → What Are You? — Default (20 / 20).
Effects → Edge Effects → Enhance More.
Blend Mode: Screen.
As layers estão assim:
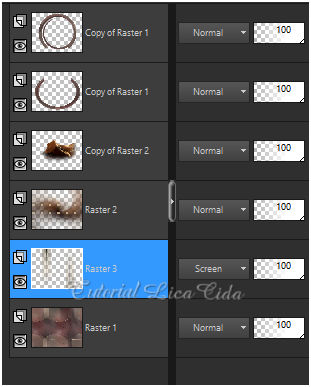
19_.
Na imagem billed4 (anexada):
Layers → New Mask Layer → From Image: 20-20 — Invert mask data marcado.
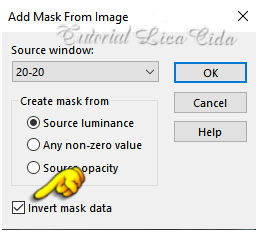
Layers → Merge → Merge Group.
Ative a Raster 1.
Layers → New Raster Layer.
Selections → Select All.
Edit → Copy na imagem billed4 com a mask aplicada
Edit → Paste Into Selection.
Selections → Select None.
20_.
Ainda na Raster 1:
Effects → Illumination Effects → Lights → Preset_Lights_lc15.
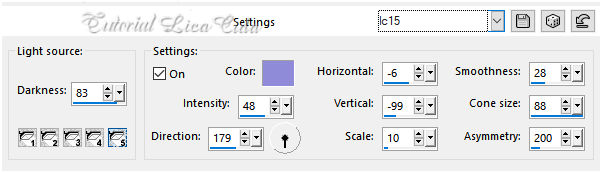
21_.
Ative a Copy of Raster 1 (a layer superior).
Layers → New Mask Layer → From Image: 002 gradientedworisch.
Layers → Duplicate (duas vezes).
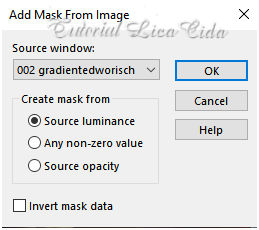
Layers → Merge → Merge Group.
Plugin Alien Skin Eye Candy 5: Impact → Perspective Shadow — Blurry.
22_.
Effects → Image Effects → Seamless Tiling — Side by side.
Effects → Reflection Effects → Rotating Mirror: 0 / 0 — Reflect.
23_.
Na layer inferior:
Plugin Alien Skin Eye Candy 5: Impact → Perspective Shadow — Blurry.
Effects → Image Effects → Seamless Tiling — Side by side.
Effects → Reflection Effects → Rotating Mirror: 0 / 0 — Reflect.
Altere os Blend Modes e a Opacity das layers (use a gosto).
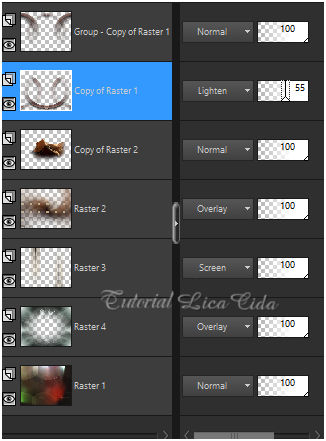
24_.
Edit → Copy no vase et roche
Edit → Paste As New Layer.
Posicione a gosto.
Image → Add Borders: 2 px, Symmetric marcado — Color: #bea780 (Background).
Edit → Copy.
Image → Add Borders: 40 px, Symmetric marcado — Color: #ffffff.
Selecione a borda.
Edit → Paste Into Selection.
Adjust → Blur → Radial Blur (print do item 12).
Plugin Graphics Plus → Cross Shadow — Default.
Selections → Invert.
Effects → 3D Effects → Drop Shadow: 0 / 0 / 80 / 40,00 — Color: #000000.
Selections → Select None.
Opcional: Plugin AAA Filters → Custom — Sharp (Default).
Image → Resize: Width 1024 px.
Aplique a marca-d'água.
Assine e salve.
Espero que gostem.
Aparecida / LicaCida, julho de 2020.
Rio de Janeiro - Brasil.


VOLTAR
Copyright ©2026 - Web Design - Naise Minas
|


