|
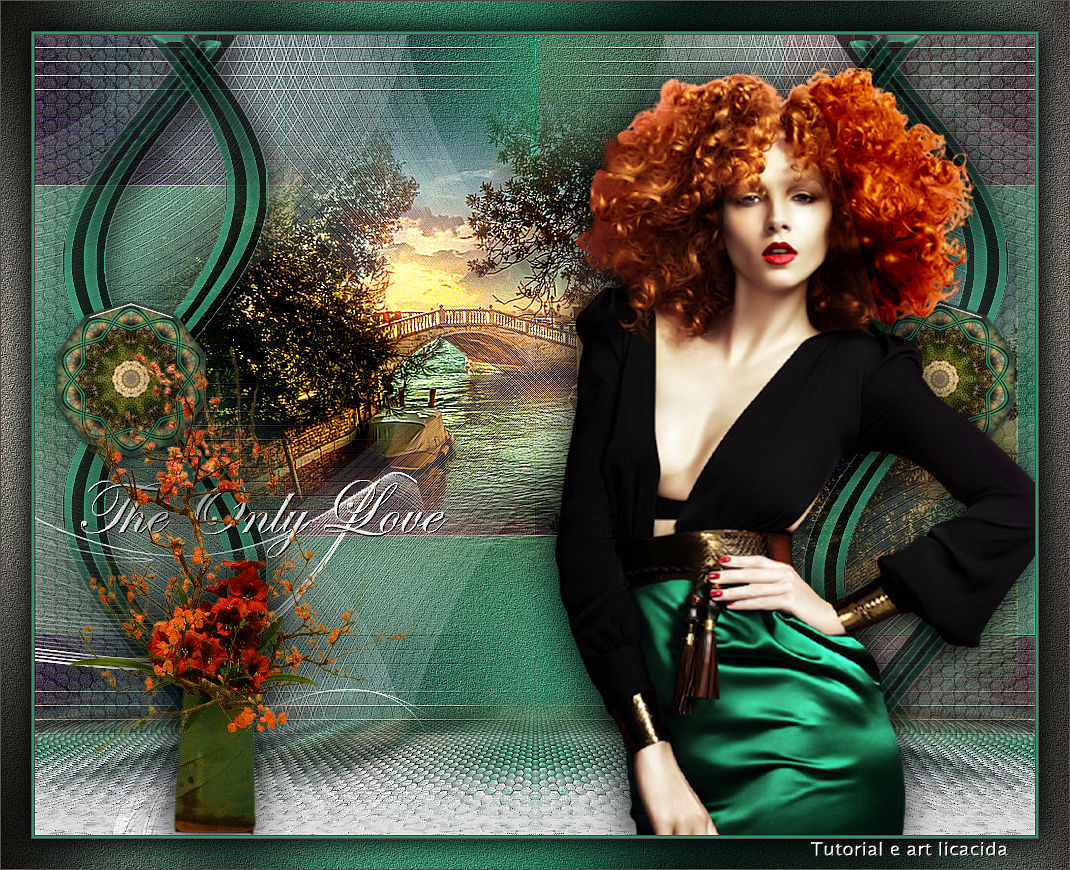
The Only Love
TRADUÇÕES

MATERIAL

Preset: Preset_CloneBrush_aplicatubelica --
Salvar na pasta Presets do PSP.
Seleção: theonlylove_lc --
Salvar na pasta Selections do PSP.
Tubes: 6819-Luz Cristina
102_paysage_p3_animabelle
Decos: Callitubes-162flores
decoarquivo net
Texto: títulotexto-lc
Marca-d'água.
Efeitos do PSP.
Versão usada: PSP X9.
PLUGINS
Plugin Mehdi → Wavy Lab
Plugin Mehdi → Sorting Tiles
Plugin L en K's → Mayra
Plugin Transparency → Eliminate Black
Plugin Filters Unlimited 2.0 → &<Bkg Designer sf10 I> → 4 Way Average
Plugin Alien Skin Eye Candy 5: Impact → Perspective Shadow
Plugin Alien Skin Eye Candy 5: Impact → Glass
Plugin Simple → Quick Tile
Plugin FM Tile Tools → Blend Emboss
Plugin AAA Filters → Custom
Plugin Tramages → Wee Scratches
Plugin MuRa's Meister → Perspective Tiling
Plugin Graphics Plus → Cross Shadow
TUTORIAL
|
Esta seta marca sua linha
Clique e arraste para movê-la
|
|
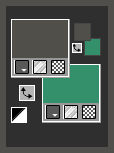
Configure: Foreground: #514f4b — Background: #358f6b.
1_.
Abra uma nova imagem de 1000 x 700 px.
2_.
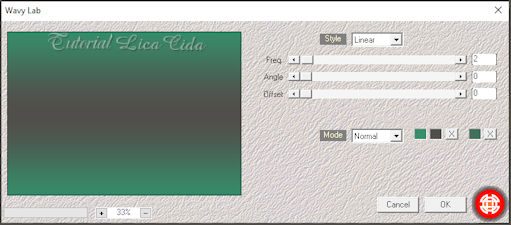
Plugin Mehdi → Wavy Lab: Linear — 2 / 0 / 0 — Color 1: #358f6b — Color 2: #514f4b — Color 3: #436f5b.
3_.
Plugin Mehdi → Sorting Tiles.
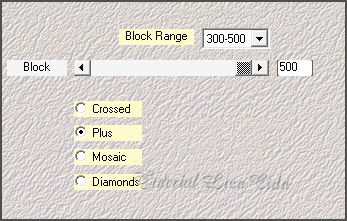
Effects → Edge Effects → Enhance.
4_.
Ative a ferramenta Selection Tool (tecla S) → Custom Selection.
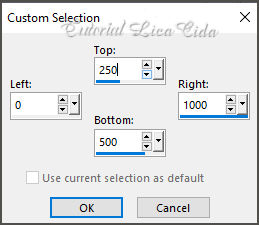
5_.
Plugin L en K's → Mayra — Default (0 / 149 / 76 / 2).
Selections → Promote Selection to Layer.
6_.
Plugin Transparency → Eliminate Black.
Selections → Select None.
7_.
Effects → Geometric Effects → Skew.
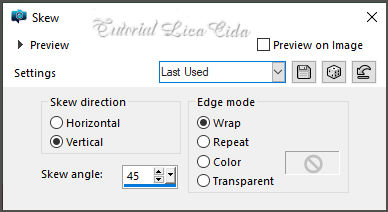
8_.
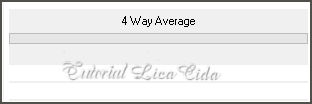
Plugin Filters Unlimited 2.0 → &<Bkg Designer sf10 I> → 4 Way Average.
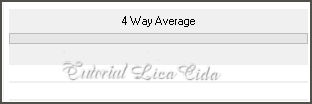
9_.
Effects → Distortion Effects → Pinch — Strength: 100%.
Effects → 3D Effects → Drop Shadow: 1 / 1 / 85 / 36,00 — Color: #000000.
Adjust → Sharpness → Sharpen.
Blend Mode: Screen.
10_.
Ative a Raster 1.
Plugin Filters Unlimited 2.0 → &<Bkg Designer sf10 I> → 4 Way Average.
11_.
Selections → Load/Save Selection → Load Selection From Disk → theonlylove_lc.
12_.
Layers → New Raster Layer.
Com a ferramenta Flood Fill — Opacity: 40%, pinte com a cor #ffffff.
13_.
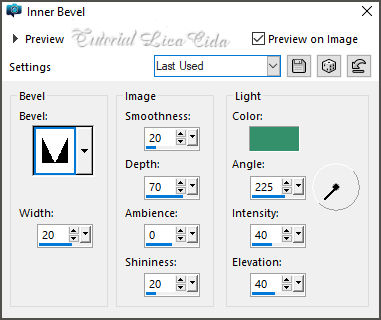
Effects → 3D Effects → Inner Bevel — Color: cor do Background.
Selections → Select None.
Image → Mirror → Mirror Vertical.
Layers → Duplicate.
Image → Mirror → Mirror Vertical.
Layers → Merge → Merge Down.
Layers → Arrange → Bring to Top.
14_.
Com a ferramenta Magic Wand (Default), selecione a parte externa da lateral direita.
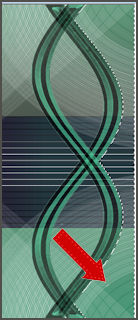
Layers → New Raster Layer.
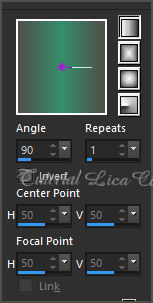
Com a ferramenta Flood Fill — Opacity: 20%, pinte essa seleção com um gradiente Linear formado pelas cores escolhidas.
15_.
Effects → Texture Effects → Tiles.
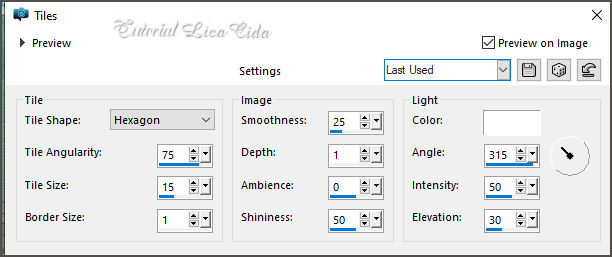
Selections → Select None.
Effects → User Defined Filter → Emboss_3.
Layers → Merge → Merge Down.
Effects → Reflection Effects → Rotating Mirror: 0 / 0 — Reflect.
Plugin Alien Skin Eye Candy 5: Impact → Perspective Shadow — Blurry.
16_.
Ative a Raster 1.
Plugin Simple → Quick Tile.
17_.
Adjust → Add/Remove Noise → Add Noise: 15% — Gaussian — Monochrome marcado.
Plugin FM Tile Tools → Blend Emboss.
18_.
Layers → New Raster Layer.
Ative a ferramenta Clone Brush e selecione o Preset_CloneBrush_aplicatubelica.

Com o botão direito do mouse, clique na parte desejada da paisagem.
Com o botão esquerdo do mouse, aplique o tube no top.
19_.
Opcional: Plugin AAA Filters → Custom — Landscape — Default.
Altere os Blend Modes e a Opacity das layers.
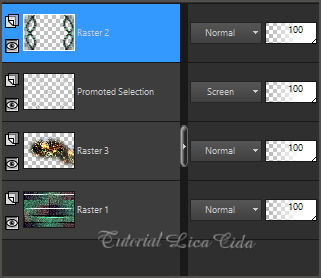
Layers → Merge → Merge Visible.
20_.
Layers → Duplicate.
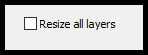
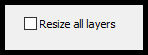
Image → Resize: 30% — Resize all layers desmarcado.
21_.
Effects → Reflection Effects → Kaleidoscope.
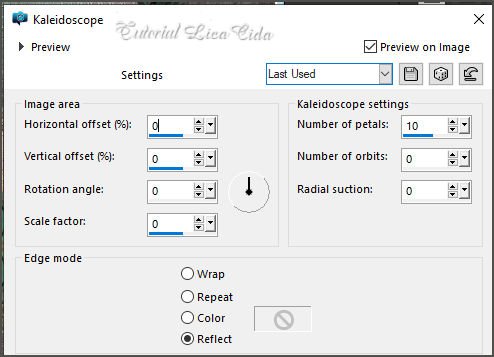
Image → Resize: 50% — Resize all layers desmarcado.
22_.
Com a ferramenta Pick Tool, posicione: Position X: 21,00 — Position Y: 265,00.
Effects → Reflection Effects → Rotating Mirror: 0 / 180 — Reflect.
Plugin Alien Skin Eye Candy 5: Impact → Perspective Shadow — Blurry.
23_.
Plugin Alien Skin Eye Candy 5: Impact → Glass — Clear (ou outro a gosto).
24_.
Ative a layer Merged.
Layers → Duplicate.
25_.
Na cópia:
Image → Canvas Size: 1000 x 800 — Bottom: 100.
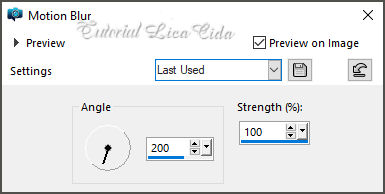
Adjust → Blur → Motion Blur (aplique duas vezes).
26_.
Plugin Tramages → Wee Scratches — Default (255).
27_.
Effects → Texture Effects → Tiles (print do item 15).
28_.
Plugin MuRa's Meister → Perspective Tiling — Default, Height: 18 (demais valores iguais).
Effects → Reflection Effects → Rotating Mirror: 0 / 0 — Reflect.
Com a ferramenta Magic Wand — Feather: 60, clique na parte transparente e pressione a tecla Delete três ou quatro vezes, para suavizar o efeito.
Selections → Select None.
Adjust → Sharpness → Sharpen More.
29_.
Layers → New Raster Layer.
Layers → Arrange → Send to Bottom.
Com a ferramenta Flood Fill — Opacity: 100%, pinte com a cor #e0e0e0.
30_.
Edit → Copy no decoarquivo net
Edit → Paste As New Layer (use acima da layer Merged).
31_.
Com a ferramenta Pick Tool, posicione: Position X: -111,00 — Position Y: 435,00.
32_.
Ative a layer do topo.
Edit → Copy no tube 6819-Luz Cristina
Edit → Paste As New Layer.
Redimensione e posicione a gosto.
33_.
Edit → Copy no tube Callitubes-162flores
Edit → Paste As New Layer.
Redimensione e posicione a gosto.
34_.
Edit → Copy no títulotexto-lc
Edit → Paste As New Layer.
Posicione a gosto.
BORDAS
Image → Add Borders: 1 px, Symmetric marcado — Color: cor do Foreground.
Image → Add Borders: 2 px, Symmetric marcado — Color: cor do Background.
Image → Add Borders: 1 px, Symmetric marcado — Color: cor do Foreground.
Selections → Select All.
Image → Add Borders: 30 px, Symmetric marcado — Color: #ffffff.
Selections → Invert.
Pinte com o gradiente formado no item 14.
Adjust → Add/Remove Noise → Add Noise: 15% — Gaussian — Monochrome marcado.
Plugin FM Tile Tools → Blend Emboss.
Plugin Graphics Plus → Cross Shadow — Default.
Selections → Invert.
Effects → 3D Effects → Drop Shadow: 0 / 0 / 80 / 40,00 — Color: #000000.
Selections → Select None.
Aplique a marca-d'água.
Assine e salve.
Espero que gostem.
Aparecida / LicaCida, março de 2022.
Rio de Janeiro - Brasil.

VOLTAR
Copyright ©2026 - Web Design - Naise Minas
|

