|
Terrace TRADUÇÕES
MATERIAL
Seleção: selterracelc --
Texture: brick013
Tubes: Gabry-woman 925
Elemento: elementoterracelc Back: Raster 1 do tube Gabry-woman 925 Premade: premade_background_24_by_sternenfee59-d4ufmnp
Masks: !!!!gradientedworisch
Marca-d'água.
Versão usada: PSP X7, podendo ser feito em outras versões.
PLUGINS
Plugin Alien Skin Eye Candy 5: Impact → Extrude
TUTORIAL
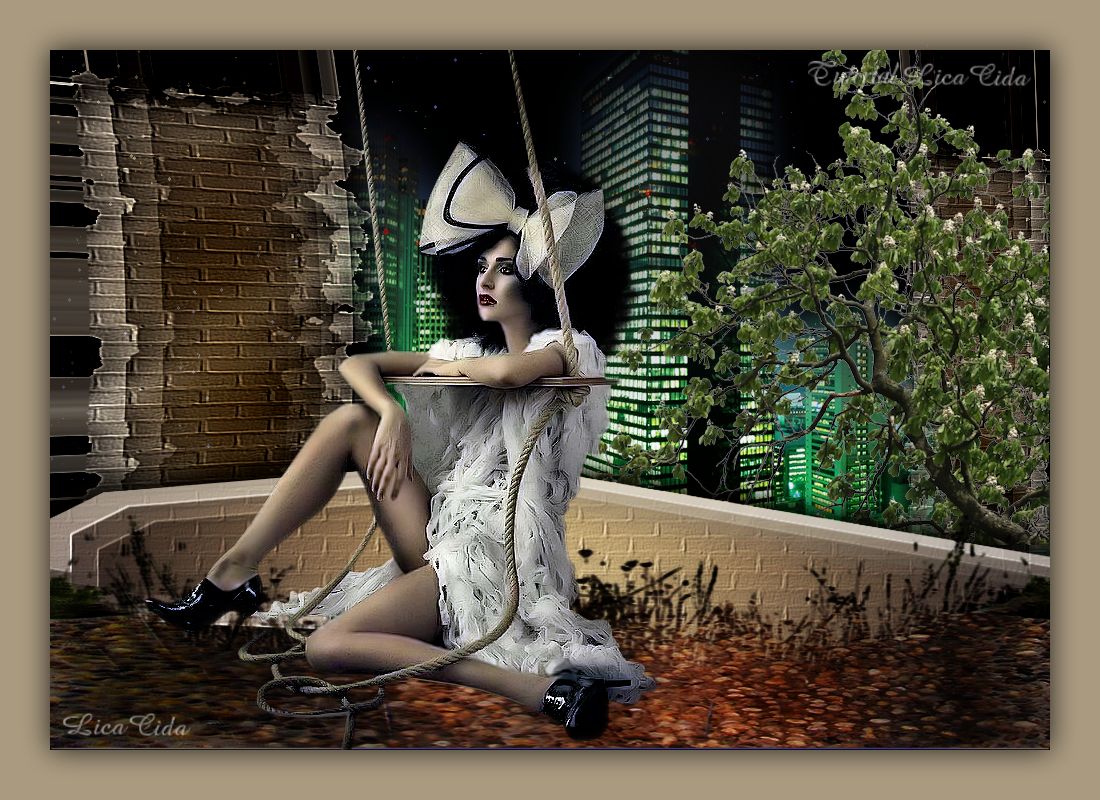
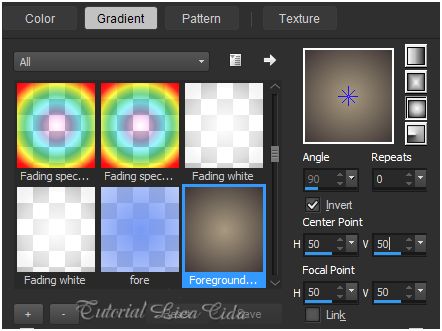
1_. Abra uma nova imagem transparente de 1000 x 700 px. 2_. Selections → Load/Save Selection → Load Selection From Disk → selterracelc. 3_. Pinte com o gradiente formado pelas cores #3e3636 e #a99a80. Configure: Style: Sunburst — Repeats: 0 — Invert marcado — Center Point: H: 50 / V: 50 — Focal Point: H: 50 / V: 50.
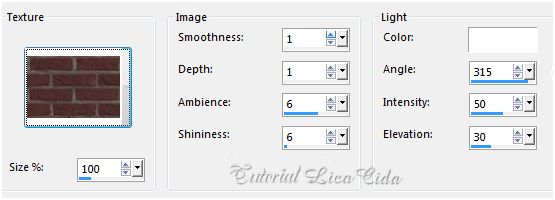
Selections → Select None. 4_. Effects → Texture Effects → Texture → brick013 (anexo).
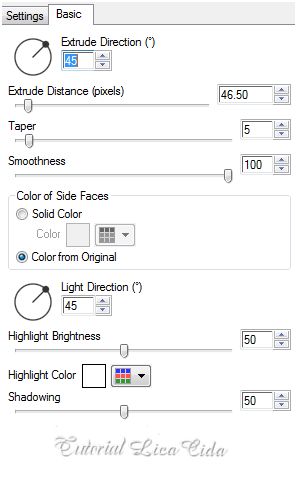
5_. Plugin Alien Skin Eye Candy 5: Impact → Extrude.
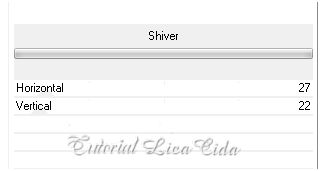
6_. Plugin Unlimited 2.0 → Special Effects 1.
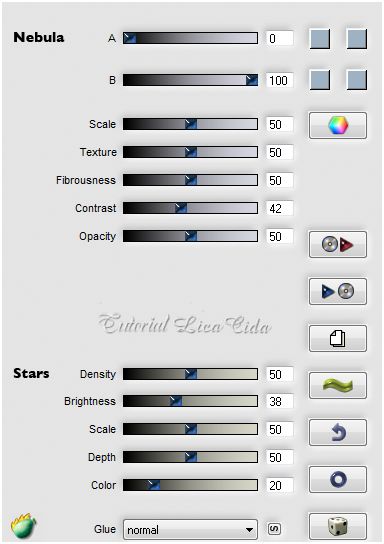
Effects → User Defined Filter → Emboss_3. Effects → 3D Effects → Drop Shadow: 0 / 0 / 80 / 40,00 — Color: #000000. 7_. Edit → Copy no elementoterracelc Edit → Paste As New Layer. Layers → Arrange → Move Down. 8_. Layers → New Raster Layer. Plugin Flaming Pear → Glitterato.
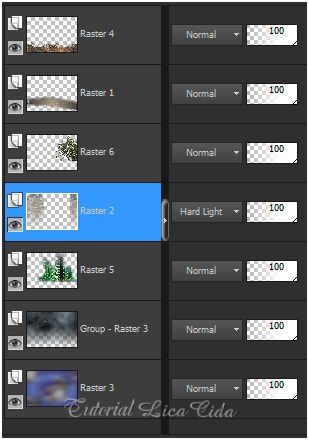
Layers → Arrange → Move Down. 9_. Layers → New Mask Layer → From Image: !!!!gradientedworisch. Layers → Merge → Merge Group. 10_. Layers → New Raster Layer. Layers → Arrange → Send to Bottom. Selections → Select All. Edit → Copy na Raster 1 do tube Gabry-woman 925 Edit → Paste Into Selection. Selections → Select None. Se preferir, pinte com uma cor que combine. 11_. Edit → Copy na premade_background_24_by_sternenfee59-d4ufmnp Edit → Paste As New Layer. A Mask_herbe segue no material, caso queira criar sua própria premade. Layers → Arrange → Bring to Top. Objects → Align → Bottom. Com a ferramenta Pick Tool, acerte as laterais. LAYERS
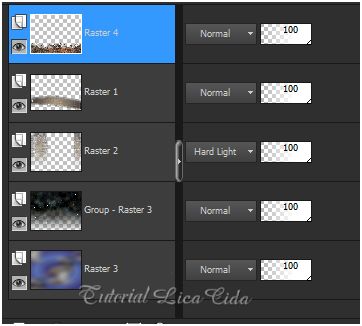
12_. Ative a Group-Raster 3. Edit → Copy no tube DBK Building_119 Edit → Paste As New Layer. Redimensione e posicione a gosto. Com a ferramenta Eraser, apague os excessos do tube. 13_. Ative a Raster 2. Edit → Copy no tube 12930417587_fleurs_nikita Edit → Paste As New Layer. Image → Mirror. Redimensione e posicione a gosto. LAYERS
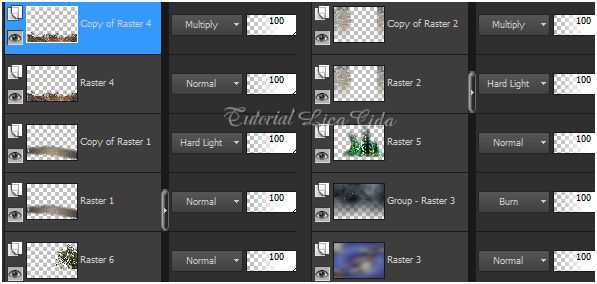
Altere os Blend Modes e a Opacity das layers.
14_. Ative a Copy of Raster 4 (a layer superior). Edit → Copy no tube Gabry-woman 925 Edit → Paste As New Layer. Posicione. Aplique a marca-d'água. Assine e salve. Espero que gostem.
Aparecida / LicaCida, janeiro de 2014.
Copyright ©2026 - Web Design - Naise Minas |