|
Suely Dam
TRADUÇÕES

MATERIAL

Seleção: alphachannel — Selection #1
(guardada no canal alfa da imagem).
Efeito: efeitoUlead — Ulead Effects → Art Texture
(anexado; use se necessário).
Decos: Ildiko_create_deco (138)
deco1lc
deco2lc
deco3lc
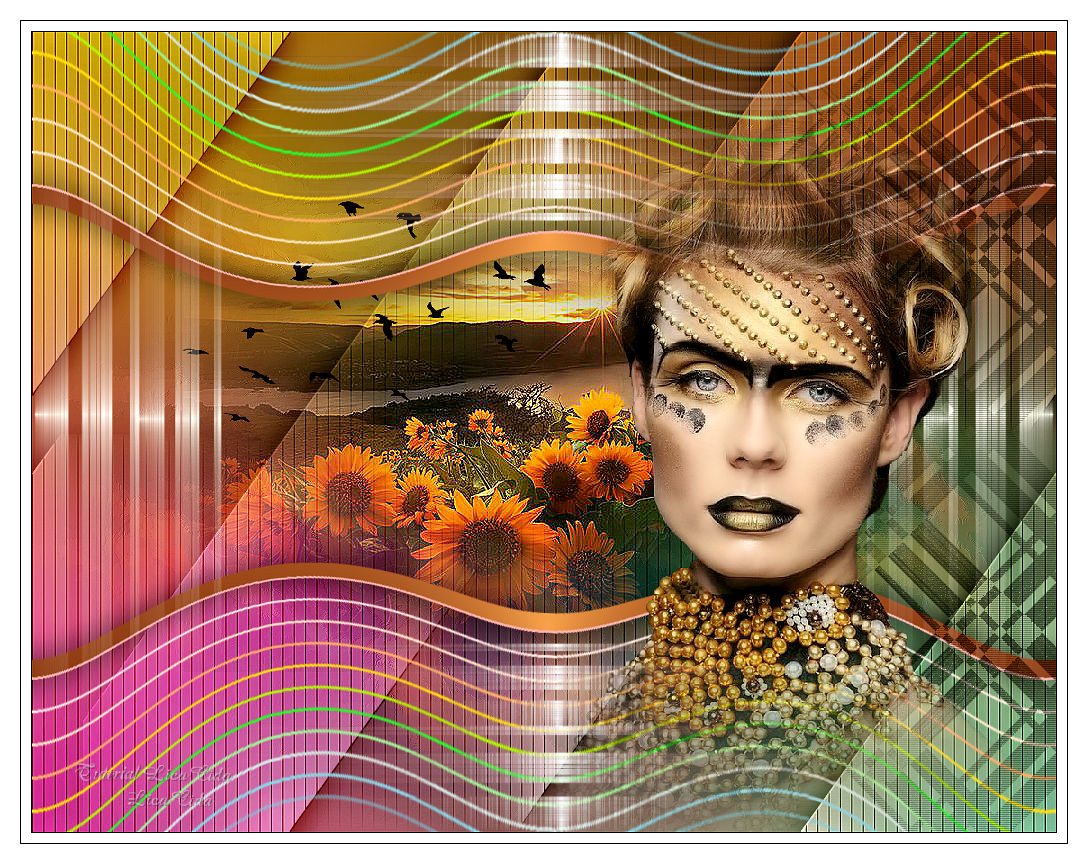
Tubes: 10814 - TUBES SUELYDAM - SDESIGNERS
lunapaisagem5224(tuna)
bird_brushes_II_by_lpdragonfly_7
Mask: 20-20
Marca-d'água.
Efeitos do PSP.
Versão usada: PSP X8.
PLUGINS
Plugin Artistic → Rough Pastels
Plugin Ulead Effects → Art Texture (efeito anexado)
Plugin MuRa's Seamless → Emboss at Alpha
Plugin Alien Skin Eye Candy 5: Impact → Backlight
Plugin Mehdi → Weaver
Plugin VanDerLee → Unplugged-X → Vertical Tile
Plugin VanDerLee → Unplugged-X → Interlace
TUTORIAL
|
Esta seta marca sua linha
Clique e arraste para movê-la
|
|
1_.
Abra o alphachannel, duplique (Shift + D) e feche (minimize) a original.
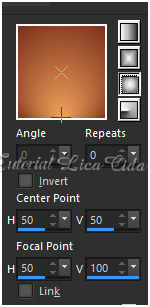
Pinte com o gradiente formado pelas cores #f0a25a e #7b311d.
Configure: Style: Sunburst — Repeats: 0 — Invert desmarcado — Center Point: H: 50 / V: 50 — Focal Point: H: 50 / V: 100.
2_.
Selections → Select All.
Edit → Copy no lunapaisagem5224(tuna)
Edit → Paste Into Selection.
Selections → Select None.
Adjust → Blur → Motion Blur — Angle: 130 — Strength: 100.
3_.
Plugin Artistic → Rough Pastels.
4_.
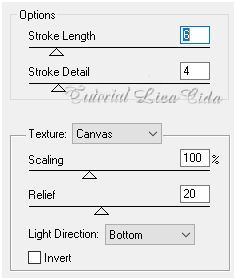
Effects → Art Media Effects → Brush Strokes.
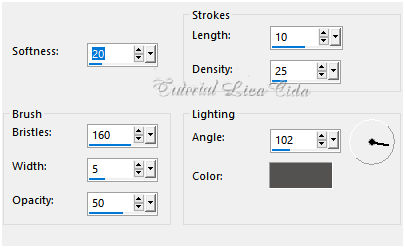
Layers → Duplicate.
5_.
Plugin Ulead Effects → Art Texture.
Clique em Reset para que o efeito apareça; clique uma vez na seta para baixo e depois na seta para cima (veja o print). O efeito está anexado ao material.
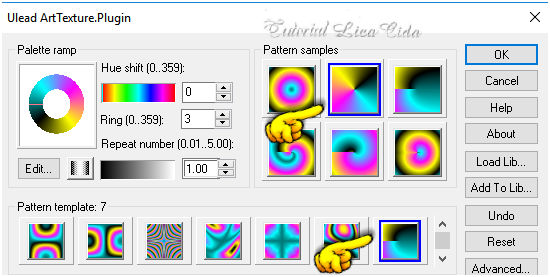
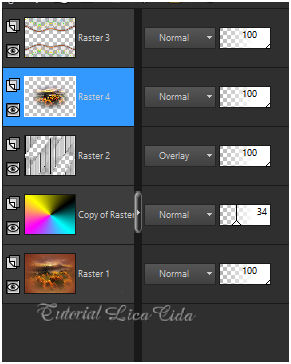
Opacity: 34%.
6_.
Layers → New Raster Layer.
Selections → Select All.
Edit → Copy no Ildiko_create_deco (138)
Edit → Paste Into Selection.
Selections → Select None.
7_.
Plugin MuRa's Seamless → Emboss at Alpha: Default.
Effects → 3D Effects → Drop Shadow: 0 / 0 / 80 / 40,00 — Color: #000000.
Blend Mode: Overlay.
8_.
Selections → Load/Save Selection → Load Selection From Alpha Channel → Selection #1.
Layers → New Raster Layer.
Pinte com o gradiente formado no item 1.
9_.
Plugin Alien Skin Eye Candy 5: Impact → Backlight.
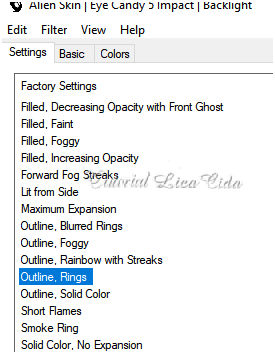
10_.
Selections → Modify → Contract: 15 px.
Pressione a tecla Delete.
Selections → Select None.
Effects → 3D Effects → Drop Shadow: 0 / 0 / 80 / 40,00 — Color: #000000.
11_.
Effects → Distortion Effects → Polar Coordinates — Polar to rectangular.
Com a ferramenta Pick Tool, abaixe o efeito para 500 px.
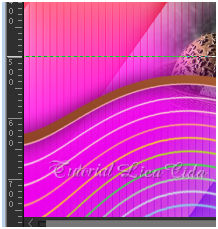
Layers → Duplicate.
Image → Mirror → Mirror Vertical.
Layers → Merge → Merge Down.
12_.
Edit → Copy no misted lunapaisagem5224(tuna)
Edit → Paste As New Layer.
Adjust → Sharpness → Sharpen More.
Layers → Arrange → Move Down.
LAYERS
Altere os Blend Modes e a Opacity das layers.
13_.
Edit → Copy no deco1lc
Edit → Paste As New Layer.
Objects → Align → Left.
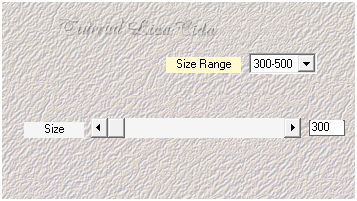
Plugin Mehdi → Weaver.
Layers → Duplicate.
Image → Resize: 80% — Resize all layers desmarcado.
Layers → Merge → Merge Down.
Layers → Duplicate.
Image → Mirror → Mirror Horizontal.
Layers → Merge → Merge Down.
14_.
Edit → Copy no deco2lc
Edit → Paste As New Layer.
Objects → Align → Right.
Plugin VanDerLee → Unplugged-X → Vertical Tile: Default.
Plugin VanDerLee → Unplugged-X → Interlace: Default.
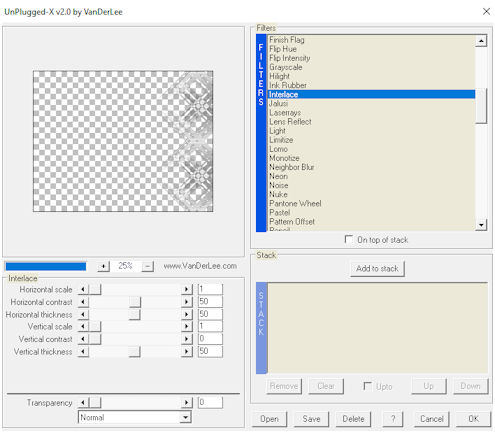
Blend Mode: Multiply.
15_.
Edit → Copy no tube 10814 - TUBES SUELYDAM - SDESIGNERS
Edit → Paste As New Layer.
Image → Resize: 90% — Resize all layers desmarcado.
Usei a mask 20-20 (anexada ao material).
16_.
Edit → Copy no deco3lc
Edit → Paste As New Layer.
17_.
Edit → Copy no bird_brushes_II_by_lpdragonfly_7
Edit → Paste As New Layer.
Use sobre o misted.
Image → Add Borders: 1 px, Symmetric marcado — Color: a gosto.
Aplique a marca-d'água.
Assine e salve.
Espero que gostem.
Aparecida / LicaCida, outubro de 2017.
Rio de Janeiro - Brasil.

VOLTAR
Copyright ©2026 - Web Design - Naise Minas
|

