|
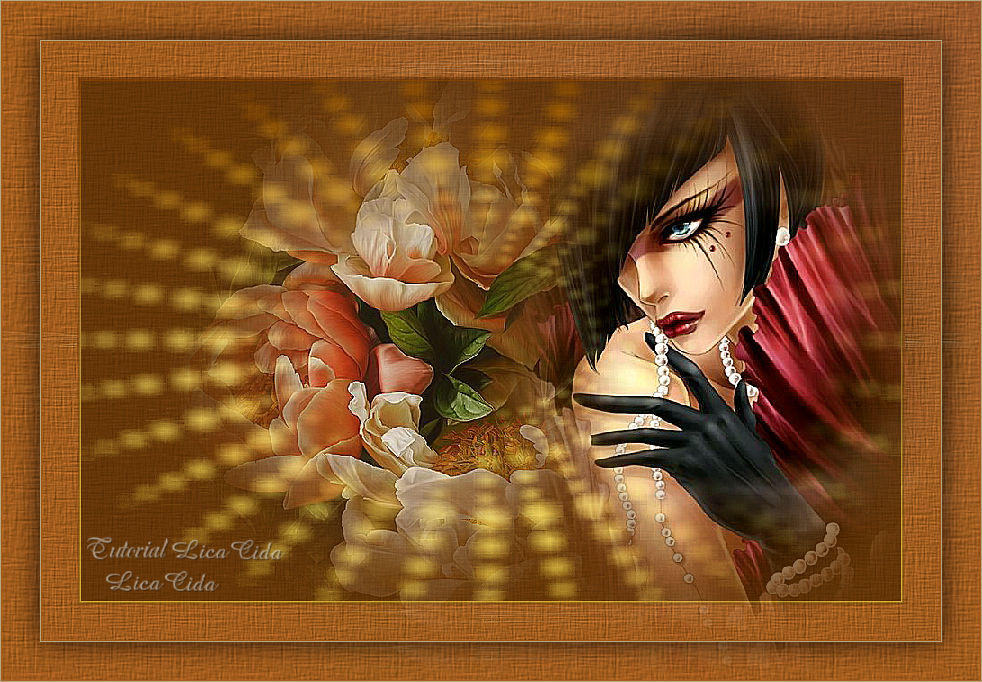
Spring Pearly
TRADUÇÕES

MATERIAL

Tubes: K@rine_dreams_Misted_Flowers_3471_Mai_2016
K@rine_dreams_Misted_Face_3435_Mai_2016
Mask: 221InsatiableDreams
Marca-d'água.
Efeitos do PSP.
Versão usada: PSP X8.
PLUGINS
Plugin dsb flux → Blast
Plugin Nik Software → Color Efex Pro 3.0
Plugin AAA Filters → Custom
TUTORIAL
|
Esta seta marca sua linha
Clique e arraste para movê-la
|
|
Configure as cores: Foreground: #432c1d — Background: #938361.
1_.
Abra uma nova imagem transparente de 900 x 600 px.
Pinte com a cor do Foreground.
2_.
Layers → New Raster Layer.
Pinte com a cor do Background.
Layers → New Mask Layer → From Image: 221InsatiableDreams.
Effects → Edge Effects → Enhance More.
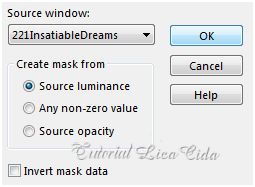
Layers → Merge → Merge Group.
Layers → Duplicate.
Blend Mode: Screen — Opacity: 69%.
3_.
Selections → Select All.
Selections → Modify → Contract: 40 px.
Selections → Invert.
Pressione a tecla Delete.
4_.
Ative a Group - Raster 2.
Plugin dsb flux → Blast.
Use as duas opções: 1 = Left, 20% / 2 = Right, 20%.
Effects → Edge Effects → Enhance More.
Selections → Invert.
5_.
Effects → 3D Effects → Chisel: Size: 4 — Transparent.
Use um tom mais claro que o do Background (Color: #afa285).
Selections → Invert.
6_.
Ative a Raster 1.
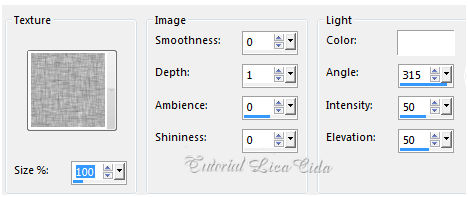
Effects → Texture Effects → Texture (do próprio PSP; use à vontade).
Selections → Select None.
7_.
Repita: Effects → Texture Effects → Texture (mesmos valores).
8_.
Plugin Nik Software → Color Efex Pro 3.0 → Bi-Color User Defined (valores a gosto).
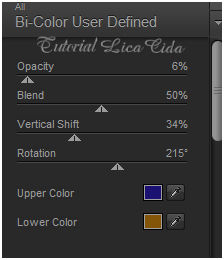
9_.
Ative a Group - Raster 2.
Plugin Nik Software → Color Efex Pro 3.0 → Bi-Color Filters — Color Set: Brown 1.
Repita na layer superior (valores a gosto).
10_.
Edit → Copy no K@rine_dreams_Misted_Flowers_3471_Mai_2016
Edit → Paste As New Layer.
Image → Mirror.
Image → Resize: 90% — Resize all layers desmarcado.
Posicione.
Adjust → Sharpness → Sharpen More.
11_.
Edit → Copy no K@rine_dreams_Misted_Face_3435_Mai_2016
Edit → Paste As New Layer.
Image → Mirror.
Image → Resize: 90% — Resize all layers desmarcado.
Posicione.
Adjust → Sharpness → Sharpen More.
Altere os Blend Modes e a Opacity das layers.
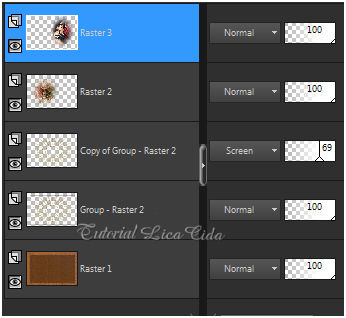
Image → Add Borders: 1 px, Symmetric marcado — Color: #afa285 (cor usada no Chisel).
Plugin AAA Filters → Custom — Landscape.
Edit → Copy.
Image → Add Borders: 40 px, Symmetric marcado — Color: #ffffff.
Selecione a borda.
Edit → Paste Into Selection.
Selections → Invert.
Effects → 3D Effects → Drop Shadow: 0 / 0 / 80 / 40,00 — Color: #000000.
Selections → Select None.
Aplique a marca-d'água.
Assine e salve.
Espero que gostem.
Aparecida / LicaCida, setembro de 2016.
Rio de Janeiro - Brasil.

VOLTAR
Copyright ©2026 - Web Design - Naise Minas
|

