|
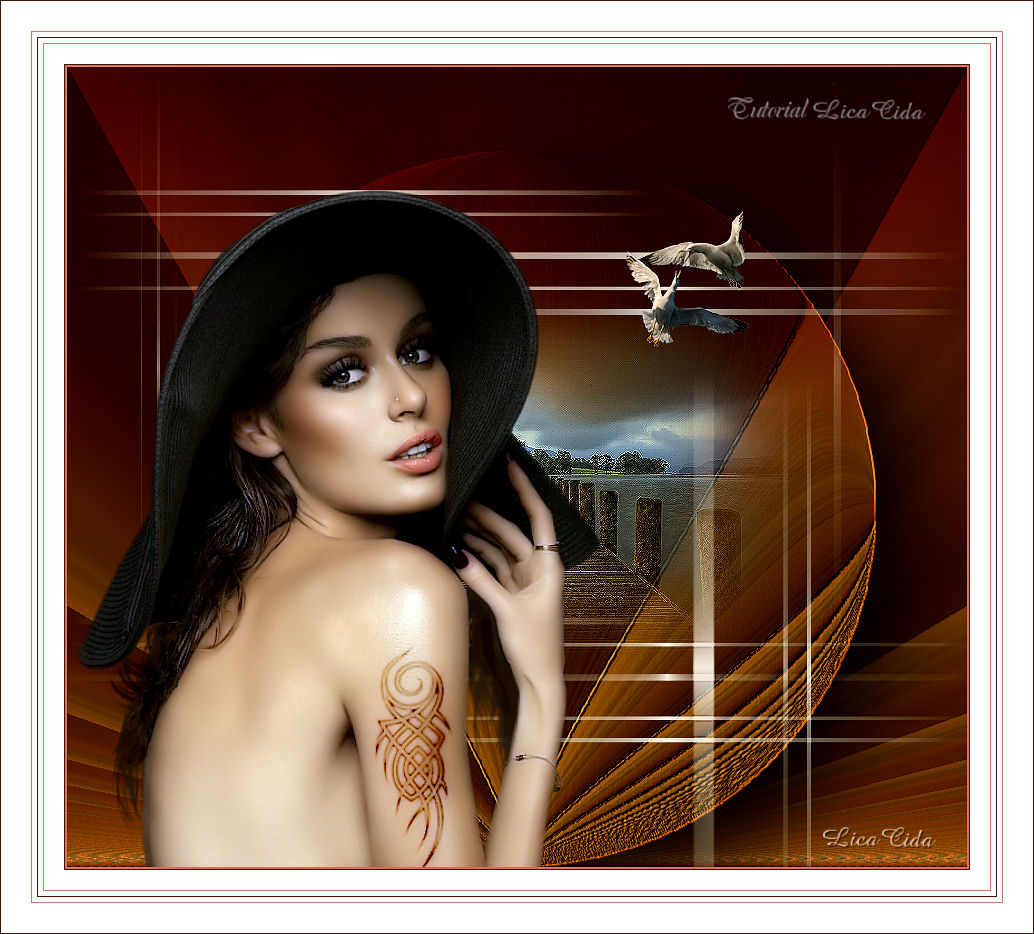
Singular
TRADUÇÕES

MATERIAL

Script: clemence --
Salvar na pasta Scripts-Restricted do PSP.
Seleção: traçoslc --
Salvar na pasta Selections do PSP.
Tubes: Gabry-woman -0-153
1816-luzcristina
ave -arquivo
Marca-d'água.
Efeitos do PSP.
Versão usada: PSP X8.
PLUGINS
Plugin Mehdi → Weaver
Plugin Nik Software → Color Efex Pro 3.0 → Bi-Color Filters
Plugin Alien Skin Eye Candy 5: Impact → Perspective Shadow
Plugin AAA Filters → Custom
TUTORIAL
|
Esta seta marca sua linha
Clique e arraste para movê-la
|
|
1_.
Abra uma nova imagem transparente de 900 x 800 px.
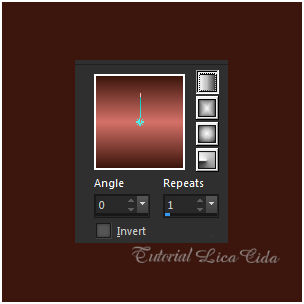
Pinte com o gradiente formado pelas cores #3c160d e #d47168.
Configure: Style: Linear — Angle: 0 — Repeats: 1 — Invert desmarcado.
2_.
Selections → Select All.
Edit → Copy no tube 1816-luzcristina
Edit → Paste Into Selection.
Selections → Select None.
3_.
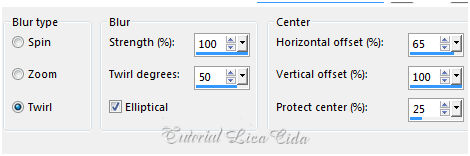
Adjust → Blur → Radial Blur.
Layers → Duplicate.
Image → Mirror → Mirror Vertical.
Blend Mode: Overlay.
Layers → Merge → Merge Down.
Layers → Duplicate.
Retire a visibilidade da Raster 1.
4_.
Effects → Geometric Effects → Perspective - Horizontal: 90 — Repeat.
Repita com o valor negativo: -90.
5_.
Effects → Geometric Effects → Perspective - Vertical: 100 — Wrap.
Repita.
6_.
Effects → Geometric Effects → Circle — Transparent.
Ative novamente a visibilidade da Raster 1.
7_.
Ainda na Copy of Raster 1:
Image → Resize: 90% — Resize all layers desmarcado.
Effects → User Defined Filter → Emboss_3.
Objects → Align → Bottom.
8_.
Edit → Copy no tube 1816-luzcristina
Edit → Paste As New Layer.
Image → Resize: 90% — Resize all layers desmarcado.
Adjust → Sharpness → Sharpen.
9_.
Selections → Load/Save Selection → Load Selection From Disk → traçoslc.
10_.
Layers → New Raster Layer.
Pinte com a cor #ffffff.
Selections → Select None.
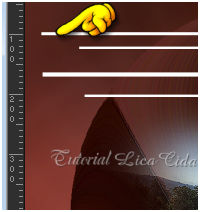
Suba o efeito 100 px.
11_.
Effects → Distortion Effects → Wind: From left — Strength: 100.
Repita: From right — Strength: 100.
Layers → Duplicate.
Image → Mirror → Mirror Vertical.
Image → Mirror → Mirror Horizontal.
Layers → Merge → Merge Down.
12_.
Effects → Geometric Effects → Circle — Transparent.
13_.
Plugin Mehdi → Weaver.
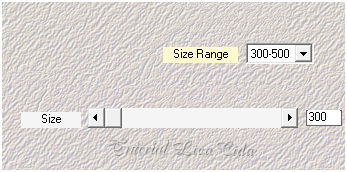
Adjust → Sharpness → Sharpen More.
14_.
Ative a Raster 1.
Effects → Geometric Effects → Perspective - Vertical: 100 — Wrap.
Effects → User Defined Filter → Emboss_3.
15_.
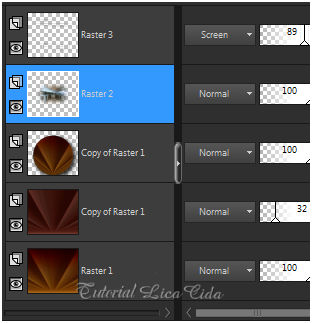
Na layer original Raster 1 e na layer do círculo:
Plugin Nik Software → Color Efex Pro 3.0 → Bi-Color Filters — Color Set: Brown 1.
Altere os Blend Modes e a Opacity das layers.
16_.
Na layer do círculo:
Plugin Alien Skin Eye Candy 5: Impact → Perspective Shadow — Blurry.
17_.
Edit → Copy no tube Gabry-woman -0-153
Edit → Paste As New Layer.
Adjust → Sharpness → Sharpen.
Image → Add Borders: 2 px, Symmetric marcado — Color: cor do Background.
Plugin AAA Filters → Custom — Landscape.
18_.
Bordas: usei o script clemence (use cores a gosto).
Rode o script clemence: procure o script clemence e clique em Run Selected Script.
Aplique a marca-d'água.
Assine e salve.
Espero que gostem.
Aparecida / LicaCida, novembro de 2016.
Rio de Janeiro - Brasil.

VOLTAR
Copyright ©2026 - Web Design - Naise Minas
|

