|
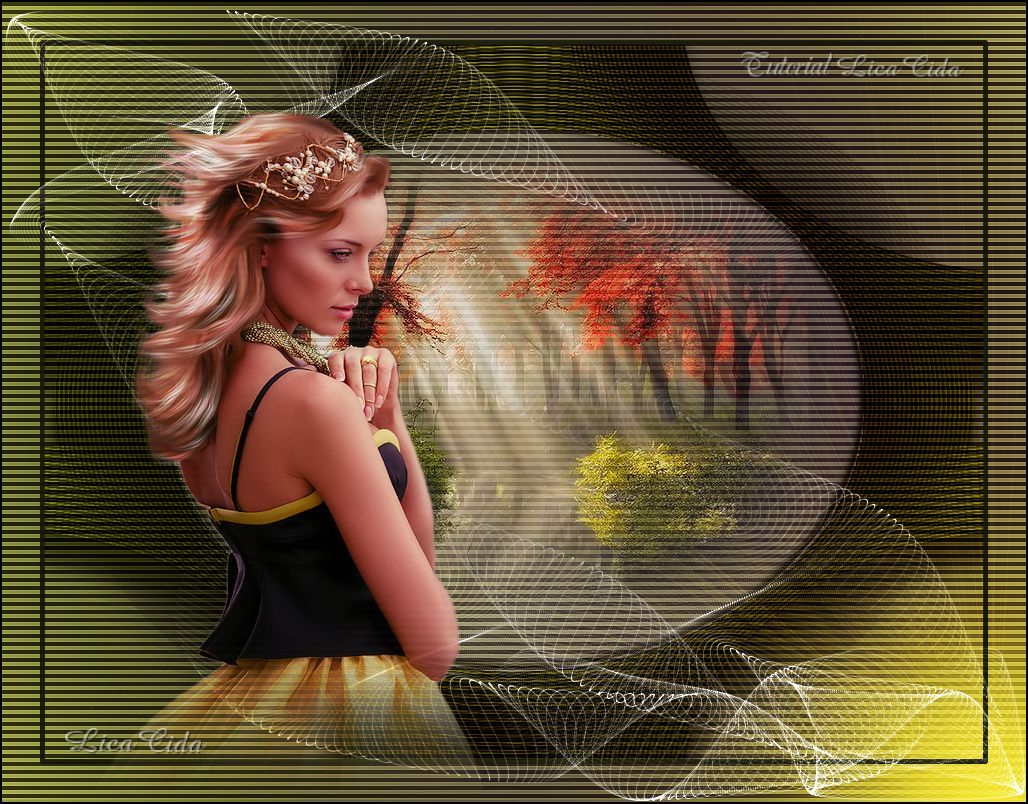
Sinedots II
TRADUÇÕES

MATERIAL

Preset do plugin: rosiecodes (autumn) --
Descompacte na pasta do plugin DragonFly → Sinedots II.
Abra o Sinedots II → Open: aparecem os presets (veja o print no item 8).
Presets: Preset_ColorAdjustLevels_color_lc
Preset_Sunburst_sunburstlc --
Salvar na pasta Presets do PSP.
Tubes: tube2729_mulher_mara_pontes
calguisMistAutomneB4092011
Marca-d'água.
Efeitos do PSP.
Versão usada: PSP X7.
PLUGINS
Plugin DragonFly → Sinedots II
Plugin VM Extravaganza → Transmission
Plugin FFG → A
TUTORIAL

|
Esta seta marca sua linha
Clique e arraste para movê-la
|
|
1_.
Abra uma nova imagem transparente de 1024 x 800 px.
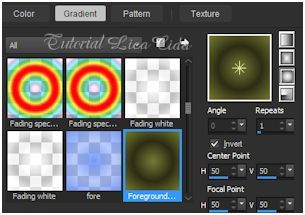
Pinte com o gradiente formado pelas cores #2d2d15 e #767a35.
Configure: Style: Sunburst — Repeats: 1 — Invert marcado — Center Point e Focal Point: H: 50 / V: 50.
2_.
Plugin VM Extravaganza → Transmission.
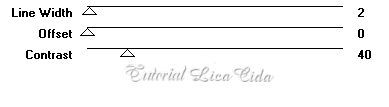
Adjust → Sharpness → Sharpen More.
Layers → Duplicate.
3_.
Ative a ferramenta Selection Tool (tecla S) → Custom Selection.
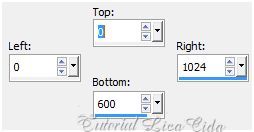
Pressione a tecla Delete.
Selections → Select None.
4_.
Effects → Distortion Effects → Polar Coordinates — Rectangular to Polar — Transparent.
Image → Resize: 90% — Resize all layers desmarcado.
5_.
Effects → Image Effects → Seamless Tiling — Default.
Effects → 3D Effects → Drop Shadow: 29 / -2 / 50 / 30,00 — Color: #000000.
6_.
Ative a ferramenta Selection Tool (tecla S).
Configure:

Centralize e forme o círculo desejado.
Selections → Edit Selection.
Acerte como no print, usando a ferramenta Pick Tool.
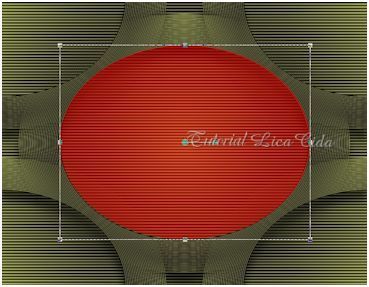
Selections → Edit Selection (desmarque).
7_.
Effects → 3D Effects → Cutout.
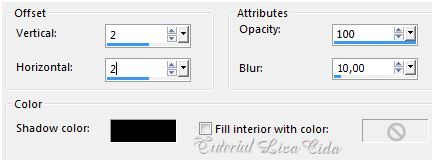
Repita com Vertical e Horizontal negativos: -2.
Selections → Select None.
8_.
Layers → New Raster Layer.
Plugin DragonFly → Sinedots II — preset autumn.
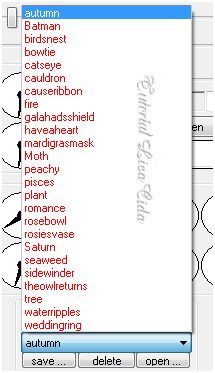
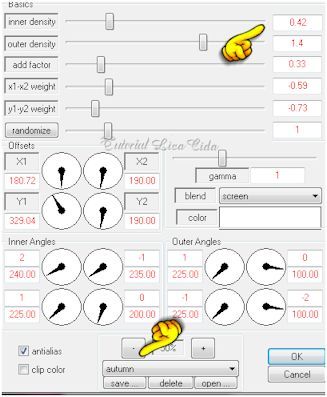
Mude somente a Opacity, para 0,42.
Com o preset autumn selecionado, clique em OK.
9_.
Volte à Copy of Raster 1.
Selections → Select All.
Selections → Modify → Contract: 40 px.
Selections → Invert.
Pressione a tecla Delete.
Selections → Invert.
Selections → Modify → Select Selection Borders: Both sides — Border width: 2 — Anti-alias marcado.
Layers → New Raster Layer.
Pinte com a cor usada no Foreground (#2d2d15).
Selections → Select None.
Volte à Copy of Raster 1.
Layers → Duplicate.
10_.
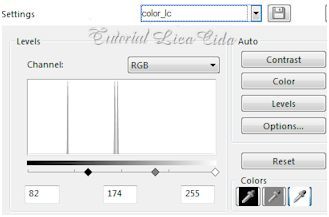
Adjust → Brightness and Contrast → Levels: aplique o preset color_lc.
11_.
Ative a Raster 1.
Layers → Duplicate.
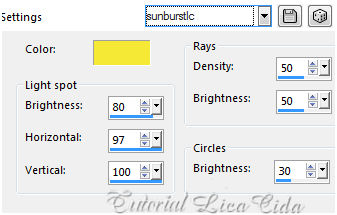
Na Raster 1: Effects → Illumination Effects → Sunburst — preset sunburstlc.
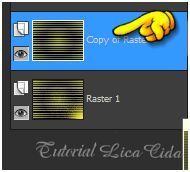
Na cópia (Copy of Raster 1):
12_.
Plugin FFG → A.
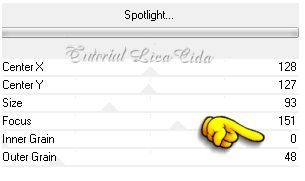
Layers → Arrange → Bring to Top.
Blend Mode: Overlay.
13_.
Ative a Raster 1.
Layers → New Raster Layer.
Clique no Background e em Accented para encontrar a cor oposta. Use-a no Foreground.
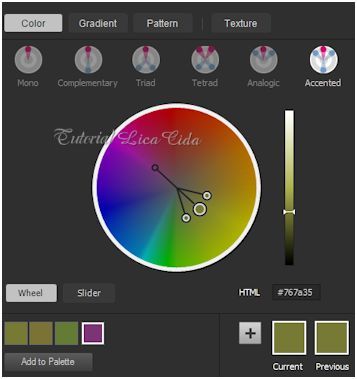
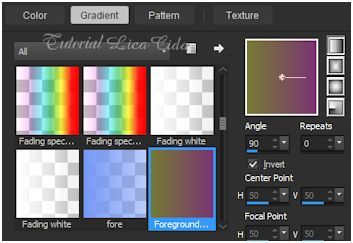
Pinte a nova layer (Raster 4) com o gradiente formado pelas cores #7b3572 e #767a35.
Configure: Style: Linear — Angle: 90 — Repeats: 0 — Invert marcado.
Ao clicar com o Flood Fill para pintar a layer, mude a Opacity para 24%.
Altere os Blend Modes e a Opacity das layers (use a gosto).
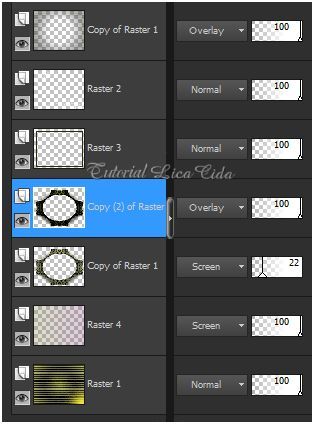
Ative a Raster 2.
14_.
Edit → Copy no tube calguisMistAutomneB4092011
Edit → Paste As New Layer.
Posicione.
15_.
Edit → Copy no tube2729_mulher_mara_pontes
Edit → Paste As New Layer.
Image → Resize: 80% — Resize all layers desmarcado.
Image → Mirror.
Posicione.
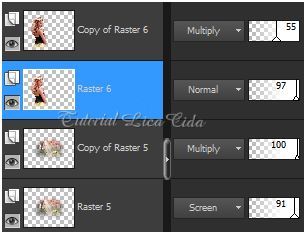
Altere os Blend Modes e a Opacity das layers dos tubes (use a gosto).
Acima do tube feminino está a layer do efeito FFG → A (observe, no print acima, a layer superior: Copy of Raster 1).
16_.
Image → Add Borders: 2 px, Symmetric marcado — Color: #000000.
Aplique a marca-d'água.
Assine e salve.
Espero que gostem.
Aparecida / LicaCida, outubro de 2015.
Rio de Janeiro - Brasil.


VOLTAR
Copyright ©2026 - Web Design - Naise Minas
|
