|
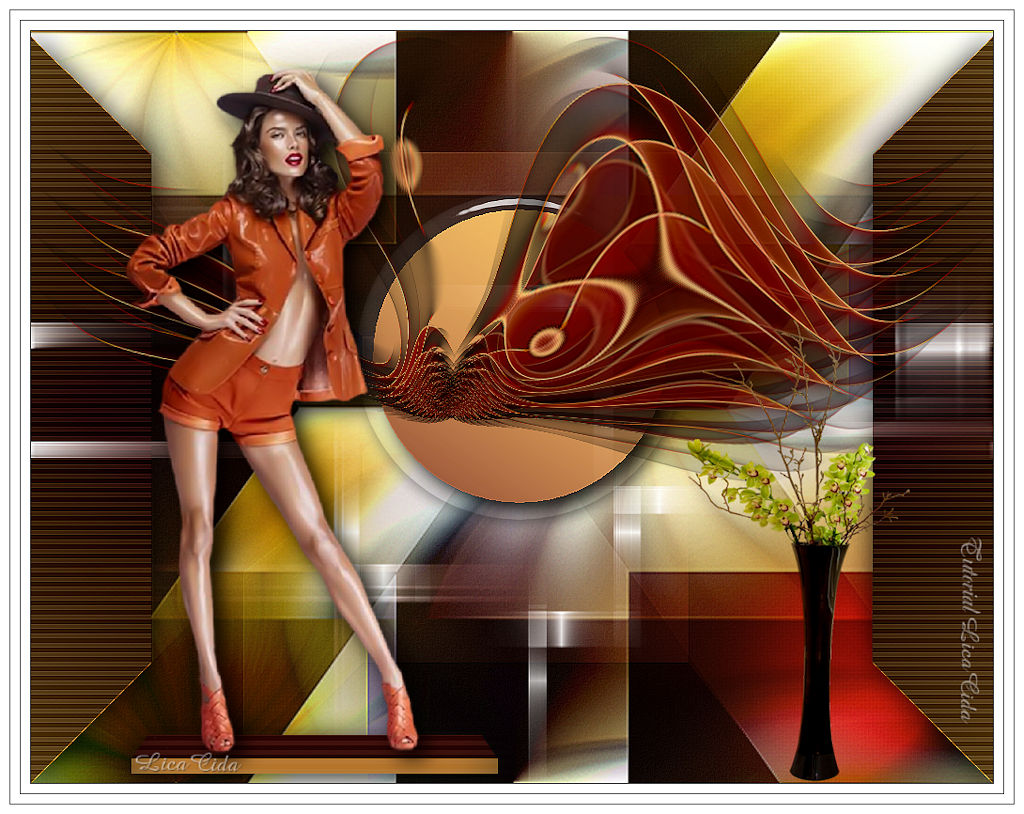
Sienna
TRADUÇÕES

MATERIAL

Seleções: circle1lc
sienna2lc
sienna3lc --
Salvar na pasta Selections do PSP.
Preset: flowers (Eye Candy 5: Impact → Glass) --
Dê um duplo clique sobre o preset para importá-lo para o plugin.
Script: brokenhearted --
Salvar na pasta Scripts-Restricted do PSP.
Caso o script não rode, o efeito segue anexado (script).
Preset: Illumination → Lights → Preset_Lights_lc11 --
Salvar na pasta Presets do PSP.
Tubes: SuizaBella_Ref_AG-00747
Grisi_Tube_Decoration_357
Back: free_back_ildiko (4)
Marca-d'água.
Efeitos do PSP.
Versão usada: PSP X8.
PLUGINS
Plugin AbstractCurves → AbstractCurves
Plugin MuRa's Meister → Copies
Plugin MuRa's Seamless → Emboss at Alpha
Plugin Alien Skin Eye Candy 5: Impact → Glass
Plugin Alien Skin Eye Candy 5: Impact → Perspective Shadow
Plugin Alien Skin Eye Candy 5: Impact → Extrude
Plugin Mehdi → Weaver
Plugin Graphics Plus → Button Beveler III
Plugin Simple → Pizza Slice Mirror
Plugin Simple → Top Left Mirror
Plugin FM Tile Tools → Blend Emboss
Plugin Carolaine and Sensibility → CS-HLines
Plugin Nik Software → Color Efex Pro 3.0 → Glamour Glow
TUTORIAL
|
Esta seta marca sua linha
Clique e arraste para movê-la
|
|
1_.
Abra uma nova imagem transparente de 1024 x 800 px.
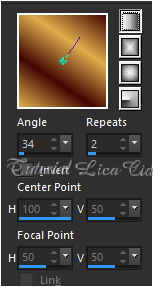
Pinte com o gradiente formado pelas cores #dfad4d (Foreground) e #400802 (Background).
Configure: Style: Linear — Angle: 34 — Repeats: 2 — Invert desmarcado.
2_.
Layers → New Raster Layer.
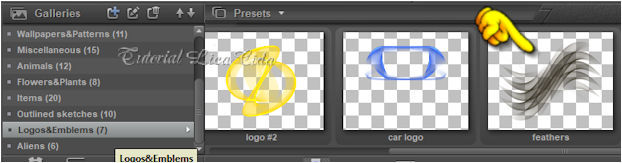
Plugin AbstractCurves → AbstractCurves → Logos&Emblems → feathers.
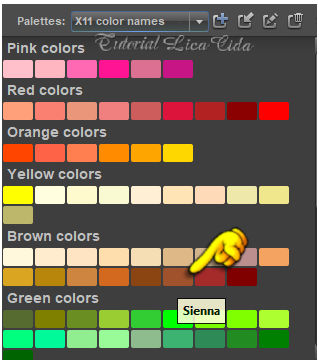
Clique para selecionar a cor (use de acordo com o seu trabalho).
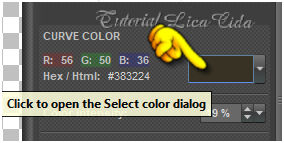
Cor "Sienna":
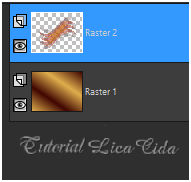
Effects → Edge Effects → Enhance.
Image → Resize: 60% — Resize all layers desmarcado.
3_.
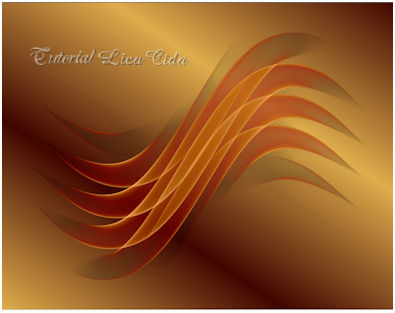
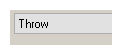
Plugin MuRa's Meister → Copies — Throw.
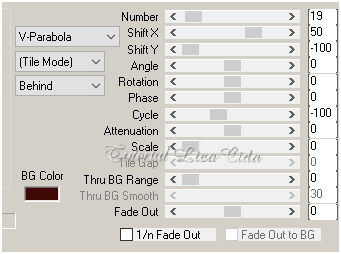
Objects → Align → Left.
Layers → Duplicate.
Image → Mirror → Mirror Horizontal.
Layers → Merge → Merge Down.
4_.
Effects → Distortion Effects → Warp.
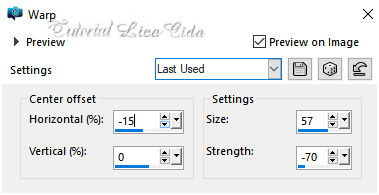
5_.
Ative a Raster 1.
Selections → Load/Save Selection → Load Selection From Disk → circle1lc.
Selections → Promote Selection to Layer.
6_.
Plugin Alien Skin Eye Candy 5: Impact → Glass — Settings: flowers.
Plugin Alien Skin Eye Candy 5: Impact → Perspective Shadow — Blurry.
7_.
Na Raster 2: Edit → Copy no efeito formado.
Edit → Paste Into Selection (na layer Promoted Selection).
Selections → Select None.
8_.
Layers → New Raster Layer (Raster 3).
Rode o script brokenhearted.
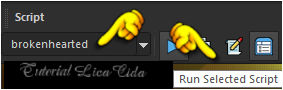
Procure o script brokenhearted e clique em Run Selected Script.
Caso o script não rode, o efeito segue anexado no material.
Será formada outra layer, a Copy of Raster 3.
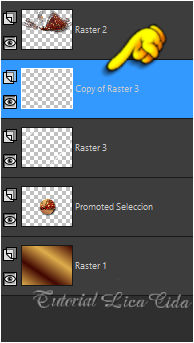
9_.
Ative a Raster 3.
Plugin Mehdi → Weaver.
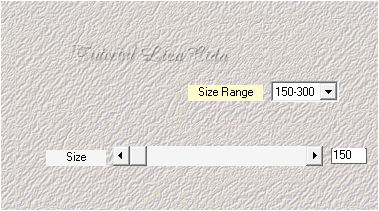
10_.
Ative a Copy of Raster 3.
Plugin Mehdi → Weaver.
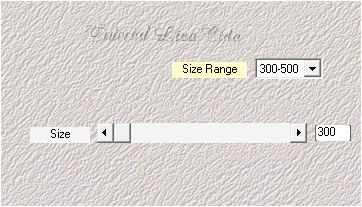
Layers → Merge → Merge Down.
Plugin MuRa's Seamless → Emboss at Alpha — Default.
Effects → Distortion Effects → Pinch — Strength: 100%.
11_.
Ative a Raster 1.
Plugin Graphics Plus → Button Beveler III.
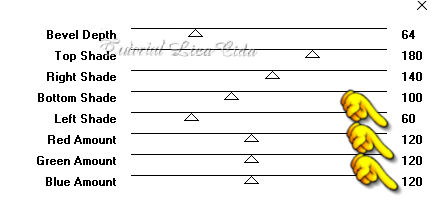
12_.
Plugin Simple → Pizza Slice Mirror.
Plugin Simple → Top Left Mirror.
13_.
Effects → Artistic Effects → Halftone.
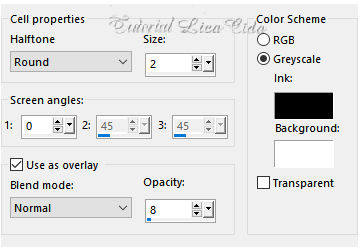
Adjust → Add/Remove Noise → JPEG Artifact Removal: Maximum — Crispness: 50.
Plugin FM Tile Tools → Blend Emboss — Default.
14_.
Selections → Load/Save Selection → Load Selection From Disk → sienna2lc.
Selections → Promote Selection to Layer.
15_.
Plugin Carolaine and Sensibility → CS-HLines — Default (3 / 0 / 10).
Selections → Select None.
Effects → Edge Effects → Enhance.
Layers → Duplicate.
Image → Mirror → Mirror Horizontal.
Layers → Merge → Merge Down.
Plugin Alien Skin Eye Candy 5: Impact → Perspective Shadow — Blurry.
16_.
Volte à Raster 1.
Selections → Load/Save Selection → Load Selection From Disk → sienna3lc.
Layers → New Raster Layer.
Pinte com a cor do Foreground: #dfad4d.
17_.
Plugin Alien Skin Eye Candy 5: Impact → Extrude — Solid Color: #400802 — Highlight Color: #400802 (cor do Background).
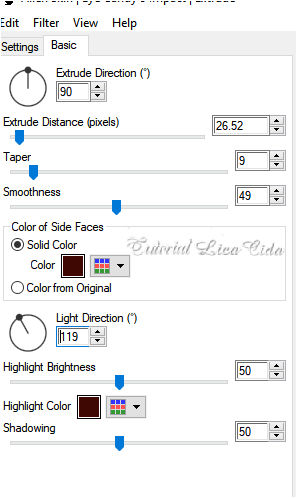
Selections → Select None.
18_.
Plugin Carolaine and Sensibility → CS-HLines — Default (3 / 0 / 10).
Effects → Edge Effects → Enhance.
Plugin Alien Skin Eye Candy 5: Impact → Perspective Shadow — Blurry.
19_.
Ative a Raster 1.
Effects → Illumination Effects → Lights → Preset_Lights_lc11.
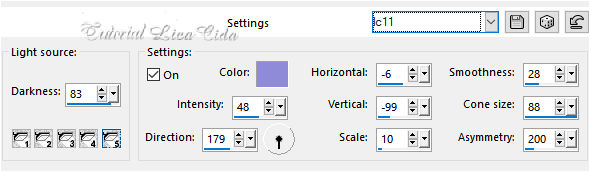
20_.
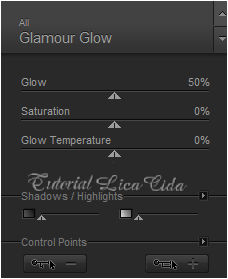
Plugin Nik Software → Color Efex Pro 3.0 → Glamour Glow.
Repita na Raster 4.
21_.
Layers → New Raster Layer.
Layers → Arrange → Send to Bottom.
Selections → Select All.
Edit → Copy no free_back_ildiko (4)
Edit → Paste Into Selection.
Selections → Select None.
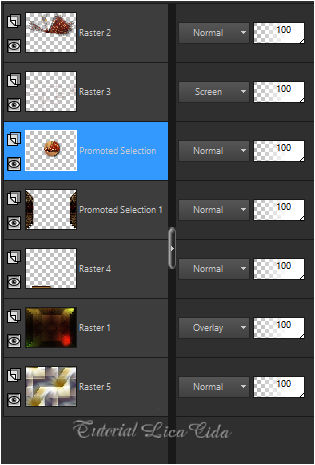
Altere o Blend Mode da Raster 1 para Overlay.
Na layer Promoted Selection (layer da seleção circle1lc): Adjust → One Step Photo Fix.
Opcional: na Raster 2, Plugin Alien Skin Eye Candy 5: Impact → Perspective Shadow — Blurry.
Altere os Blend Modes e a Opacity das layers.
22_.
Edit → Copy no tube SuizaBella_Ref_AG-00747
Edit → Paste As New Layer.
Posicione como no modelo.
23_.
Edit → Copy no Grisi_Tube_Decoration_357
Edit → Paste As New Layer.
Use a gosto.
24_.
Image → Add Borders: 1 px, Symmetric marcado — Color: #000000.
Image → Add Borders: 10 px, Symmetric marcado — Color: #ffffff.
Image → Add Borders: 1 px, Symmetric marcado — Color: #000000.
Image → Add Borders: 10 px, Symmetric marcado — Color: #ffffff.
Image → Add Borders: 1 px, Symmetric marcado — Color: #000000.
Image → Add Borders: 10 px, Symmetric marcado — Color: #ffffff.
Image → Resize: Width 1024 px.
Aplique a marca-d'água.
Assine e salve.
Espero que gostem.
Aparecida / LicaCida, março de 2020.
Rio de Janeiro - Brasil.

VOLTAR
Copyright ©2026 - Web Design - Naise Minas
|


