|
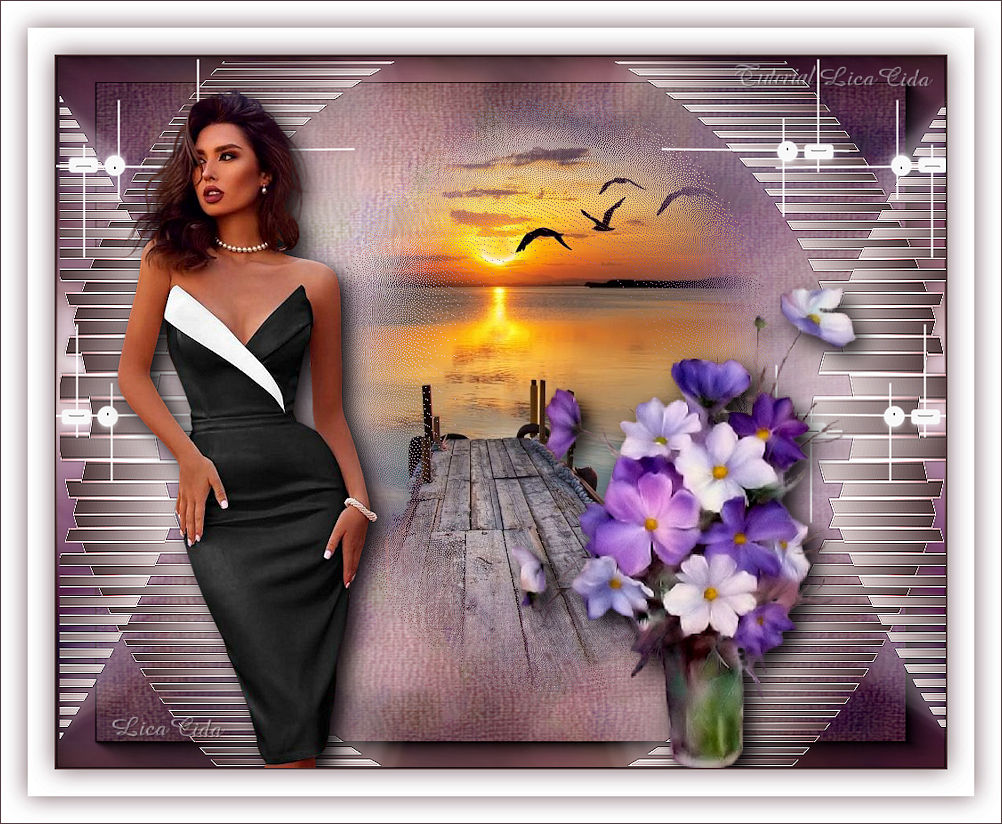
Riviera
TRADUÇÕES

MATERIAL

Presets do Eye Candy 5: Impact: riviera2 (Motion Trail)
riviera1 (Perspective Shadow)
Dê duplo clique sobre os presets para importá-los ao plugin.
Tubes: Jeanne_Woman_May_20_02_2021
SvB Zee 40 misted
6518-Luz Cristina
Back: 6577-Luz Cristina.pspimage _back
Decor: decor_nmcriacoes_135
Marca-d'água.
Efeitos do PSP.
Versão usada: PSP X9.
PLUGINS
Plugin Alien Skin Eye Candy 5: Impact → Motion Trail
Plugin Alien Skin Eye Candy 5: Impact → Perspective Shadow
Plugin Simple → Top Left Mirror
Plugin AAA Filters → Custom (opcional)
TUTORIAL
|
Esta seta marca sua linha
Clique e arraste para movê-la
|
|
1_.
Abra uma nova imagem transparente de 1000 x 700 px.
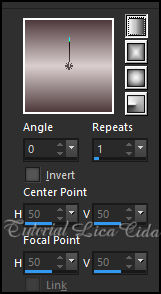
Pinte com o gradiente formado pelas cores #4f3b3d e #dacecf.
Configure: Style: Linear — Angle: 0 — Repeats: 1 — Invert desmarcado.
2_.
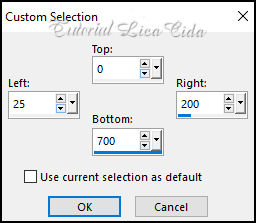
Ative a ferramenta Selection Tool (tecla S) → Custom Selection.
3_.
Layers → New Raster Layer.
Pinte com o gradiente formado pelas cores acima, alterando: Angle: 90 — Repeats: 0.
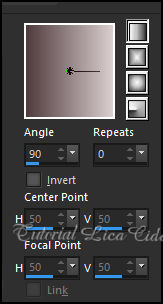
Configure a ferramenta Eraser e passe como no print.

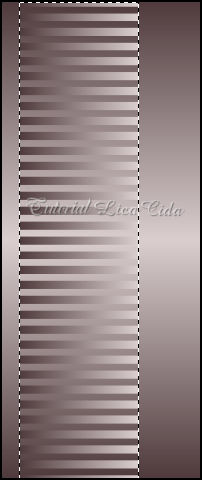
Selections → Select None.
Effects → Edge Effects → Enhance.
4_.
Effects → Geometric Effects → Skew.
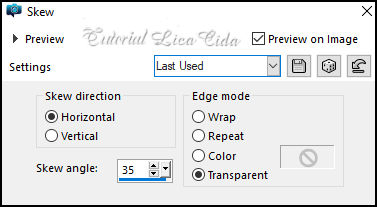
Layers → Duplicate.
Image → Mirror.
Layers → Merge → Merge Down.
Layers → Duplicate.
Image → Flip.
Layers → Merge → Merge Down.
5_.
Ative a Raster 1.
Image → Canvas Size: 1000 x 800 — Bottom: 100.
Com a ferramenta Pick Tool, leve o gradiente até o final do top.
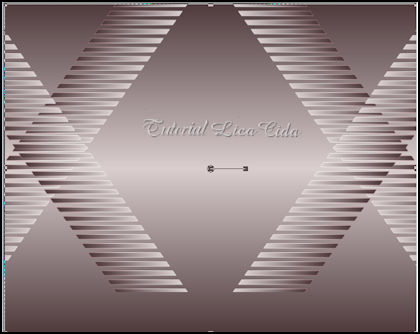
6_.
Ative a Raster 2.
Effects → 3D Effects → Drop Shadow: 2 / 2 / 80 / 2,00 — Color: cor do Background.
Repita: Effects → 3D Effects → Drop Shadow: 2 / 2 / 80 / 2,00 — Color: #000000.
7_.
Plugin Alien Skin Eye Candy 5: Impact → Motion Trail — preset riviera2.
8_.
Plugin Simple → Top Left Mirror.
9_.
Plugin Alien Skin Eye Candy 5: Impact → Perspective Shadow — preset riviera1.
10_.
Effects → Distortion Effects → Punch.
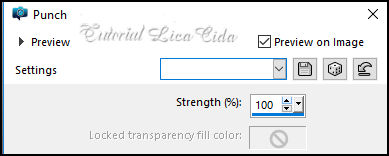
Effects → Edge Effects → Enhance.
11_.
Ative a Raster 1.
Selections → Select All.
Edit → Copy no tube SvB Zee 40 misted
Edit → Paste Into Selection.
Selections → Select None.
12_.
Effects → Image Effects → Seamless Tiling: Default.
13_.
Effects → Art Media Effects → Brush Strokes.
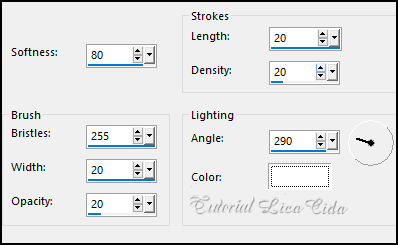
14_.
Edit → Copy no tube SvB Zee 40 misted
Edit → Paste As New Layer.
Ajuste a posição, se necessário.
15_.
Layers → New Raster Layer.
Layers → Arrange → Send to Bottom.
16_.
Selections → Select All.
Edit → Copy no back 6577-Luz Cristina.pspimage _back
Edit → Paste Into Selection.
Selections → Select None.
Na Raster 1: Blend Mode: Overlay.
17_.
Edit → Copy no decor_nmcriacoes_135
Edit → Paste As New Layer.
Layers → Arrange → Bring to Top.
Image → Negative Image.
Posicione.
Layers → Duplicate.
Image → Flip.
Posicione.
Layers → Merge → Merge Down.
Layers → Duplicate.
Image → Mirror.
Layers → Merge → Merge Down.
Observe o modelo.
18_.
Edit → Copy no tube 6518-Luz Cristina
Edit → Paste As New Layer.
Adjust → Sharpness → Sharpen.
Posicione.
Plugin Alien Skin Eye Candy 5: Impact → Perspective Shadow — Blurry.
19_.
Edit → Copy no tube Jeanne_Woman_May_20_02_2021
Edit → Paste As New Layer.
Adjust → Sharpness → Sharpen.
Posicione.
Plugin Alien Skin Eye Candy 5: Impact → Perspective Shadow — Blurry.
20_.
Image → Add Borders: 2 px, Symmetric marcado — Color: Foreground.
Image → Add Borders: 60 px, Symmetric marcado — Color: #ffffff.
Selections → Select All.
Selections → Modify → Contract: 30 px.
Effects → 3D Effects → Drop Shadow: 0 / 0 / 80 / 40,00 — Color: Foreground.
Selections → Modify → Contract: 30 px.
Effects → 3D Effects → Drop Shadow: 0 / 0 / 80 / 40,00 — Color: #000000.
Selections → Select None.
Image → Add Borders: 1 px, Symmetric marcado — Color: Foreground.
21_.
Opcional: Plugin AAA Filters → Custom → Landscape (Default).
Image → Resize: Width 1000 px.
Aplique a marca-d'água.
Assine e salve.
Espero que gostem.
Aparecida / LicaCida, junho de 2021.
Rio de Janeiro - Brasil.

VOLTAR
Copyright ©2026 - Web Design - Naise Minas
|


