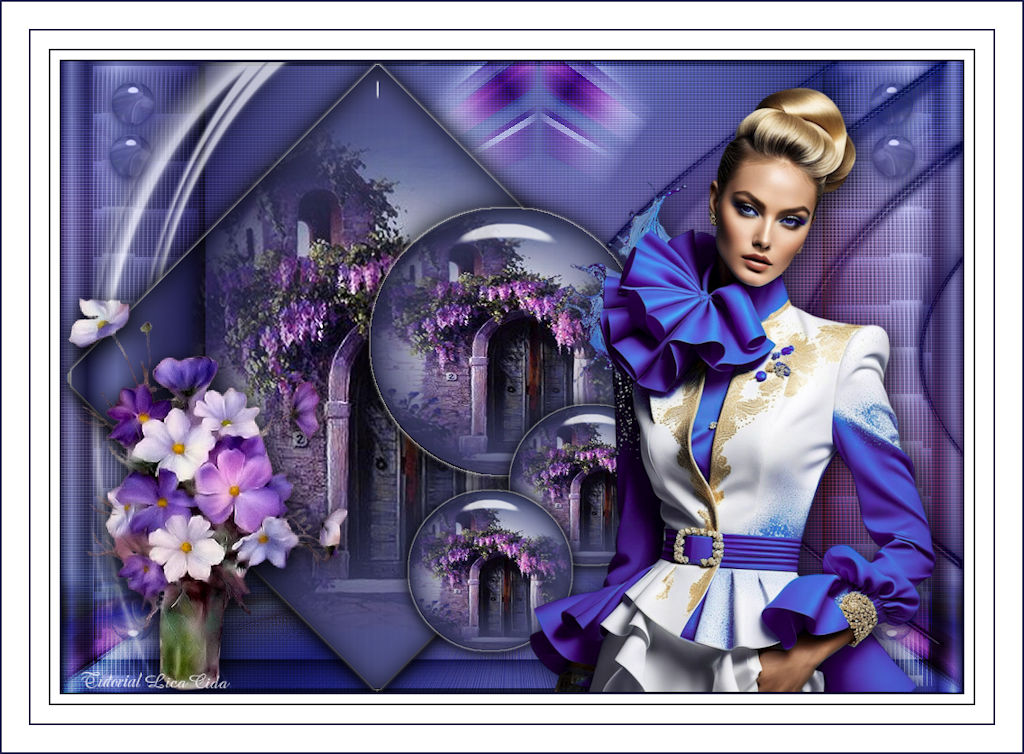
|
Purple TRADUÇÕES
MATERIAL
Alpha Channel: alphachannelbylc --
Preset: Illumination → Lights → Preset_Lights_lc11 --
Tubes: SuizaBella_Ref_AG-004270
Decor: deco1bylc
Marca-d'água.
PLUGINS
Plugin MuRa's Seamless → Shift at Random
TUTORIAL
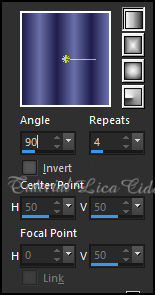
1_. Abra o material no PSP, duplique e feche o original. Escolha duas cores para trabalhar: Foreground: #1f1d4c — Background: #6a70aa. 2_. Abra o arquivo alphachannelbylc. 3_. Layers → New Raster Layer. Pinte com o gradiente Linear formado pelas cores em uso.
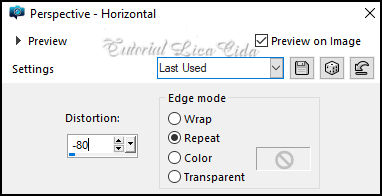
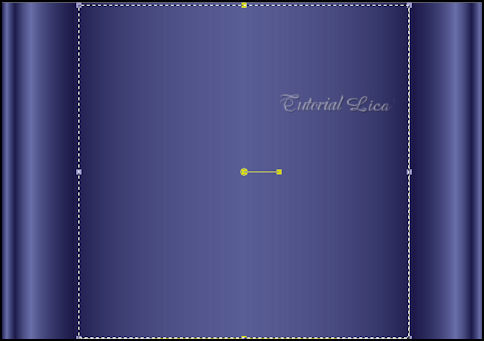
4_. Effects → Geometric Effects → Perspective - Horizontal.
Repita o efeito (Edit → Repeat). 5_. Effects → Reflection Effects → Rotating Mirror: 0 / 180. 6_. Selections → Load/Save Selection → Load Selection From Alpha Channel → Selection #1.
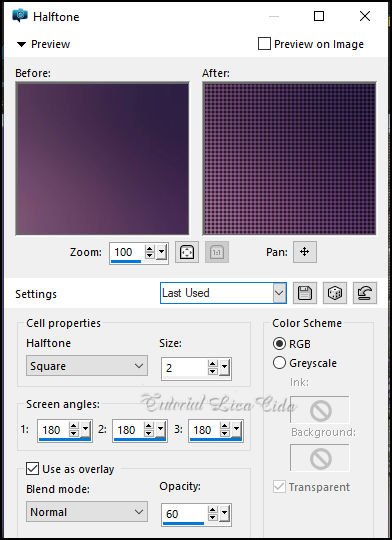
Selections → Promote Selection to Layer. Effects → 3D Effects → Drop Shadow: 0 / 0 / 100 / 40,00 — Color: #000000. Repita (Edit → Repeat). Aplique o mesmo Drop Shadow na Raster 1 e repita (Edit → Repeat). Ative a layer do topo (Promoted Selection), que deve continuar selecionada. 7_. Edit → Copy no tube Callitubes-303paisagens Edit → Paste Into Selection. Selections → Select None. Adjust → Blur → Gaussian Blur — Radius: 28,00. 8_. Plugin MuRa's Seamless → Shift at Random — Default (255 / 16 / 0 / 0). Effects → Edge Effects → Enhance. 9_. Plugin MuRa's Meister → Perspective Tiling — Height: 20. 10_. Effects → Reflection Effects → Rotating Mirror: 0 / 180. Com a ferramenta Magic Wand (Tolerance: 0 — Feather: 60), clique na parte transparente. Aperte a tecla Delete do teclado 5 ou 6 vezes. Selections → Select None. Adjust → Sharpness → Sharpen More. 11_. Plugin AAA Frames → Foto Frame — Width: 36 — Opacity: 50, demais valores Default. Repita (Edit → Repeat). 12_. Ative a layer do fundo (Background). Effects → Artistic Effects → Halftone.
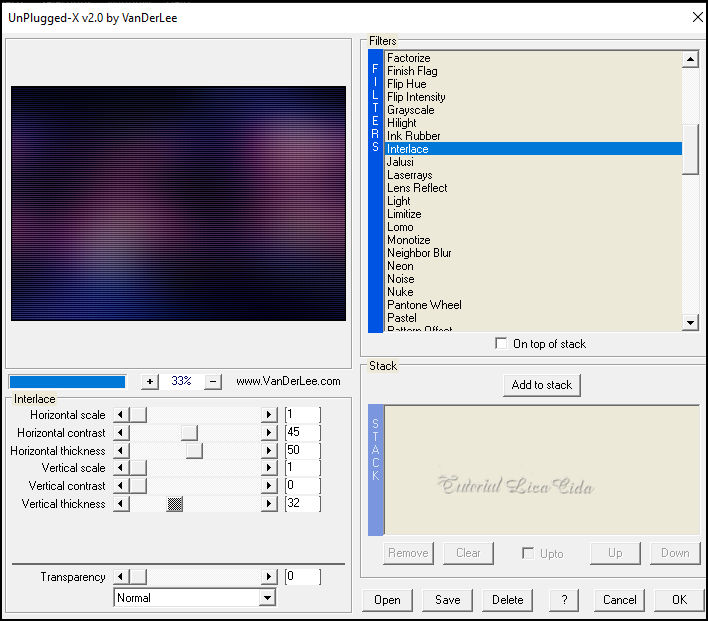
13_. Plugin UnPlugged-X v2.0 by VanDerLee → Interlace (observe os valores).
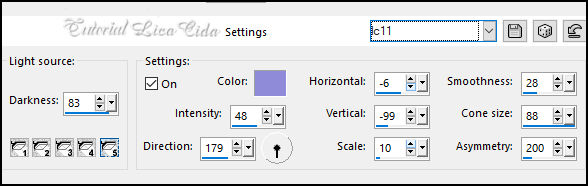
14_. Ainda na layer do fundo (Background): Effects → Illumination Effects → Lights → Preset_Lights_lc11.
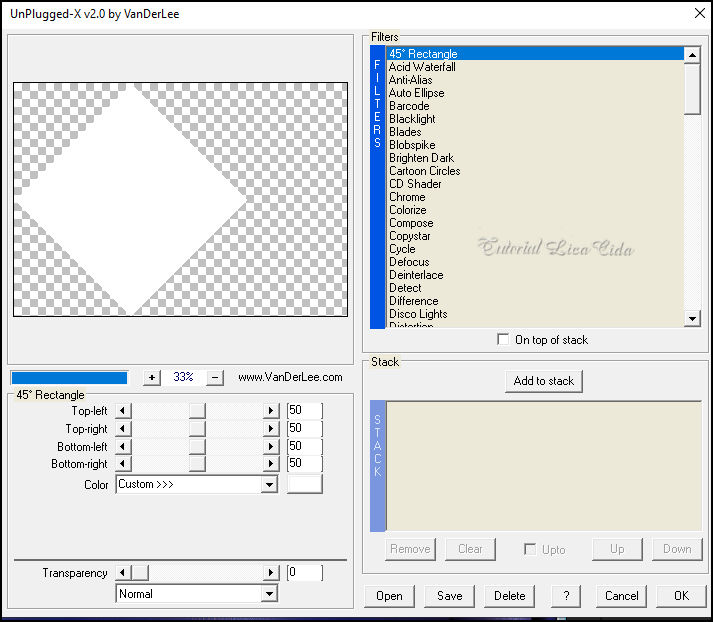
15_. Layers → New Raster Layer. Plugin UnPlugged-X v2.0 by VanDerLee → 45° Rectangle.
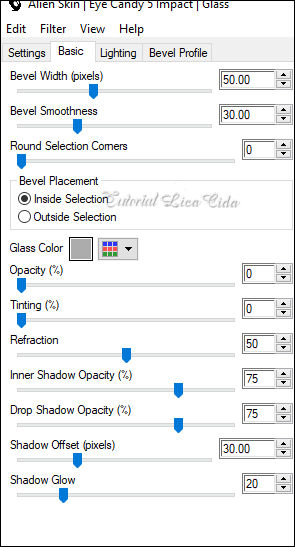
16_. Com a ferramenta Magic Wand (Default), selecione o retângulo. 17_. Ative a Raster 1. Selections → Promote Selection to Layer. Layers → Arrange → Bring to Top. Effects → 3D Effects → Drop Shadow: 0 / 0 / 100 / 40,00 — Color: #000000. 18_. Edit → Copy no tube Callitubes-303paisagens Edit → Paste As New Layer. Posicione. Adjust → Sharpness → Sharpen. Layers → Merge → Merge Down. 19_. Plugin Alien Skin Eye Candy 5: Impact → Glass — Settings: Clear.
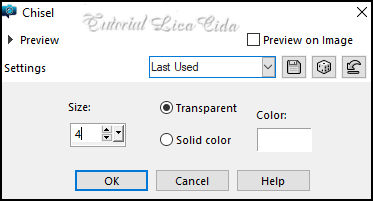
20_. Effects → 3D Effects → Chisel.
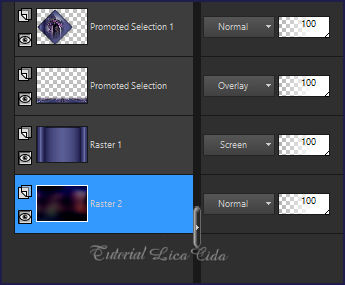
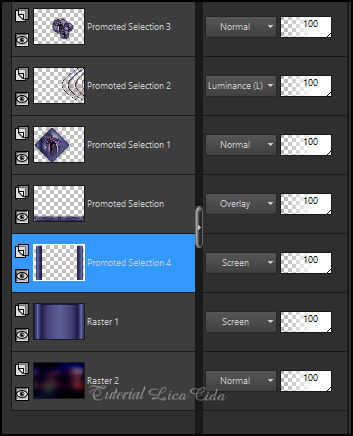
Selections → Select None. Feche a visibilidade da Raster 2 (triângulo branco) e delete essa layer. LAYERS Confira as layers (Blend Modes a gosto).
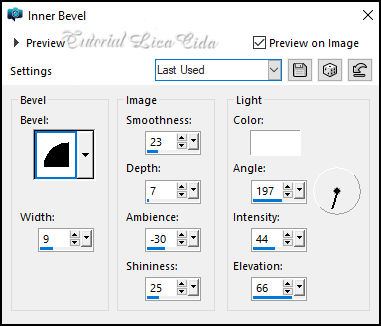
21_. Ative a layer do fundo (Background). Selections → Load/Save Selection → Load Selection From Alpha Channel → Selection #2. Selections → Promote Selection to Layer. Layers → Arrange → Bring to Top. 22_. Effects → 3D Effects → Inner Bevel.
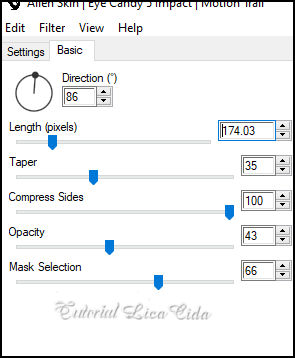
Selections → Select None. 23_. Plugin Alien Skin Eye Candy 5: Impact → Motion Trail.
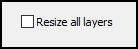
Blend Mode: Luminance (L) — Opacity: 100%. 24_. Ative a Raster 1. Selections → Load/Save Selection → Load Selection From Alpha Channel → Selection #3. Selections → Promote Selection to Layer. Layers → Arrange → Bring to Top. 25_. Edit → Copy no tube Callitubes-303paisagens Edit → Paste Into Selection. Adjust → Sharpness → Sharpen. 26_. Repita, com os mesmos valores: Plugin Alien Skin Eye Candy 5: Impact → Glass — Settings: Clear. 27_. Repita, com os mesmos valores: Effects → 3D Effects → Chisel. Selections → Select None. Effects → 3D Effects → Drop Shadow: 0 / 0 / 100 / 40,00 — Color: #000000. 28_. Pick Tool: Position X: 322 / Position Y: 149. Layers → Duplicate. Image → Resize: 60% — Resize all layers desmarcado.
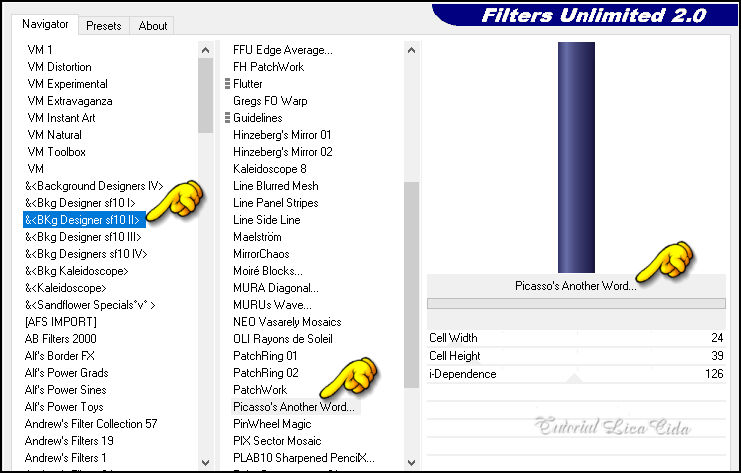
29_. Layers → Duplicate. Posicione os círculos menores de acordo com o seu tube, onde preferir. Layers → Merge → Merge Down (três vezes), para unir os círculos. 30_. Ative a Raster 1. Selections → Load/Save Selection → Load Selection From Alpha Channel → Selection #4. Selections → Promote Selection to Layer. 31_. Plugin Filters Unlimited 2.0 → &<Bkg Designer sf10 II> → Picasso's Another Word.
Selections → Select None. Blend Mode: Screen — Opacity: 100%. 32_. Effects → Reflection Effects → Rotating Mirror: 0 / 180. Confira as layers (Blend Modes a gosto).
33_. Edit → Copy no deco1bylc Edit → Paste As New Layer. Blend Mode: Luminance (L) — Opacity: 100%. 34_. Pick Tool: Position X: 45 / Position Y: 17. Effects → 3D Effects → Drop Shadow: 0 / 0 / 100 / 40,00 — Color: #000000. 35_. Effects → Reflection Effects → Rotating Mirror: 0 / 180. Layers → Duplicate. 36_. Plugin Filters Unlimited 2.0 → VM Stylize → Zoom Blur — Default (39 / 60). Esse efeito também se encontra em outros plugins. Blend Mode: Overlay — Opacity: 100%. Layers → Duplicate. Effects → Image Effects → Seamless Tiling: Side by side. Blend Mode: Overlay — Opacity: 100%. 37_. Edit → Copy no deco2bylc Edit → Paste As New Layer. Blend Mode: Overlay — Opacity: 100%. Effects → Edge Effects → Enhance. 38_. Edit → Copy no deco3bylc Edit → Paste As New Layer. Opacity a gosto. Objects → Align → Left. Use abaixo da layer do triângulo. 39_. Ative a layer do topo. Edit → Copy no tube SuizaBella_Ref_AG-004270 Edit → Paste As New Layer. Use a gosto e posicione. 40_. Edit → Copy no tube 6518-Luz Cristina Edit → Paste As New Layer. Use a gosto e posicione. BORDAS Image → Add Borders: 2 px, Symmetric marcado — Color: #1f1d4c. Image → Add Borders: 10 px, Symmetric marcado — Color: #ffffff. Image → Add Borders: 2 px, Symmetric marcado — Color: #1f1d4c. Image → Add Borders: 20 px, Symmetric marcado — Color: #ffffff. Image → Add Borders: 2 px, Symmetric marcado — Color: #1f1d4c. Image → Add Borders: 30 px, Symmetric marcado — Color: #ffffff. Image → Add Borders: 2 px, Symmetric marcado — Color: #1f1d4c. Image → Resize: Width 1024 px. Aplique a marca-d'água. Assine e salve. File → Export → JPEG Optimizer.
Aparecida / LicaCida, julho de 2024.
Copyright ©2026 - Web Design - Naise Minas |