|
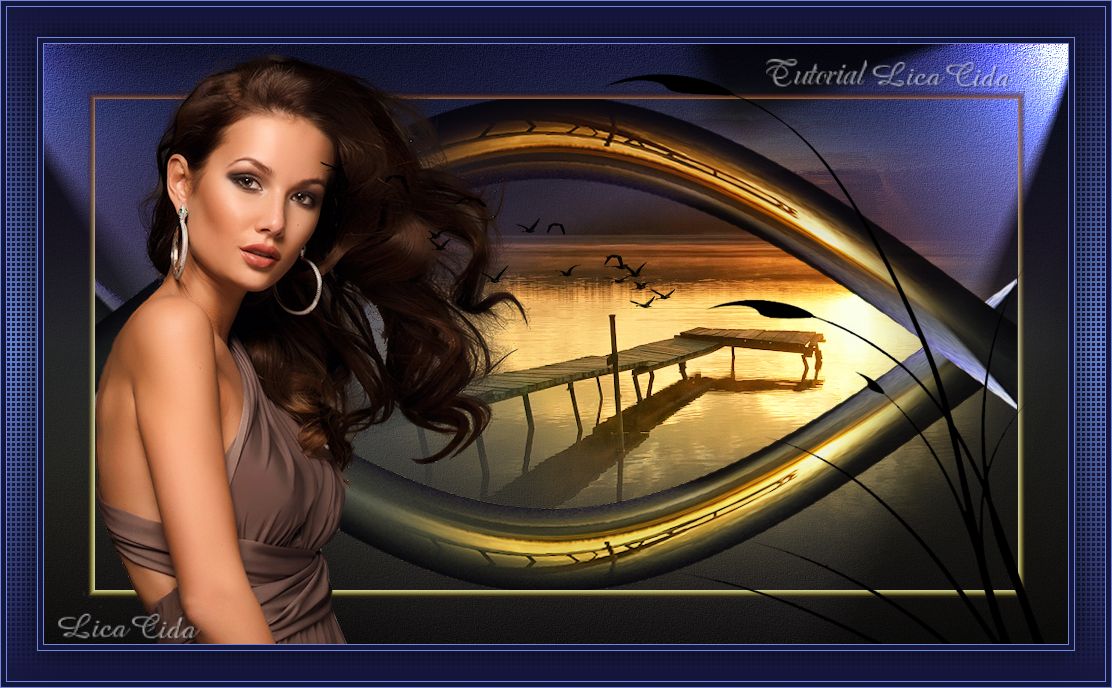
Plenitude
DEDICATÓRIA
Dedico o tutorial à querida amiga Chichi, com carinho.
TRADUÇÕES

MATERIAL

Preset: Preset_Lights_lihgtlc6
(Salve em sua pasta de Presets do My PSP Files.)
Tubes: tube1353_mulher_mara_pontes
bird_brushes_II_by_lpdragonfly_5
calguisvectordecor12110
Grisi_Misted_Land_348
Marca-d'água.
Efeitos do PSP.
Versão usada: PSP X6.
PLUGINS
Plugin Distort → Shear
Plugin Nik Software Color Efex Pro 3.0 → Bi-Color Filters
Plugin AAA Frames → Foto Frame
Plugin FM Tile Tools → Blend Emboss
TUTORIAL

|
Esta seta marca sua linha
Clique e arraste para movê-la
|
|
1_.
Abra uma nova imagem transparente de 1024 x 600 px.
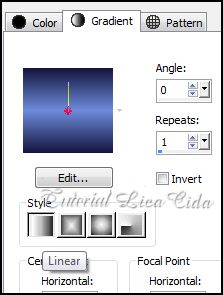
Pinte com o gradiente formado pelas cores #16163e e #6d8bdb.
Configure: Style: Linear — Angle: 0 — Repeats: 1 — Invert desmarcado.
2_.
Adjust → Add/Remove Noise → JPEG Artifact Removal — Maximum: 80.
3_.
Plugin FM Tile Tools → Blend Emboss.
4_.
Effects → Illumination Effects → Lights — Preset: lihgtlc6.
5_.
Edit → Copy no tube Grisi_Misted_Land_348
Edit → Paste As New Layer.
Image → Resize: 90% — Resize all layers desmarcado (duas vezes).
Posicione um pouco à direita (direcione a luz).
Layers → Merge → Merge Down.
Layers → Duplicate.
6_.
Effects → Geometric Effects → Perspective - Horizontal — Distortion: 80 — Transparent.
Repita usando Distortion: -80 — Transparent.
7_.
Image → Rotate Left.
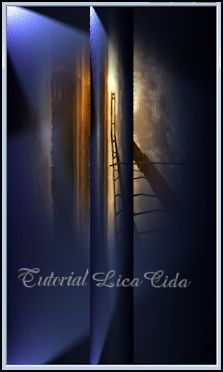
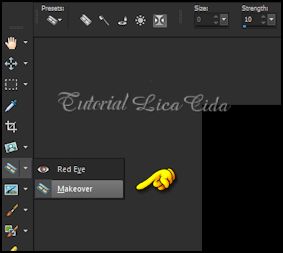
Com a ferramenta Makeover, dê pequenos cliques no efeito e deixe-o como no print.
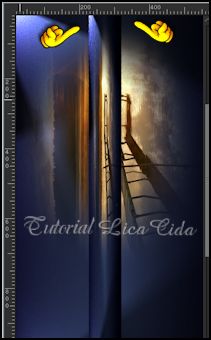
8_.
Plugin Distort → Shear.
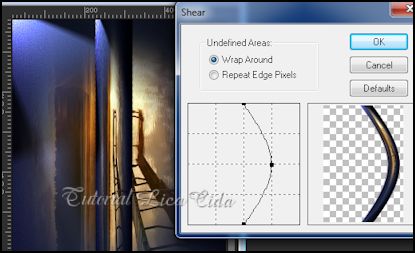
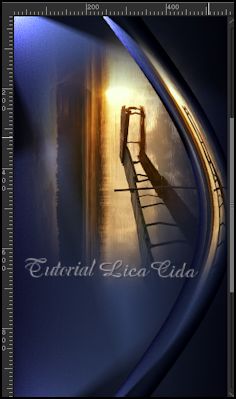
9_.
Image → Rotate Right.
Layers → Duplicate.
Image → Flip.
Layers → Merge → Merge Down.
10_.
Image → Resize: 90% — Resize all layers desmarcado.
Com a ferramenta Selection Tool → Rectangle (Default), faça um retângulo como mostra o print abaixo.
Selections → Edit Selection.
Ative a ferramenta Pick (Mode: Scale) e use-a para aumentar ou diminuir o retângulo formado.
Ajuste-o sobre o efeito, como mostra o print.
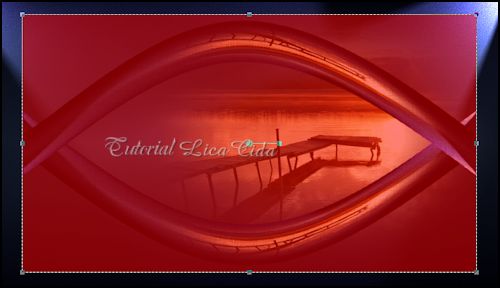
Selections → Edit Selection.
11_.
Effects → 3D Effects → Chisel — Size: 8 — Transparent — Color: #c1cbe9.
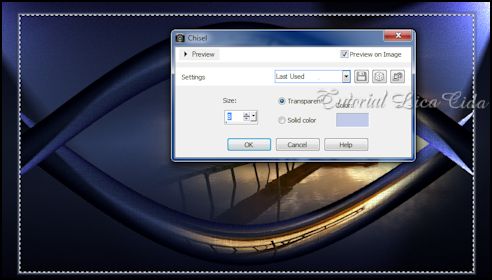
Selections → Select None.
12_.
Layers → Duplicate.
Plugin Nik Software Color Efex Pro 3.0 → Bi-Color Filters — Color Set: Brown 1.
13_.
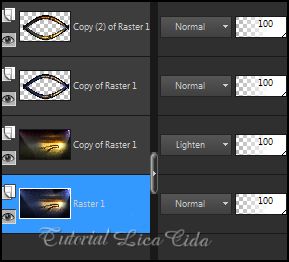
Ative a Raster 1.
Layers → Duplicate.
Repita o Plugin Nik Software Color Efex Pro 3.0 → Bi-Color Filters — Color Set: Brown 1.
Altere os Blend Modes e a Opacity das layers.
14_.
Edit → Copy no tube tube1353_mulher_mara_pontes
Edit → Paste As New Layer.
Posicione e redimensione a gosto.
Edit → Copy nos tubes bird_brushes_II_by_lpdragonfly_5 e calguisvectordecor12110
Edit → Paste As New Layer.
Decore a gosto.
15_.
Image → Add Borders: 1 px — Symmetric marcado — Color: #6d8bdb.
Image → Add Borders: 5 px — Symmetric marcado — Color: #16163e.
Image → Add Borders: 1 px — Symmetric marcado — Color: #6d8bdb.
16_.
Image → Add Borders: 30 px — Symmetric marcado — Color: #ffffff.
Selecione a borda com a ferramenta Magic Wand e pinte com o gradiente usado no item 1.
17_.
Plugin AAA Frames → Foto Frame — Width: 30 — demais valores Default.
18_.
Effects → Texture Effects → Weave — Color: #16163e.
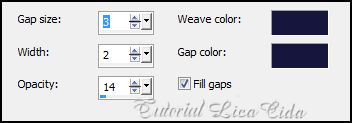
Selections → Select None.
19_.
Repita o item 15.
Aplique a marca-d'água.
Assine e salve.
Espero que gostem.
Aparecida / LicaCida, janeiro de 2014.
Rio de Janeiro - Brasil.

VOLTAR
Copyright ©2026 - Web Design - Naise Minas
|

