|

Pensando Carnaval
TRADUÇÕES

MATERIAL

Seleção: selcarnavallc --
Salvar na pasta Selections do PSP.
Preset: Illumination → Lights → Preset_Lights_coldmp --
Salvar na pasta Presets do PSP.
Tube: 32.- Ivo - Arlequina
Backs: colorida-rb
colorida-rb2
Mask: !!!!gradientedworisch
Brush: Brush Abstract Aura
Marca-d'água.
Efeitos do PSP.
Versão usada: PSP X7.
PLUGINS
Plugin Render → ButtonMaker Round
Plugin Mirror Rave → Quadrant Flip
Plugin Tile & Mirror → XY Offset 50% (negative)
Plugin VanDerLee → UnPlugged-X → Transition
Plugin Nik Software → Color Efex Pro 3.0 → Bi-Color Filters
Plugin FM Tile Tools → Blend Emboss
TUTORIAL
|
Esta seta marca sua linha
Clique e arraste para movê-la
|
|
1_.
Abra uma nova imagem transparente de 900 x 550 px.
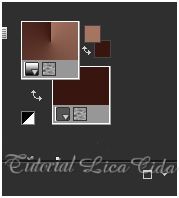
Pinte com o gradiente formado pelas cores #a57561 e #391711.
Configure: Style: Radial — Angle: 45 — Repeats: 3 — Invert desmarcado — Center Point: H: 50 / V: 50.

2_.
Plugin Render → ButtonMaker Round → Default.
Adjust → Sharpness → Sharpen More.
3_.
Plugin Mirror Rave → Quadrant Flip → Default.
Layers → Duplicate.
4_.
Plugin Tile & Mirror → XY Offset 50% (negative).
Diminua a Opacity para visualizar o efeito.
5_.
Selections → Load/Save Selection → Load Selection From Disk → selcarnavallc.
Selections → Promote Selection to Layer.
6_.
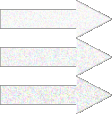
Effects → Texture Effects → Blinds. Use a cor do Background.
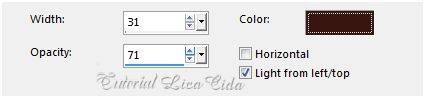
Selections → Select None.
Effects → 3D Effects → Drop Shadow (valores negativos em V e H).
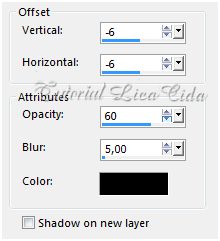
Layers → Duplicate.
7_.
Plugin VanDerLee → UnPlugged-X → Transition.
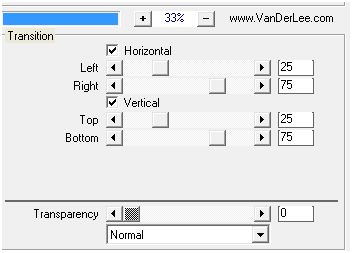
Effects → 3D Effects → Drop Shadow (valores positivos em V e H).
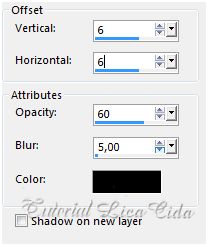
Layers → Arrange → Move Down.
8_.
Layers → New Raster Layer.
Layers → Arrange → Send to Bottom.
Selections → Select All.
Edit → Copy no back colorida-rb
Edit → Paste Into Selection.
Selections → Select None.
9_.
Layers → New Raster Layer.
Selections → Select All.
Edit → Copy no back colorida-rb2
Edit → Paste Into Selection.
Selections → Select None.
Use o colorida-rb2 de acordo com as cores do tube usado.
LAYERS

10_.
Ative a Raster 1.
Layers → New Mask Layer → From Image: !!!!gradientedworisch.
Layers → Duplicate (duas vezes).
Layers → Merge → Merge Group.
11_.
Plugin Nik Software → Color Efex Pro 3.0 → Bi-Color Filters — Color Set: Green/Brown 4 (use de acordo com suas cores).
12_.
Effects → Illumination Effects → Lights → Preset_Lights_coldmp.

Adjust → One Step Photo Fix.
13_.
Adjust → Add/Remove Noise → JPEG Artifact Removal — Maximum marcado — C: 80.
Plugin FM Tile Tools → Blend Emboss.
14_.
Retire a visibilidade da layer superior (Promoted Selection).
Na Copy of Promoted Selection, ative a ferramenta Change to Target.
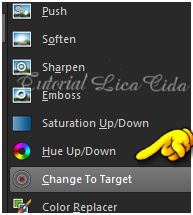
Configure:

Dê pequenos cliques usando o gradiente do item 1, mudando os valores A e R para 0.
15_.
Na layer Promoted Selection e na sua cópia:
Plugin Nik Software → Color Efex Pro 3.0 → Bi-Color Filters (use de acordo com as cores usadas).
Altere os Blend Modes e a Opacity das layers.

16_.
Ative a Copy of Raster 1.
Edit → Copy no brush Brush Abstract Aura
Edit → Paste As New Layer.
17_.
Ative a layer superior.
Edit → Copy no tube 32.- Ivo - Arlequina
Edit → Paste As New Layer.
Aplique a marca-d'água.
Assine e salve.
Espero que gostem.
Aparecida / LicaCida, fevereiro de 2015.
Rio de Janeiro - Brasil.

VOLTAR
Copyright ©2026 - Web Design - Naise Minas
|


