|
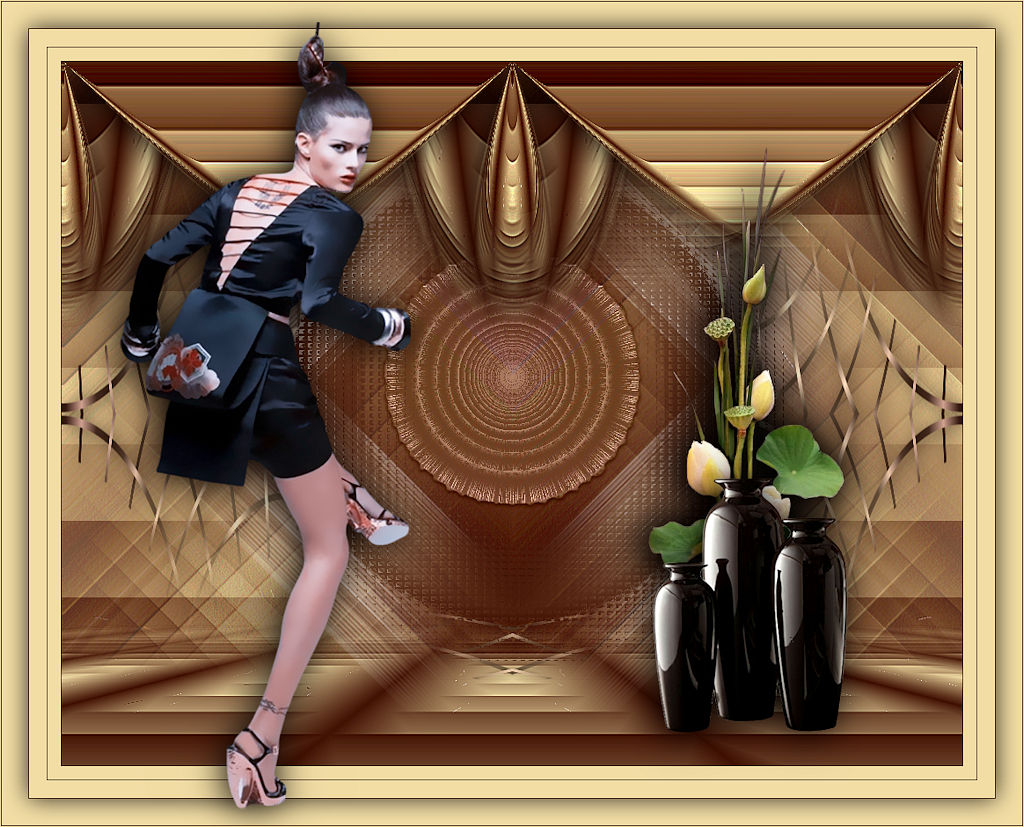
Only Girl
TRADUÇÕES

MATERIAL

Imagem: alphachannel_onlygirl --
Seleções 1 e 2 guardadas no Alpha Channel.
Script: onlygirl --
Salvar na pasta Scripts-Restricted do PSP.
Caso o seu não rode: script onlygirl.
Tube: SuizaBella_Ref_AG-002973
Mask: !!!!.mask.ket01
Deco: SuizaBella Vaso 7
Callitubes-155flores
Back: back_lc_onlygirl
Elementos: elementosuperior_lc_onlygirl
elemento central_lc_onlygirl
Marca-d'água.
Efeitos do PSP.
Versão usada: PSP X9.
PLUGINS
Plugin Unlimited 2 → VM Distortion → FlipChop
Plugin Unlimited 2 → VM Natural → Weave Distortion
Plugin Unlimited 2 → &<Bkg Kaleidoscope> → @Mirrored Scaled
Plugin Simple → Pizza Slice Mirror
Plugin Alien Skin Eye Candy 5: Impact → Motion Trail
Plugin MuRa's Meister → Perspective Tiling
TUTORIAL
|
Esta seta marca sua linha
Clique e arraste para movê-la
|
|
Configure: Foreground: #431607 — Background: #f2e0a8.
1_.
Abra a imagem alphachannel_onlygirl.
Window → Duplicate.
Feche a original. Vamos trabalhar na cópia.
2_.
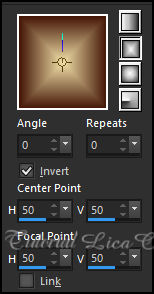
Pinte com o gradiente formado pelas cores configuradas acima.
Configure: Style: Rectangular — Angle: 0 — Repeats: 0 — Invert marcado — Center Point: H: 50 / V: 50 — Focal Point: H: 50 / V: 50.
3_.
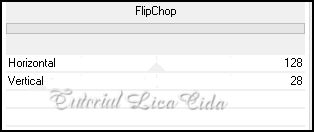
Plugin Unlimited 2 → VM Distortion → FlipChop.
4_.
Layers → New Raster Layer.
Layers → Arrange → Send to Bottom.
Selections → Select All.
Edit → Copy no back_lc_onlygirl
Edit → Paste Into Selection.
Selections → Select None.
Effects → User Defined Filter → Emboss_3.
Na layer superior: Opacity: 65%.
5_.
Ainda na layer superior:
Selections → Load/Save Selection → Load Selection From Alpha Channel → Selection #1.
Selections → Promote Selection to Layer (a Opacity irá para 100%, deixe assim).
Selections → Select None.
6_.
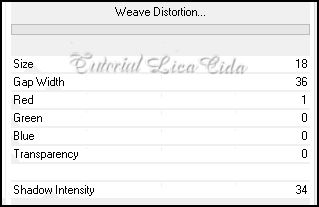
Plugin Unlimited 2 → VM Natural → Weave Distortion.
7_.
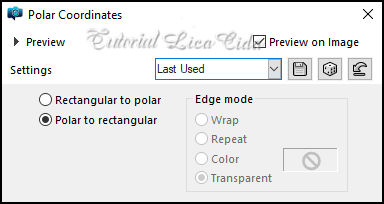
Effects → Distortion Effects → Polar Coordinates.
8_.
Layers → New Mask Layer → From Image: !!!!.mask.ket01.
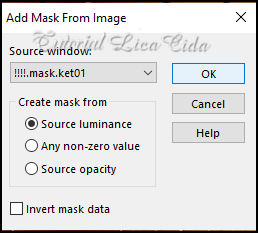
Layers → Duplicate (duas vezes).
Layers → Merge → Merge Group.
9_.
Plugin Simple → Pizza Slice Mirror.
Effects → 3D Effects → Drop Shadow: 3 / 3 / 50 / 26,09 — Color: #000000.
10_.
Selections → Load/Save Selection → Load Selection From Alpha Channel → Selection #2.
Pressione a tecla Delete.
11_.
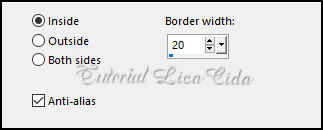
Selections → Modify → Select Selection Borders.
12_.
Layers → New Raster Layer.
Pinte com o mesmo gradiente formado no item 2.
Selections → Select None.
13_.
Plugin Alien Skin Eye Candy 5: Impact → Motion Trail.
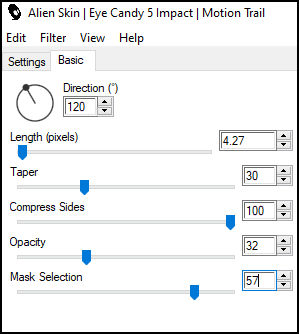
14_.
Effects → Texture Effects → Mosaic - Glass.
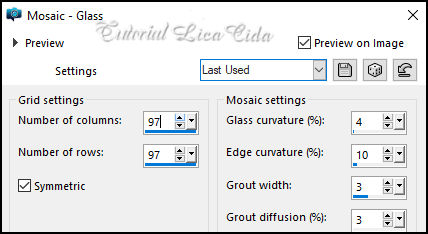
Duplique a layer Promoted Selection.
15_.
Plugin Unlimited 2 → &<Bkg Kaleidoscope> → @Mirrored Scaled.
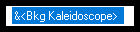
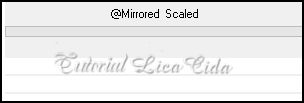
16_.
Plugin MuRa's Meister → Perspective Tiling — Height: 20 (demais valores iguais).
A layer deverá estar com Opacity 100%.
Com a ferramenta Magic Wand — Feather: 60, clique na parte transparente.
Pressione a tecla Delete (quatro ou cinco vezes, para suavizar o efeito).
Selections → Select None.
Adjust → Sharpness → Sharpen More.
Layers → Duplicate.
17_.
Effects → Distortion Effects → Polar Coordinates (print do item 7).
Image → Mirror → Mirror Vertical.
Adjust → Sharpness → Sharpen More.
Layers → Arrange → Bring to Top.
18_.
Effects → Image Effects → Seamless Tiling.
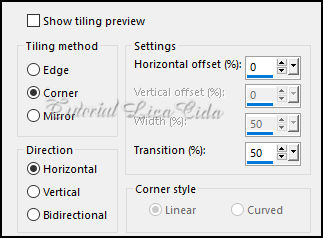
Image → Resize: 80% — Resize all layers desmarcado.
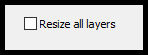
Com a ferramenta Pick Tool, acerte as laterais.
Effects → Image Effects → Offset: H: 0 / V: 32 — Custom e Transparent marcados (deixe assim).
19_.
Edit → Copy no elementosuperior_lc_onlygirl
Edit → Paste As New Layer.
Objects → Align → Top.
Aplique sombra a gosto nas duas layers.
LAYERS
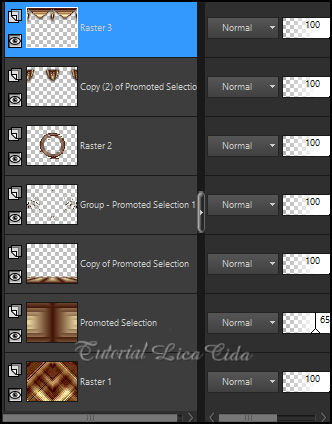
20_.
Ative a Copy of Promoted Selection.
Layers → New Raster Layer.
Rode o script onlygirl: procure o script e clique em Run Selected Script.
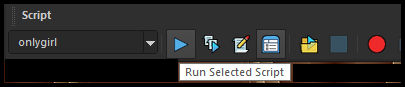
Caso o seu não rode, use o script onlygirl que segue no material.
21_.
Edit → Copy no elemento central_lc_onlygirl
Edit → Paste As New Layer.
Effects → Image Effects → Offset: H: 0 / V: 26 — Custom e Transparent marcados.
Blend Mode: Luminance (L).
BORDAS
Image → Add Borders: 1 px, Symmetric marcado — Color: #431607.
Image → Add Borders: 15 px, Symmetric marcado — Color: #f2e0a8.
Image → Add Borders: 1 px, Symmetric marcado — Color: #431607.
Image → Add Borders: 20 px, Symmetric marcado — Color: #f2e0a8.
Image → Add Borders: 1 px, Symmetric marcado — Color: #431607.
Selections → Select All.
Image → Add Borders: 30 px, Symmetric marcado — Color: #f2e0a8.
Effects → 3D Effects → Drop Shadow: 0 / 0 / 80 / 40,00 — Color: #000000.
Selections → Select None.
22_.
Edit → Copy no tube SuizaBella_Ref_AG-002973
Edit → Paste As New Layer.
Posicione.
23_.
Edit → Copy no SuizaBella Vaso 7
Edit → Paste As New Layer.
Redimensione a gosto e posicione.
24_.
Edit → Copy no Callitubes-155flores
Edit → Paste As New Layer.
Intercale (opcional). Use a gosto.
Image → Add Borders: 1 px, Symmetric marcado — Color: #431607.
Image → Add Borders: 1 px, Symmetric marcado — Color: #f2e0a8.
Image → Resize: Width 1024 px.
Aplique a marca-d'água.
Assine e salve.
Aparecida / LicaCida, janeiro de 2021.
Rio de Janeiro - Brasil.

VOLTAR
Copyright ©2026 - Web Design - Naise Minas
|


