|
Only
TRADUÇÕES

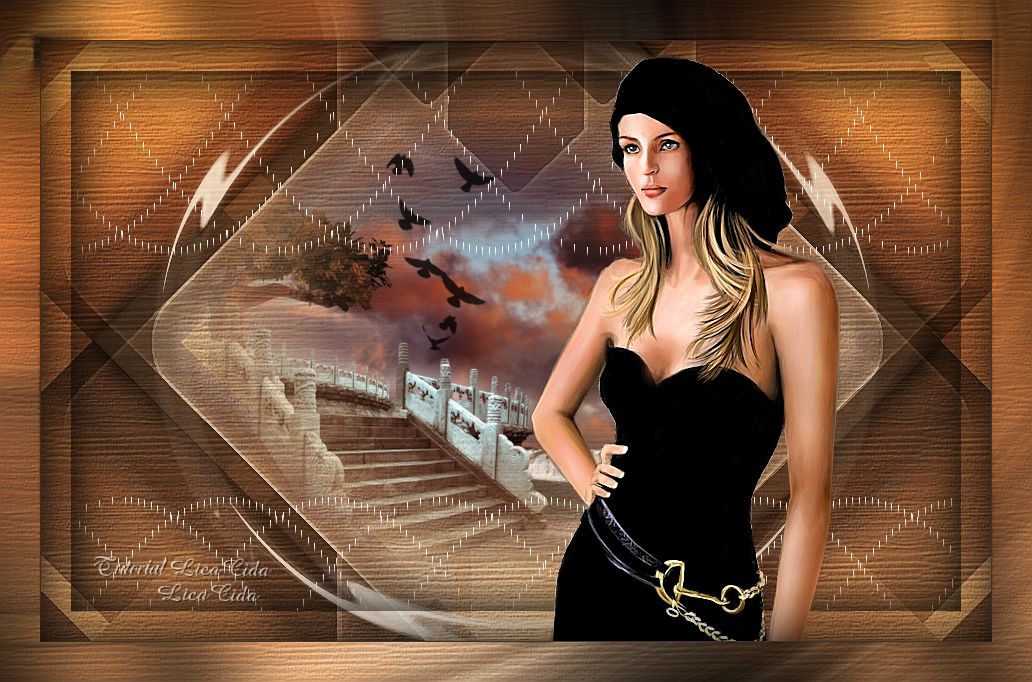
MATERIAL

Imagem: alphachannel --
Seleções #1, #2, #3 e #4 salvas no canal alfa.
Tube: tube2447_mulher_mara_pontes
Paisagem: stairway_to_titania___stock_by_thy_darkest_hour-d4x80be (Raster 1)
Textura: Woodgrain
Marca-d'água.
Efeitos do PSP.
Versão usada: PSP X7.
PLUGINS
Plugin Simple → Diamonds
Plugin Mehdi → Sorting Tiles
Plugin VanDerLee → UnPlugged-X → Flip Intensity
Plugin VanDerLee → UnPlugged-X → Defocus
Plugin MuRa's Meister → Pole Transform
Plugin MuRa's Seamless → Shift at Wave
Plugin Nik Software → Color Efex Pro 1.0 → Graduated User Defined
Plugin Graphics Plus → Cross Shadow
TUTORIAL
|
Esta seta marca sua linha
Clique e arraste para movê-la
|
|
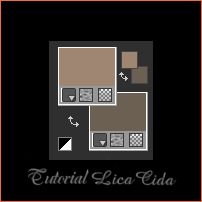
Configure as cores: Foreground: #9f8672 — Background: #6b6052.
1_.
Abra a imagem alphachannel, faça uma cópia e minimize a original.
Pinte com o gradiente formado pelas cores acima.
Configure: Style: Linear — Angle: 0 — Repeats: 0 — Invert desmarcado (escuro acima).
2_.
Plugin Simple → Diamonds.
3_.
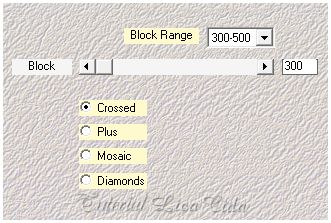
Plugin Mehdi → Sorting Tiles.
4_.
Effects → Reflection Effects → Rotating Mirror: 0 / 0 — Reflect.
Layers → Duplicate.
Image → Mirror → Mirror Vertical (Flip).
Opacity: 50% — Blend Mode: Overlay.
Layers → Merge → Merge Down.
5_.
Effects → Texture Effects → Texture — Woodgrain.
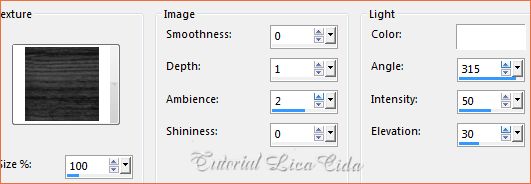
Adjust → Sharpness → Sharpen More.
6_.
Selections → Load/Save Selection → Load Selection From Alpha Channel → Selection #1.
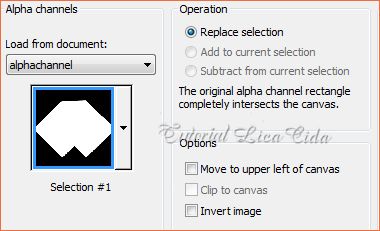
Selections → Promote Selection to Layer.
Effects → 3D Effects → Drop Shadow: 0 / 0 / 80 / 49,00 — Color: #000000.
7_.
Adjust → Blur → Radial Blur.
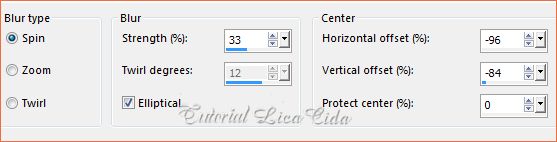
Selections → Select None.
Layers → Duplicate.
Image → Mirror → Mirror Vertical (Flip).
8_.
Plugin VanDerLee → UnPlugged-X → Flip Intensity.
9_.
Plugin VanDerLee → UnPlugged-X → Defocus: 16.
10_.
Repita o item 5: Effects → Texture Effects → Texture — Woodgrain.
Adjust → Sharpness → Sharpen More.
Layers → Merge → Merge Down.
11_.
Selections → Load/Save Selection → Load Selection From Alpha Channel → Selection #2.
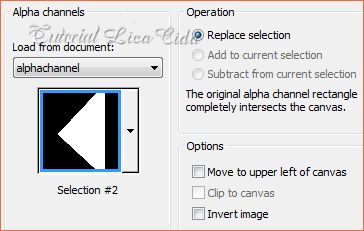
Selections → Promote Selection to Layer.
Effects → 3D Effects → Drop Shadow: 0 / 0 / 80 / 49,00 — Color: #000000.
Selections → Select None.
12_.
Effects → Reflection Effects → Rotating Mirror: 0 / 0 — Reflect.
13_.
Effects → Geometric Effects → Perspective - Horizontal: 90 — Transparent.
14_.
Effects → Distortion Effects → Pinch — Strength: 100.
Layers → Duplicate.
Image → Mirror → Mirror Horizontal.
Layers → Merge → Merge Down.
Repita: Effects → Distortion Effects → Pinch — Strength: 100.
15_.
Plugin MuRa's Meister → Pole Transform — Default.
Image → Resize: 90% — Resize all layers desmarcado.
Blend Mode: Screen.
16_.
Effects → Geometric Effects → Spherize — Strength: 100 — Ellipse.
17_.
Effects → Distortion Effects → Ripple.
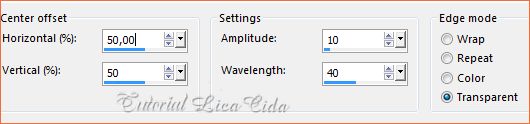
18_.
Ative a layer Promoted Selection.
Edit → Copy na paisagem stairway_to_titania___stock_by_thy_darkest_hour-d4x80be (Raster 1)
Edit → Paste As New Layer.
19_.
Volte à layer superior (Promoted Selection 1).
Selections → Load/Save Selection → Load Selection From Alpha Channel → Selection #3.
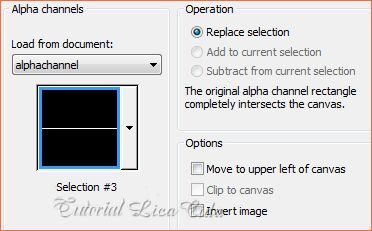
Layers → New Raster Layer.
Pinte com a cor #9f8672 (Foreground).
20_.
Effects → 3D Effects → Inner Bevel.
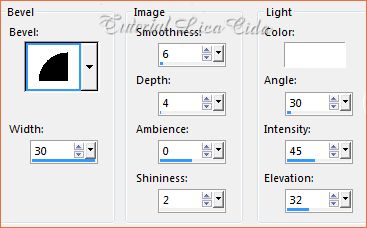
Selections → Select None.
21_.
Plugin MuRa's Seamless → Shift at Wave.
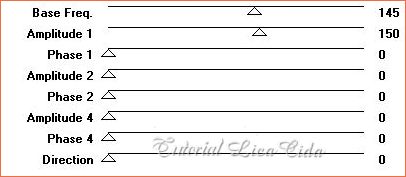
Effects → 3D Effects → Drop Shadow: 1 / 1 / 100 / 1,00 — Color: #000000.
22_.
Selections → Load/Save Selection → Load Selection From Alpha Channel → Selection #4.
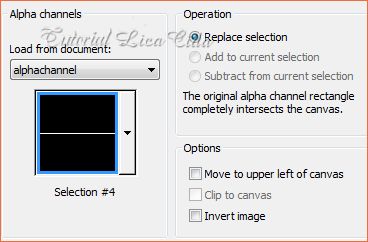
Layers → New Raster Layer.
Pinte com a cor #ffffff.
Repita os itens 20 e 21, usando o mesmo Drop Shadow.
Altere os Blend Modes e a Opacity das layers.
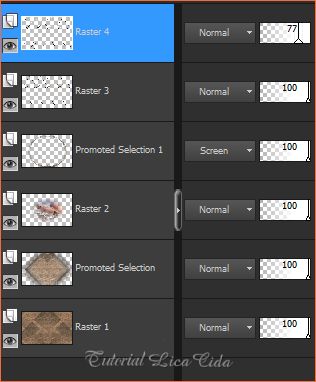
Na Raster 4: Layers → Merge → Merge Down.
23_.
Selections → Select All.
Selections → Modify → Contract: 30 px.
Selections → Invert.
Pressione a tecla Delete.
Selections → Invert.
24_.
Layers → New Raster Layer.
Effects → 3D Effects → Cutout: 2 / 2 / 100 / 85,00 — Color: #000000 — Fill desmarcado.
Selections → Select None.
25_.
Edit → Copy no tube2447_mulher_mara_pontes
Edit → Paste As New Layer.
Redimensione e posicione.
Adjust → Sharpness → Sharpen More.
26_.
Ative a Raster 1.
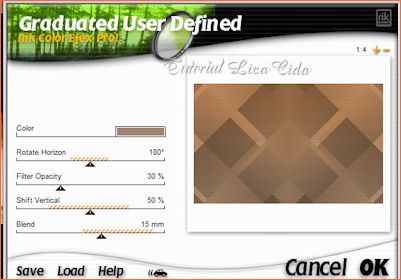
Plugin Nik Software → Color Efex Pro 1.0 → Graduated User Defined (Color: #9f8672, usada no Foreground).
Opcional: altere os Blend Modes e a Opacity das layers.
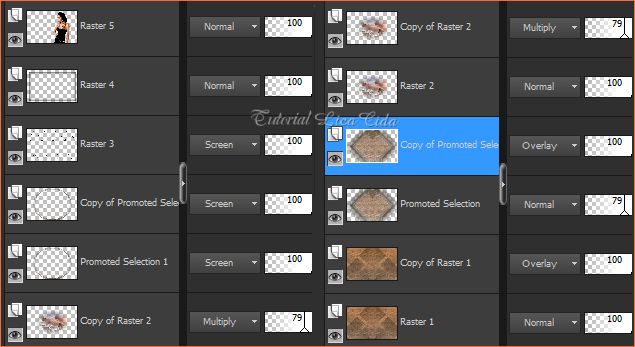
Arrume a gosto.
ACABAMENTO
27_.
Image → Add Borders: 1 px, Symmetric marcado — Color: #6b6052 (usada no Background).
Edit → Copy (copie o fundo formado).
Image → Add Borders: 40 px, Symmetric marcado — Color: #ffffff.
Selecione a borda.
Edit → Paste Into Selection.
Repita o item 7: Adjust → Blur → Radial Blur.
Repita o item 5: Effects → Texture Effects → Texture — Woodgrain.
Adjust → Sharpness → Sharpen More.
Plugin Graphics Plus → Cross Shadow — Default.
Selections → Invert.
Layers → New Raster Layer.
Effects → 3D Effects → Cutout: 2 / 2 / 100 / 85,00 — Color: #000000 — Fill desmarcado.
Selections → Select None.
Aplique a marca-d'água.
Assine e salve.
Espero que gostem.
Aparecida / LicaCida, junho de 2015.
Rio de Janeiro - Brasil.

VOLTAR
Copyright ©2026 - Web Design - Naise Minas
|

