|
Neusa Novaes
TRADUÇÕES

MATERIAL

Preset: Airbrush → Preset_Airbrush_3d (MaraPontes) --
Salvar na pasta Presets do PSP.
Tubes: Nubes en capa
Paysage misted jewel 025
4360-luzcristina
Decorações: Athe-DEC24
deco-athe-tuto-khamsin
Brush: designal brushes 3_12
Back: JHanna_32 bground
Marca-d'água.
Efeitos do PSP.
Versão usada: PSP X8.
PLUGINS
Plugin FM Tile Tools → Blend Emboss
Plugin VM Instant Art → Tripolis
Plugin Mehdi → Edges FX
Plugin Graphics Plus → Vertical Mirror
Plugin MuRa's Meister → Perspective Tiling
Plugin AAA Filters → Custom
Plugin Nik Software → Color Efex Pro 3.0 → Bi-Color Filters
TUTORIAL
|
Esta seta marca sua linha
Clique e arraste para movê-la
|
|
1_.
Abra uma nova imagem transparente de 950 x 650 px.
Selections → Select All.
Edit → Copy no back JHanna_32 bground
Edit → Paste Into Selection.
Selections → Select None.
Effects → Image Effects → Seamless Tiling — Transition: 96.
Adjust → Blur → Motion Blur — Angle: 298 / Strength: 100.
2_.
Adjust → Add/Remove Noise → JPEG Artifact Removal — Strength: Maximum — Crispness: 89.
Plugin FM Tile Tools → Blend Emboss.
3_.
Edit → Copy no tube Nubes en capa
Edit → Paste As New Layer.
Objects → Align → Top.
Blend Mode: Overlay.
Layers → Merge → Merge Down.
Layers → Duplicate.
Adjust → Blur → Gaussian Blur — Radius: 26.
4_.
Plugin VM Instant Art → Tripolis — Default.
5_.
Plugin Mehdi → Edges FX — Color: #000000.
Configure:
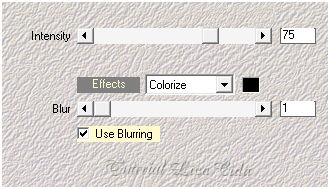
Adjust → Sharpness → Sharpen More.
6_.
Ative a ferramenta Freehand Selection.
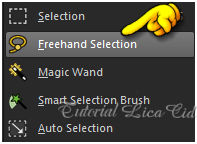
Configure:

Selecione como mostra o print e tecle Delete.
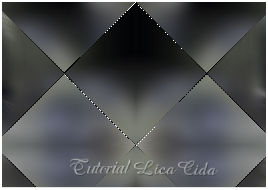
Ative a Raster 1.
Selections → Promote Selection to Layer.
Selections → Select None.
7_.
Ative a Copy of Raster 1.
Effects → Image Effects → Seamless Tiling — Transition: 96 (repita).
8_.
Ative a ferramenta Airbrush.
Configure: Foreground: #ffffff — Background: transparente.
Procure o Preset_Airbrush_3d ou configure:

Use de baixo para cima, seguindo o efeito do Motion Blur.
Effects → Edge Effects → Enhance.
9_.
Plugin Graphics Plus → Vertical Mirror: 128 / 0.
Effects → 3D Effects → Drop Shadow: 0 / 0 / 80 / 40,00 — Color: #000000.
10_.
Edit → Copy no tube Paysage misted jewel 025
Edit → Paste As New Layer.
Layers → Arrange → Move Down.
Image → Resize: 80% — Resize all layers desmarcado.
Adjust → Sharpness → Sharpen More.
11_.
Duplique a Raster 1.
Plugin Nik Software → Color Efex Pro 3.0 → Bi-Color Filters — Color Set: Brown 1.
12_.
Duplique a Copy of Raster 1.
Plugin Nik Software → Color Efex Pro 3.0 → Bi-Color Filters — Color Set: Cool/Warm 1.
Altere os Blend Modes e a Opacity das layers.
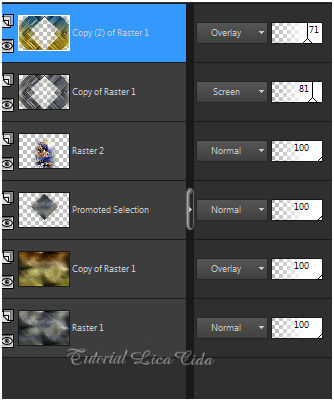
Layers → Merge → Merge All (Flatten).
Edit → Copy (copie o back formado).
13_.
Image → Canvas Size: 950 x 750 — Bottom: 100.
Com a ferramenta Magic Wand, selecione a parte formada (Bottom: 100).
Edit → Paste Into Selection.
14_.
Plugin MuRa's Meister → Perspective Tiling — Default.
Selections → Select None.
15_.
Escolha duas cores que combinem com seu trabalho. Usei Foreground: #454019 — Background: #b9aa3f.
Image → Add Borders: 1 px, Symmetric marcado — Color: cor do Background.
Image → Add Borders: 10 px, Symmetric marcado — Color: cor do Foreground.
Image → Add Borders: 1 px, Symmetric marcado — Color: cor do Background.
Image → Add Borders: 1 px, Symmetric marcado — Color: cor do Foreground.
Image → Add Borders: 20 px, Symmetric marcado — Color: cor do Background.
Image → Add Borders: 1 px, Symmetric marcado — Color: cor do Foreground.
Image → Add Borders: 1 px, Symmetric marcado — Color: cor do Background.
Image → Add Borders: 30 px, Symmetric marcado — Color: cor do Foreground.
Image → Add Borders: 1 px, Symmetric marcado — Color: cor do Background.
Plugin AAA Filters → Custom — Landscape.
16_.
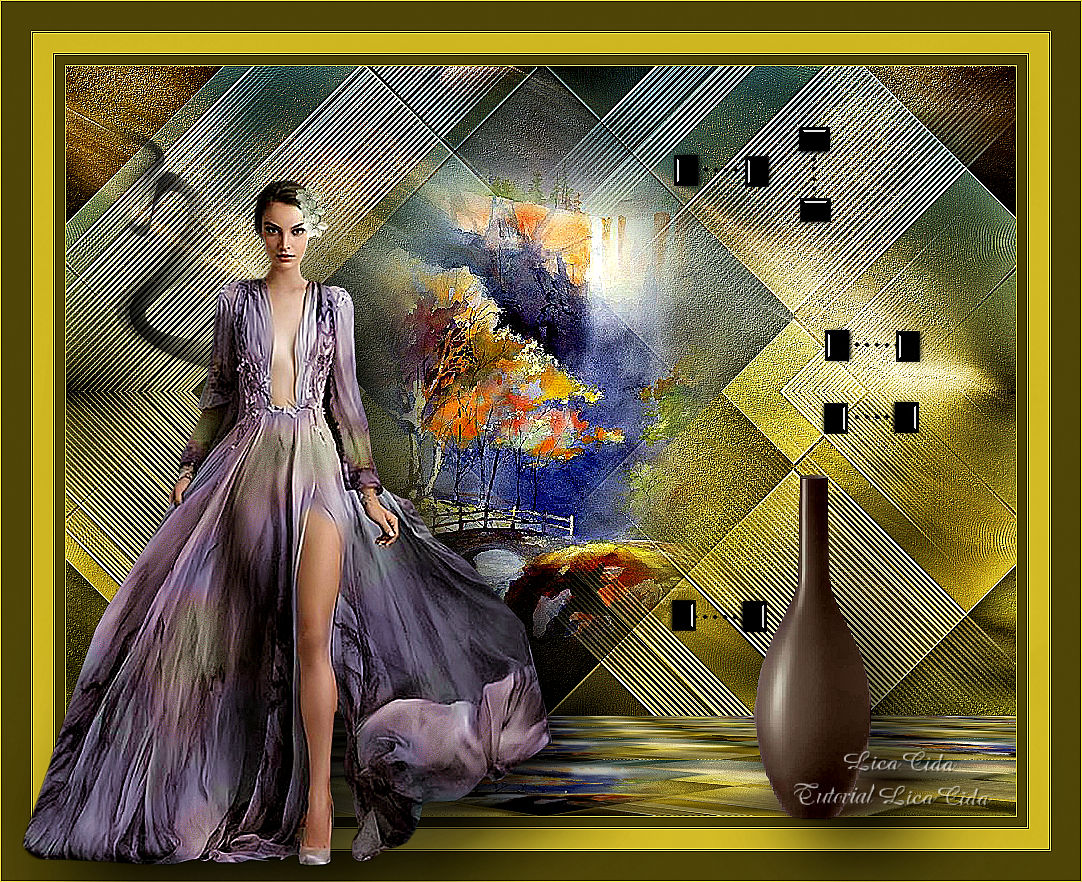
Edit → Copy no tube 4360-luzcristina
Edit → Paste As New Layer.
Posicione.
17_.
Edit → Copy no tube Athe-DEC24
Edit → Paste As New Layer.
Redimensione e posicione.
18_.
Edit → Copy no tube deco-athe-tuto-khamsin
Edit → Paste As New Layer.
Posicione e use a gosto.
19_.
Edit → Copy no designal brushes 3_12
Edit → Paste As New Layer.
Posicione.
Layers → Merge → Merge All (Flatten).
OPCIONAL
Plugin Nik Software → Color Efex Pro 3.0 → Tonal Contrast.
Aplique a marca-d'água.
Assine e salve.
Espero que gostem. Obrigada!
Aparecida / LicaCida, setembro de 2016.
Rio de Janeiro - Brasil.

VOLTAR
Copyright ©2026 - Web Design - Naise Minas
|

