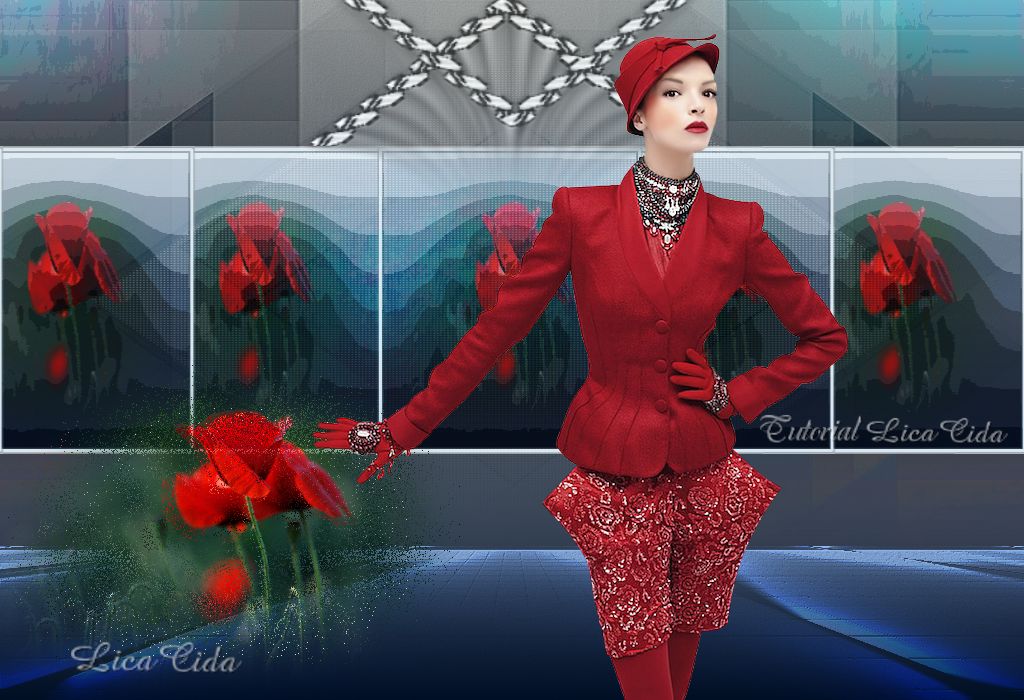
Narah
TRADUÇÕES

MATERIAL

Preset: Illumination → Lights → Narah_Luces —
Salvar na pasta
Presets
do PSP.
Obrigada, Narah, pelo Preset cedido.
Masks: Narah_mask_0201
Mask: Gradiente
Tubes: calguismistcoquelicotDanae03102011
calguismistcoquelicot17119
Tocha23922
Elemento: attache_fairymist
Marca D'água.
Efeitos do PSP.
Versão PSP X5.

PLUGINS
Plugin Toadies → What Are You?
Plugin Toadies → Posterize
Plugin Toadies → Ommadawn
Plugin FM Tile Tools → Blend Emboss
Plugin MuRa's Meister → Copies
Plugin MuRa's Meister → Perspective Tiling
Plugin Alien Skin Eye Candy 5: Impact → Motion Trail
TUTORIAL
|
Esta seta marca sua linha
Clique e arraste para movê-la
|
1_.
Abra uma nova imagem transparente de 1024 x 600 px.
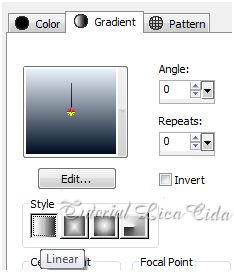
Pinte com o gradiente formado pelas cores #000e23 e #e8f1fa.
Configure: Style: Linear — Angle: 0 — Repeats: 0 — Invert desmarcado.
2_.
Layers → New Raster Layer.
Selections → Select All.
Edit → Copy no tube calguismistcoquelicotDanae03102011
Edit → Paste Into Selection.
Selections → Select None.
Effects → Image Effects → Seamless Tiling → Default.
Plugin Toadies → What Are You? → Default.
Plugin Toadies → Posterize → Default.
3_.
Layers → New Raster Layer.
Pinte com a cor #000e23.
Aplique a Narah_mask_0201.
Layers → Merge → Merge Group.
Opacity: 81%.
Adjust → Add/Remove Noise → JPEG Artifact Removal.
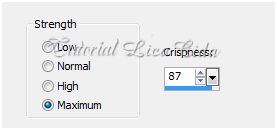
Plugin FM Tile Tools → Blend Emboss → Default.
Layers → Merge → Merge Visible.
4_.
Layers → New Raster Layer.
Ative a ferramenta Selection → Rectangle ou pressione a tecla S.
Em Custom Selection, configure:
Top: 150 — Left: 383 — Right: 642 — Bottom: 451.
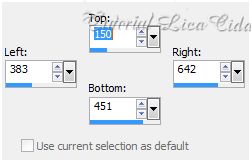
Pinte com o mesmo gradiente formado no item 1.
Edit → Copy no tube calguismistcoquelicot17119
Edit → Paste Into Selection.
Selections → Modify → Select Selection Borders.
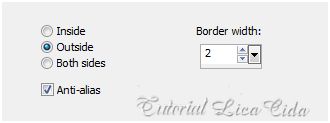
Layers → New Raster Layer.
Pinte com a cor #e8f1fa.
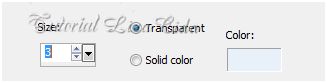
Effects → 3D Effects → Chisel:
3 — Transparent — Color: #e8f1fa.
Use a cor clara usada para formar o gradiente.
Selections → Select None.
Layers → Merge → Merge Down.
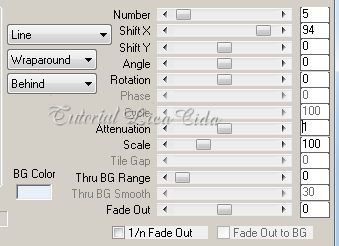
Plugin MuRa's Meister → Copies → Line.
Plugin Toadies → Posterize → Default.
5_.
Ative a layer Merged.
Aplique a Mask Gradiente.
Layers → Merge → Merge Group.
Image → Canvas Size: 1024 x 700 — Bottom: 100.
6_.
Layers → New Raster Layer.
Layers → Arrange → Send to Bottom.
Pinte com o mesmo gradiente formado no item 1.
7_.
Layers → Duplicate.
Plugin Toadies → Ommadawn → Default.
Effects → Illumination Effects → Lights → Narah_Luces.
Plugin MuRa's Meister → Perspective Tiling.
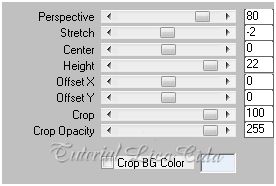
Adjust → Add/Remove Noise → JPEG Artifact Removal.
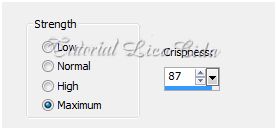
Plugin FM Tile Tools → Blend Emboss → Default.
8_.
Ative a Raster 1.
Edit → Copy no elemento attache_fairymist
Edit → Paste As New Layer.
Elemento preparado para este tutorial.
Posicione como no modelo.
Plugin Alien Skin Eye Candy 5: Impact → Motion Trail.
Configure:
D: 270 — L: 339.57 — T: 100 — CS: 100 — O: 51 — MS: 78.
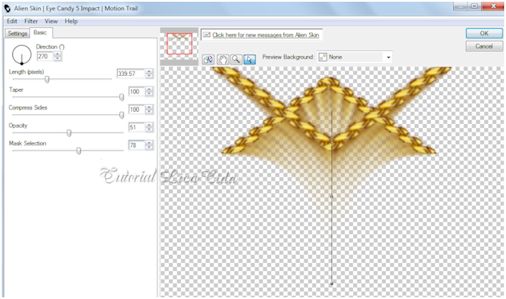
Effects → Edge Effects → Enhance.
OBSERVAÇÃO
Configure as Layers:
Raster 3 — Blend Mode: Luminance (L) — Opacity: 100%.
Raster 1 — Blend Mode: Hard Light — Opacity: 85 a 90%.
Group-Merged — Blend Mode: Difference — Opacity: 60 a 65%.
Copy of Raster 2 — Blend Mode: Dodge — Opacity: 65 a 70%.
Raster 2 — Sem alteração.
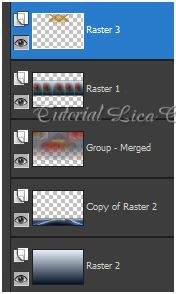
Ative a Raster 3.
9_.
Edit → Copy no tube calguismistcoquelicot17119
Edit → Paste As New Layer.
Image → Resize 80% - Resize all layers desmarcado.
Repita o Resize 80%.
Posicione.
Layers → Duplicate.
10_.
Volte a ativar a Raster 4.
Adjust → Blur → Gaussian Blur — Radius: 32.
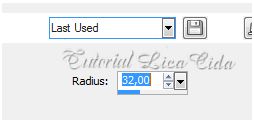
Blend Mode: Dissolve — Opacity: 18%.
Image → Resize 80% - Resize all layers desmarcado.
11_.
Volte a ativar a Copy of Raster 4.
Layers → Duplicate.
Blend Mode: Dissolve — Opacity: 100%.
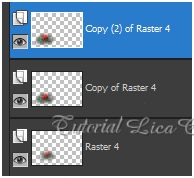
12_.
Edit → Copy no tube Tocha23922
Edit → Paste As New Layer.
Redimensione e posicione a gosto.
Faça o acabamento do seu Top.
Aplique a Marca D'água.
Assine e salve.
Espero que gostem.
Aparecida / LicaCida, em novembro de 2012.
Rio de Janeiro - Brasil.


VOLTAR
Copyright ©2020/2025 -
Web Design -
Liriani Silva®
|