|
Naise
DEDICATÓRIA
Com carinho!
TRADUÇÕES

MATERIAL

Tubes: TUBE_NAISEM_MULHERES_249
TUBE_NAISEM_FLORES_12
Decos: DECOS_NAISEM_CRIAÇOES_OO16
DECOS_NAISEM_CRIAÇOES_OO6
decomarapontes _raster2_
bottomreduzido (autor no tube)
Marca-d'água.
Efeitos do PSP.
Versão usada: PSP X8.
PLUGINS
Plugin Mehdi → Sorting Tiles
Plugin Flaming Pear → Flexify 2
Plugin Graphics Plus → Vertical Mirror
Plugin Graphics Plus → Cross Shadow
Plugin MuRa's Meister → Perspective Tiling
Plugin Nik Software → Color Efex Pro 3.0 → Bi-Color Filters
Plugin Carolaine & Sensibility → CS-Texture
Plugin VM Toolbox → Zoom Blur
Plugin AAA Filters → Custom
TUTORIAL
|
Esta seta marca sua linha
Clique e arraste para movê-la
|
|
1_.
Abra uma nova imagem transparente de 900 x 700 px.
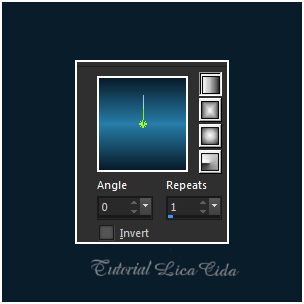
Pinte com o gradiente formado pelas cores #091c2a e #277ca8.
Configure: Style: Linear — Angle: 0 — Repeats: 1 — Invert desmarcado.
2_.
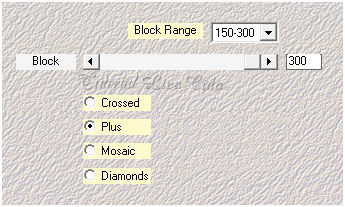
Plugin Mehdi → Sorting Tiles.
3_.
Effects → Reflection Effects → Rotating Mirror: Horizontal offset: 0 — Rotation angle: 180 — Reflect.
Effects → Edge Effects → Enhance More.
4_.
Ative a ferramenta Selection Tool (tecla S) → Custom Selection.
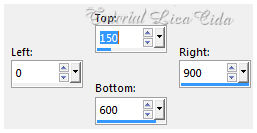
Selections → Promote Selection to Layer.
Effects → 3D Effects → Drop Shadow: 0 / 0 / 80 / 40,00 — Color: #000000.
Selections → Select None.
Layers → Duplicate.
5_.
Plugin Flaming Pear → Flexify 2.
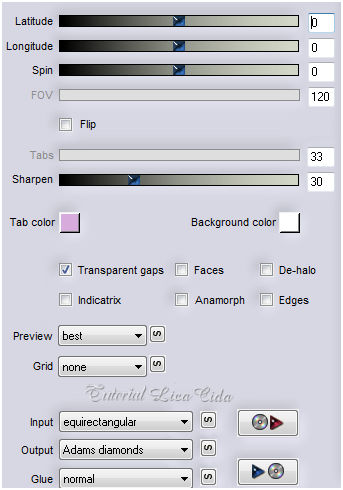
6_.
Plugin Graphics Plus → Vertical Mirror: 102 / 0.
7_.
Effects → 3D Effects → Drop Shadow — Color: #000000.
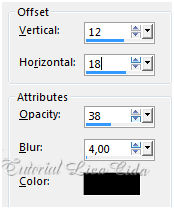
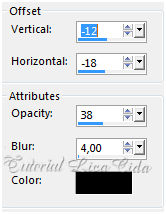
Repita com os valores negativos:
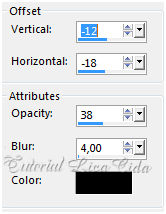
8_.
Edit → Copy no bottomreduzido (anexado)
Edit → Paste As New Layer.
Posicione.
Layers → Duplicate.
Image → Mirror.
Layers → Merge → Merge Down.
Blend Mode: Luminance (L).
Effects → 3D Effects → Drop Shadow: 0 / 0 / 80 / 40,00 — Color: #000000.
Layers → Merge → Merge Down.
9_.
Ative a ferramenta Selection Tool (tecla S) → Custom Selection.
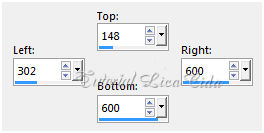
Ative a layer Promoted Selection.
Selections → Promote Selection to Layer.
Effects → 3D Effects → Drop Shadow: 0 / 0 / 80 / 40,00 — Color: #000000.
Selections → Select None.
10_.
Ative a Raster 1.
Image → Canvas Size: 900 x 800 — Bottom: 100.
Layers → Duplicate.
11_.
Plugin MuRa's Meister → Perspective Tiling.
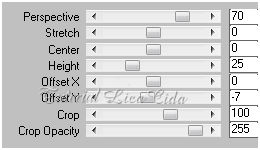
Com a ferramenta Pick Tool, traga o efeito a 680 px.
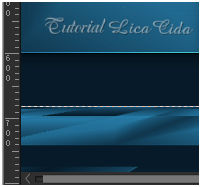
Effects → User Defined Filter → Emboss_3.
12_.
Ative novamente a layer Promoted Selection.
Layers → Duplicate.
Adjust → Blur → Radial Blur.
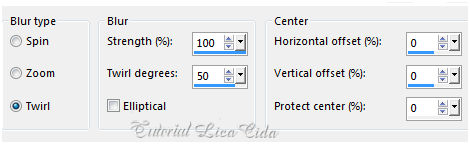
Layers → Duplicate.
Image → Mirror.
Layers → Merge → Merge Down.
Blend Mode: Overlay.
Layers → Arrange → Move Down.
13_.
Plugin Nik Software → Color Efex Pro 3.0 → Bi-Color Filters — Color Set: Brown 1.
Layers → Duplicate.
Layers → Arrange → Send to Bottom.
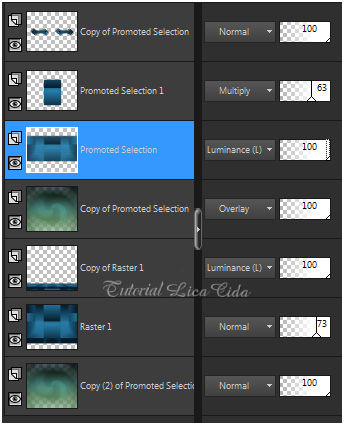
Altere os Blend Modes e a Opacity das layers (use a gosto).
14_.
Depois de acertar os Blend Modes e a Opacity, aplique na layer Promoted Selection:
Plugin Carolaine & Sensibility → CS-Texture — Default: 52 / 0 / 175 / 10.
Layers → Merge → Merge Visible.
15_.
Edit → Copy no decomarapontes _raster2_
Edit → Paste As New Layer.
Blend Mode: Screen — Opacity: 79%.
Adjust → Sharpness → Sharpen More.
16_.
Edit → Copy no DECOS_NAISEM_CRIAÇOES_OO6
Edit → Paste As New Layer.
Objects → Align → Top.
Com a ferramenta Pick Tool, puxe as laterais, acertando como no print.
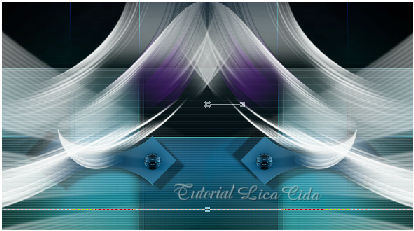
Layers → Duplicate.
17_.
Effects → Geometric Effects → Spherize: 100 — Circle.
Effects → Distortion Effects → Pinch — Strength: 100.
Layers → Merge → Merge Down.
Opacity: entre 70% e 80%.
Adjust → Sharpness → Sharpen More.
18_.
Edit → Copy no DECOS_NAISEM_CRIAÇOES_OO16
Edit → Paste As New Layer.
Layers → Duplicate.
Effects → Image Effects → Seamless Tiling: Default.
19_.
Plugin VM Toolbox → Zoom Blur — Default: 39 / 60.
Blend Mode: Overlay.
Layers → Arrange → Move Down.
20_.
Ative a layer superior.
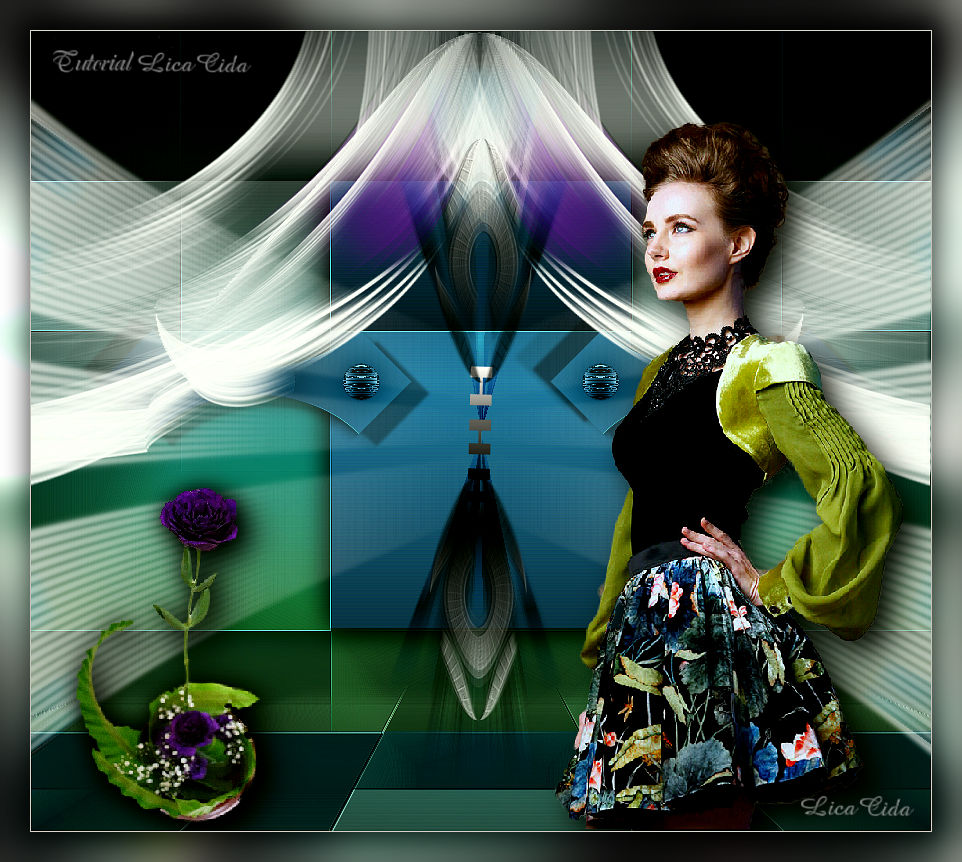
Edit → Copy no TUBE_NAISEM_MULHERES_249
Edit → Paste As New Layer.
Redimensione a gosto.
Posicione.
Adjust → Sharpness → Sharpen.
21_.
Edit → Copy no TUBE_NAISEM_FLORES_12
Edit → Paste As New Layer.
Posicione.
Adjust → Sharpness → Sharpen.
Image → Add Borders: 1 px, Symmetric marcado — Color: #ffffff.
Plugin AAA Filters → Custom → Landscape.
Edit → Copy.
Image → Add Borders: 30 px, Symmetric marcado — Color: a gosto.
Selecione a borda.
Edit → Paste Into Selection.
Adjust → Blur → Gaussian Blur — Radius: 22,00.
Plugin Graphics Plus → Cross Shadow → Default.
Selections → Invert.
Effects → 3D Effects → Drop Shadow: 0 / 0 / 80 / 40,00 — Color: #000000.
Selections → Select None.
Aplique a marca-d'água.
Assine e salve.
Espero que gostem.
Aparecida / LicaCida, novembro de 2016.
Rio de Janeiro - Brasil.

VOLTAR
Copyright ©2026 - Web Design - Naise Minas
|


