|
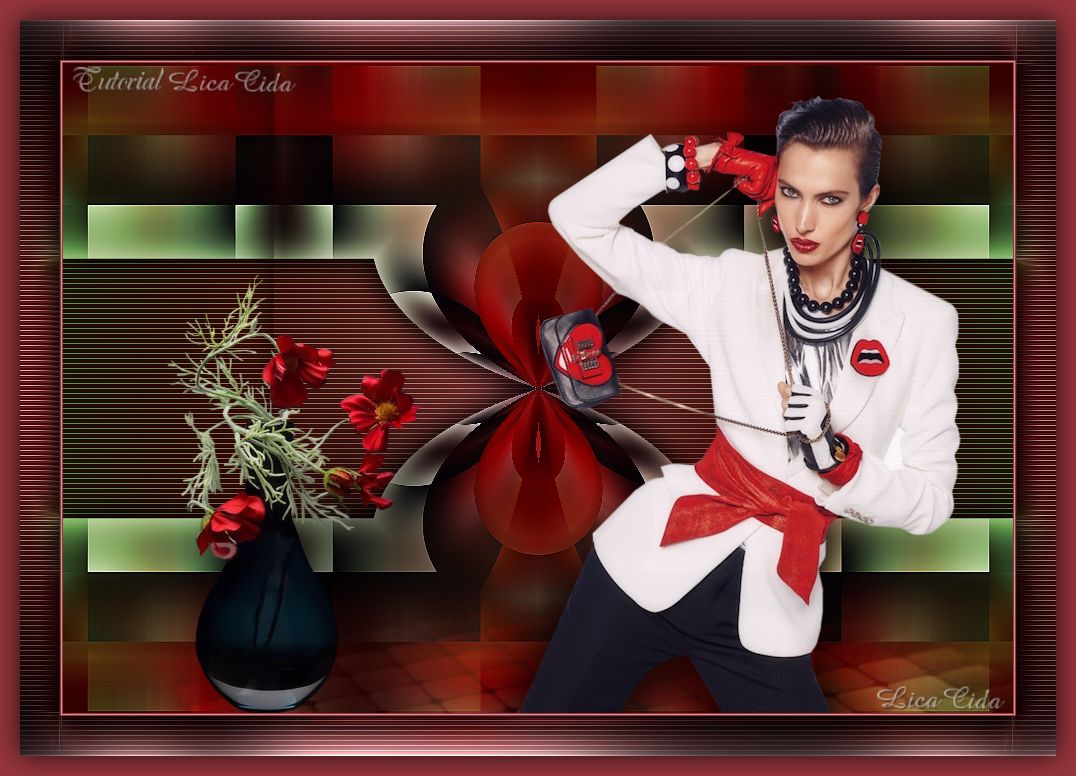
Modern
TRADUÇÕES

MATERIAL

Script: movermask --
Salvar na pasta Scripts-Restricted do PSP.
Seleções: modernlc1
modernlc2 --
Salvar na pasta Selections do PSP.
Tubes: TubeNaraPamplona 1515
Jeanne_Flower_ZwVase_30_05_2014
Mask: 34_sharev_msk
Marca-d'água.
Efeitos do PSP.
Versão usada: PSP X7.
PLUGINS
Plugin Redfield → Fractalius
Plugin Toadies → Weaver
Plugin Simple → Blintz
Plugin Simple → Half Wrap
Plugin AP [Lines] → Lines - SilverLining
Plugin Graphics Plus → Cross Shadow
TUTORIAL
|
Esta seta marca sua linha
Clique e arraste para movê-la
|
|
1_.
Abra uma nova imagem transparente de 950 x 650 px.
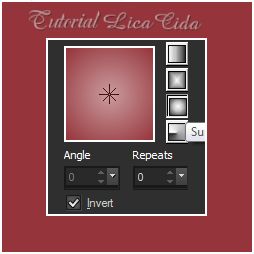
Pinte com o gradiente formado pelas cores #95353b e #ca9b9e.
Configure: Style: Sunburst — Repeats: 0 — Invert marcado — Center Point e Focal Point: H: 50 / V: 50.
2_.
Selections → Select All.
Edit → Copy no tube TubeNaraPamplona 1515 (procure usar um tube com cores claras)
Edit → Paste Into Selection.
Selections → Select None.
Effects → Image Effects → Seamless Tiling — Default.
Adjust → Blur → Gaussian Blur — Radius: 35,00.
3_.
Plugin Redfield → Fractalius.
Layers → Duplicate.
4_.
Plugin Toadies → Weaver: 55 / 38 / 255.
5_.
Plugin Simple → Blintz.
Repita o plugin Simple → Blintz.
6_.
Effects → Reflection Effects → Rotating Mirror: Horizontal Offset: 0 — Rotation Angle: 180 — Reflect.
Adjust → Sharpness → Sharpen More.
7_.
Plugin Simple → Half Wrap.
8_.
Selections → Load/Save Selection → Load Selection From Disk → modernlc1.
Pressione a tecla Delete.
Selections → Select None.
9_.
Effects → Reflection Effects → Kaleidoscope: 26 / 55 / 270 / -20 / 2 / 0 / 37 — Reflect.
Effects → 3D Effects → Drop Shadow: 0 / 0 / 80 / 40,00 — Color: #000000.
10_.
Selections → Load/Save Selection → Load Selection From Disk → modernlc2.
Selections → Promote Selection to Layer.
Effects → 3D Effects → Drop Shadow: 0 / 0 / 80 / 40,00 — Color: #000000.
Selections → Select None.
11_.
Ative a Raster 1.
Layers → New Mask Layer → From Image: 34_sharev_msk — Invert mask data marcado.
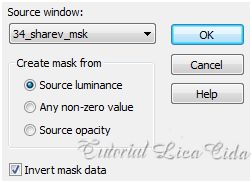
Layers → Merge → Merge Group.
12_.
Rode o script "movermask".
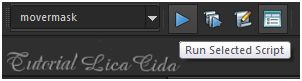
Procure o script "movermask".
Clique em Run Selected Script para rodá-lo.
Blend Mode: Screen.
Layers → Arrange → Move Up (duas vezes).
13_.
Layers → New Raster Layer.
Layers → Arrange → Send to Bottom.
Pinte com o mesmo gradiente formado no item 1.
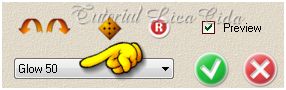
Plugin AP [Lines] → Lines - SilverLining.
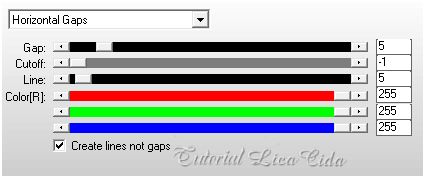
14_.
Plugin Redfield → Fractalius.
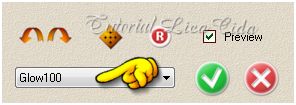
Clique no Foreground e ative Accented para ver a cor oposta. Escolha um tom que combine (#00ff00).
15_.
Layers → New Raster Layer.
Layers → Arrange → Bring to Top.
Pinte com o mesmo gradiente formado acima, trocando a cor do Foreground (#00ff00). Use Opacity: 20%.
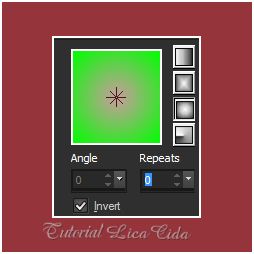
Altere os Blend Modes e a Opacity das layers.
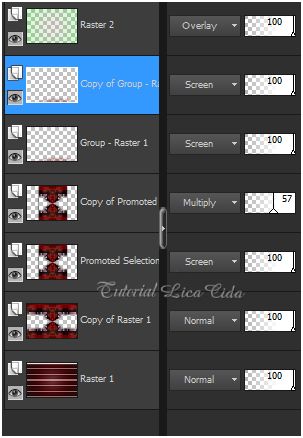
Duplique a Raster 2.
Blend Mode: Multiply — Opacity: 50%.
16_.
Edit → Copy no tube TubeNaraPamplona 1515
Edit → Paste As New Layer.
Image → Resize: 80% — Resize all layers desmarcado (duas vezes).
Posicione.
17_.
Edit → Copy no tube Jeanne_Flower_ZwVase_30_05_2014
Edit → Paste As New Layer.
Posicione.
18_.
Image → Add Borders: 1 px, Symmetric marcado — Color: #95353b (cor do Foreground).
Image → Add Borders: 1 px, Symmetric marcado — Color: #ca9b9e (cor do Background).
Image → Add Borders: 1 px, Symmetric marcado — Color: #95353b (cor do Foreground).
19_.
Image → Add Borders: 40 px, Symmetric marcado — Color: #ffffff.
Selecione a borda.
Pinte com o gradiente formado no item 1.
20_.
Plugin AP [Lines] → Lines - SilverLining (veja o print do item 13).
21_.
Plugin Redfield → Fractalius.
22_.
Plugin Graphics Plus → Cross Shadow → Default.
Selections → Invert.
Effects → 3D Effects → Drop Shadow: 0 / 0 / 80 / 40,00 — Color: #000000.
Selections → Select None.
Aplique a marca-d'água.
Assine e salve.
Espero que gostem.
Aparecida / LicaCida, julho de 2015.
Rio de Janeiro - Brasil.

VOLTAR
Copyright ©2026 - Web Design - Naise Minas
|

