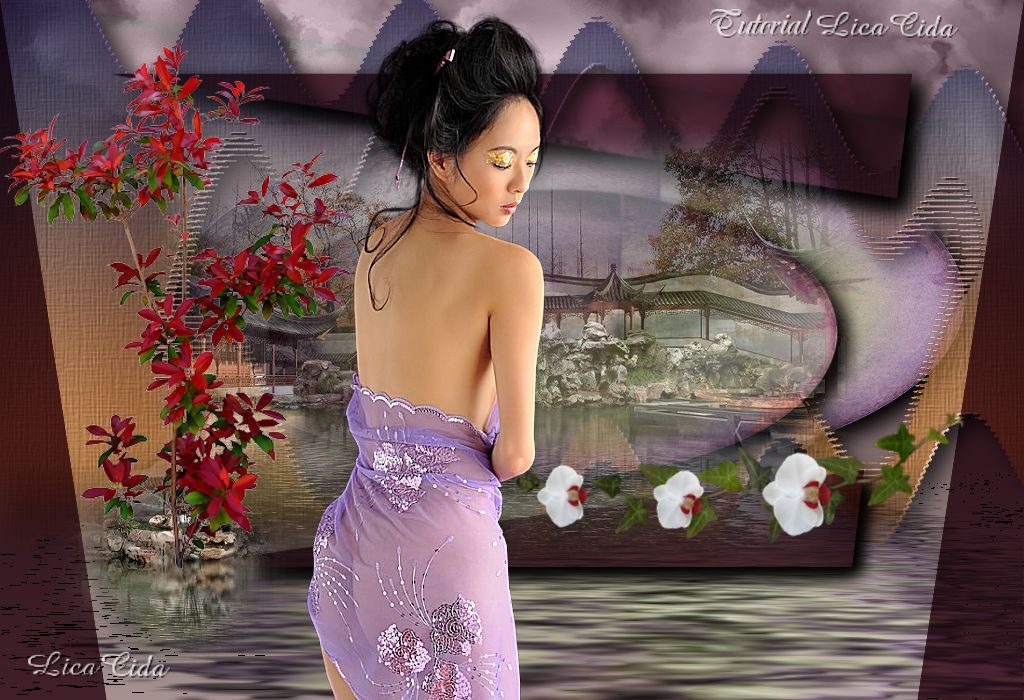
Mineko
TRADUÇÕES

MATERIAL

Script: nuvens mara10 —
Salvar na pasta
Scripts-Restricted
do PSP.
Obrigada, Mara, amiga!
Tubes: MR_Sensuality
764 - orient - LB TUBES
Background: JHanna_572 background
Elementos: Caro753_Fleur2
Caro753_Feuillage6
Mask: !!!!.mask
Marca D'água.
Efeitos do PSP.
Versão PSP X5.

PLUGINS
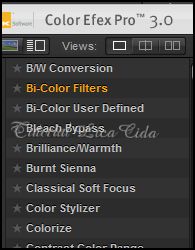
Plugin Nik Software → Color Efex Pro 3.0 → Bi-Color Filters
Plugin Flaming Pear → Flood
TUTORIAL

|
Esta seta marca sua linha
Clique e arraste para movê-la
|
1_.
Abra uma nova imagem transparente de 1024 x 600 px.
2_.
Selections → Select All.
Edit → Copy no JHanna_572 background
Edit → Paste Into Selection.
Selections → Select None.
3_.
Effects → Distortion Effects → Polar Coordinates.
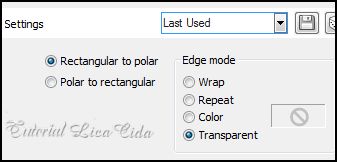
Image → Resize 80% - Resize all layers desmarcado.
4_.
Effects → Geometric Effects → Perspective - Horizontal:
45 — Color: #331c25.
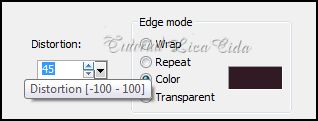
Layers → Duplicate.
Image → Resize 80% - Resize all layers desmarcado.
5_.
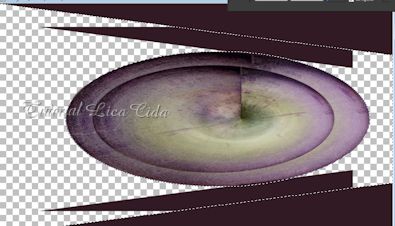
Ative a Raster 1.
Selecione com a ferramenta Magic Wand, como mostra o print.
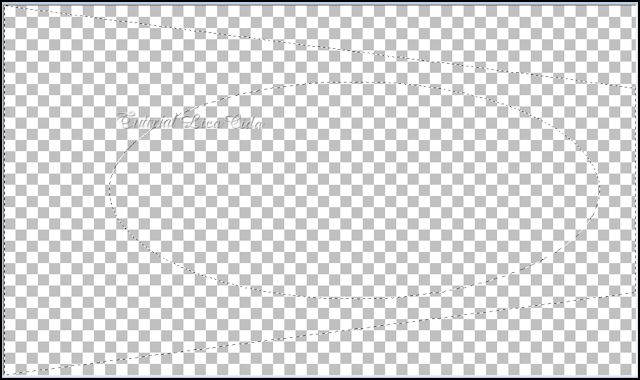
6_.
Layers → New Raster Layer.
Pinte com o gradiente formado pelas cores #a49190 e #331c25.
Configure: Style: Linear — Angle: 0 — Repeats: 0 —
Invert desmarcado.
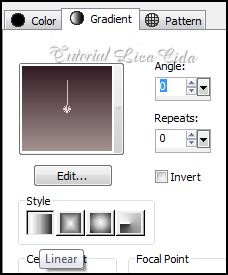
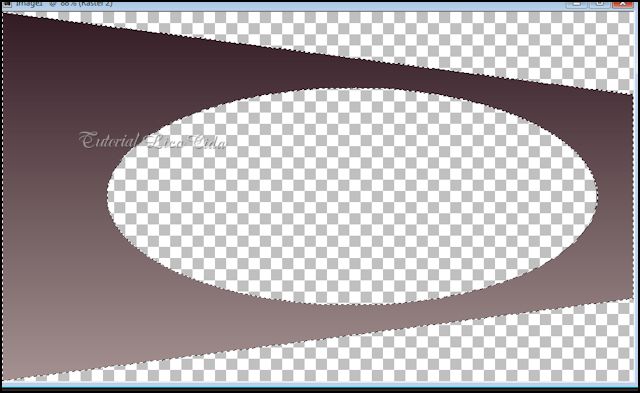
Selections → Select None.
7_.
Effects → Distortion Effects → Wave: 2 / 1 / 10 / 18.
Repita o efeito.
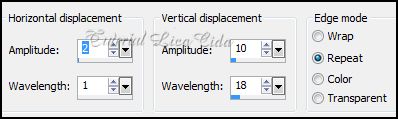
8_.
Effects → Texture Effects → Texture.
Configure: 80 / 2 / 1 / 2 / 23 —
315 / 50 / 30 — Color: #ffffff.
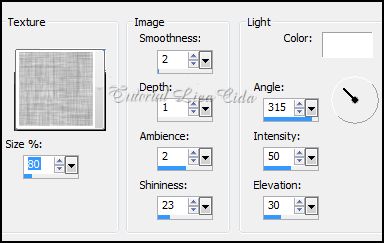
Effects → User Defined Filter → Emboss_3.
9_.
Aplique a !!!!.mask.
Layers → Merge → Merge Group.
Aplique a mask duas vezes.
10_.
Plugin Nik Software → Color Efex Pro 3.0 →
Bi-Color Filters → Cool/Warm 2.
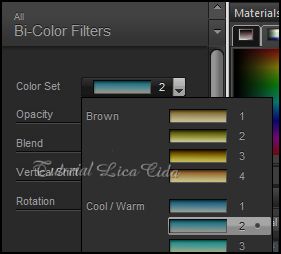
Opacity: 73%.
11_.
Image → Canvas Size: 1024 x 700 — Bottom: 100.
12_.
Layers → New Raster Layer.
Layers → Arrange → Send to Bottom.
Pinte com o mesmo gradiente formado no item 6.
13_.
Ative a Raster 1.
Plugin Flaming Pear → Flood.
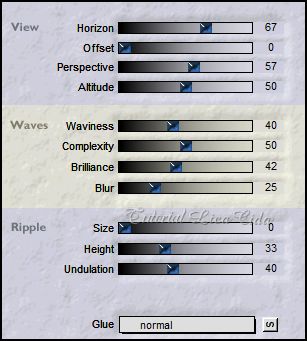
14_.
Layers → New Raster Layer.
Execute o Script nuvens mara10.
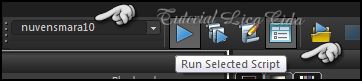
Busque o Script.
Clique em Run Selected Script.
Blend Mode: Luminance (L).
Layers:
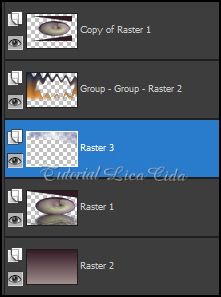
15_.
Ative a Copy of Raster 1.
Effects → Geometric Effects → Perspective - Vertical:
21 — Color: #331c25.
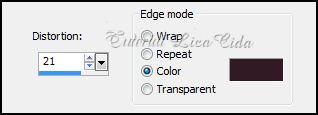
Blend Mode: Hard Light.
Aplique nos efeitos:
Effects → 3D Effects → Drop Shadow.
Configure a gosto — Color: #000000.
16_.
Edit → Copy nos tubes escolhidos
Edit → Paste As New Layer.
Posicione e redimensione, se necessário.
Faça o acabamento do seu Top.
Aplique a Marca D'água.
Assine e salve.
Aparecida / LicaCida, novembro de 2012.
Rio de Janeiro - Brasil.


VOLTAR
Copyright ©2020/2025 -
Web Design -
Liriani Silva®

