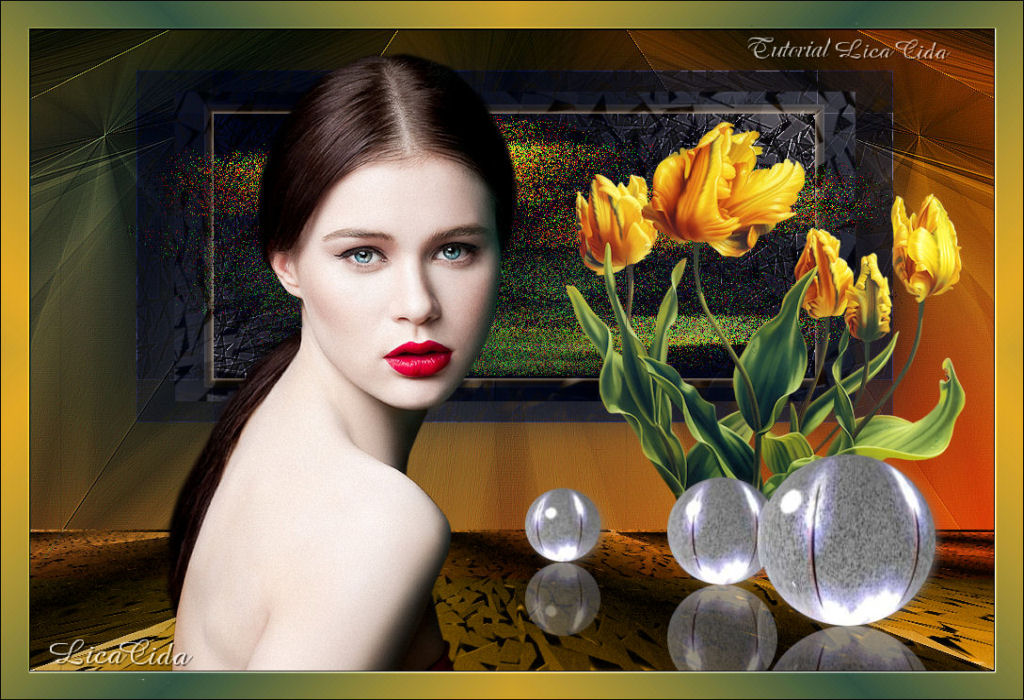
Malu Fróes

MATERIAL

Tubes: 659 - woman3 - LB TUBES
Mtm_Bloemen 249-@IL-Me-small-21
kTs~08_049
Marca D'água.
Efeitos do PSP.
Versão PSP X3.

PLUGINS
Plugin Alien Skin Xenofex 2 → Shatter
Plugin Toadies → What Are You?
Plugin MuRa's Meister → Perspective Tiling
Plugin VanDerLee → UnPlugged-X
Plugin Nik Software → Color Efex Pro 3.0
Plugin FM Tile Tools → Blend Emboss
Plugin Mirror Rave → Quadrant Flip
TUTORIAL
|
Esta seta marca sua linha
Clique e arraste para movê-la
|
1_.
Abra uma nova imagem transparente de 1024 x 600 px.
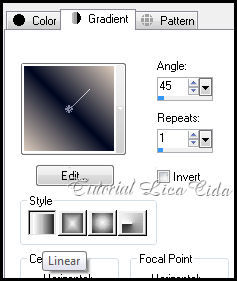
Pinte com o gradiente formado pelas cores #dacabc e #00071f.
Configure: Style: Linear — Angle: 45 — Repeats: 1 — Invert desmarcado.
2_.
Selections → Select All.
Edit → Copy no tube 659 - woman3 - LB TUBES
Edit → Paste Into Selection.
Selections → Select None.
3_.
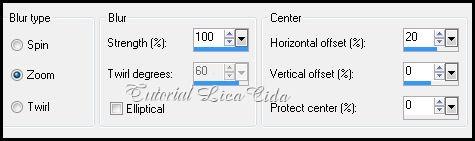
Adjust → Blur → Radial Blur.
4_.
Effects → Geometric Effects → Perspective - Vertical: -77 — Wrap.
5_.
Layers → Duplicate.
Image → Mirror.
Opacity: 60%.
Layers → Merge → Merge Down.
Effects → Edge Effects → Enhance More.
6_.
Layers → New Raster Layer.
Pinte com o mesmo gradiente formado no item 1.
7_.
Plugin Alien Skin Xenofex 2 → Shatter → Default.
8_.
Ative a ferramenta Selection → Rectangle ou pressione a tecla S.
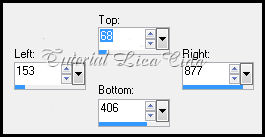
Em Custom Selection, configure:
Top: 68 — Left: 153 — Right: 877 — Bottom: 406.
Selections → Invert.
Pressione Delete.
Selections → Select None.
Layers → Duplicate.
9_.
Plugin Toadies → What Are You? → Default.
Effects → Edge Effects → Enhance More.
Effects → 3D Effects → Drop Shadow:
0 / 0 / 50 / 50 — Color: #000000.
10_.
Ative novamente a ferramenta Selection → Rectangle
ou pressione a tecla S.
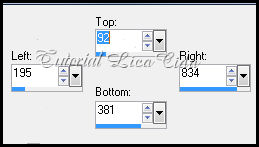
Em Custom Selection, configure:
Top: 92 — Left: 195 — Right: 834 — Bottom: 381.
11_.
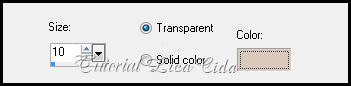
Effects → 3D Effects → Chisel:
10 — Transparent — Color: #dacabc
(cor clara do seu tube).
Adjust → Sharpness → Sharpen More.
Selections → Select None.
12_.
Image → Canvas Size:
1024 x 700 — Bottom: 100.
13_.
Layers → New Raster Layer.
Pinte com o mesmo gradiente formado no item 1.
14_.
Repita:
Plugin Alien Skin Xenofex 2 → Shatter → Default.
15_.
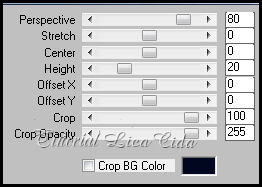
Plugin MuRa's Meister → Perspective Tiling.
16_.
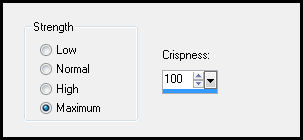
Adjust → Add/Remove Noise → JPEG Artifact Removal.
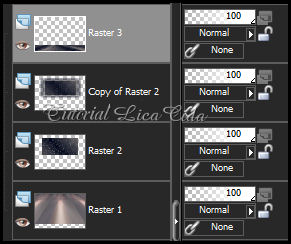
Layers:
17_.
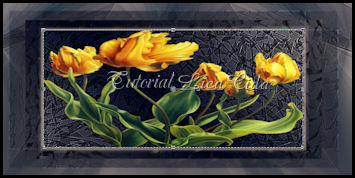
Ative a layer inferior → Copy of Raster 2.
Edit → Copy no tube Mtm_Bloemen 249-@IL-Me-small-21
Edit → Paste As New Layer.
Com a ferramenta Deform Tool, ajuste conforme o modelo.
18_.
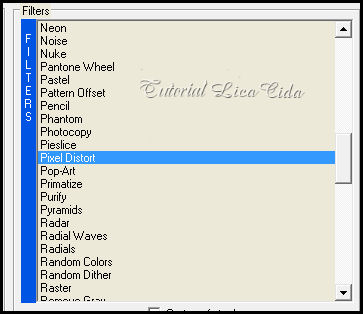
Plugin VanDerLee → UnPlugged-X.
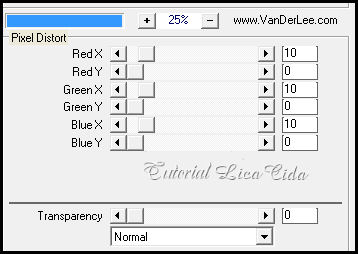
19_.
Layers → New Raster Layer.
Layers → Arrange → Send to Bottom.
Use cores contrastantes que combinem com o tube usado no efeito do item 17.
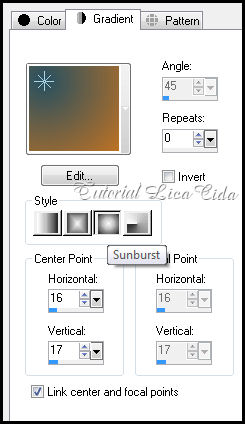
Pinte com o gradiente formado pelas cores #275061 e #bf7224.
Configure:
Style: Sunburst — Repeats: 0 —
H: 16 / V: 17 — Invert desmarcado.
20_.
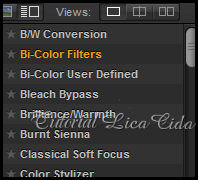
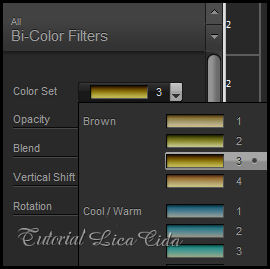
Plugin Nik Software → Color Efex Pro 3.0 →
Bi-Color Filters → Color Set 3.
21_.
Plugin FM Tile Tools → Blend Emboss.
Observe os Blend Modes.
Duplique as layers, se necessário, e altere a Opacity a gosto.
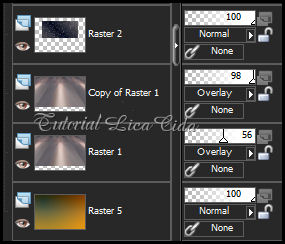
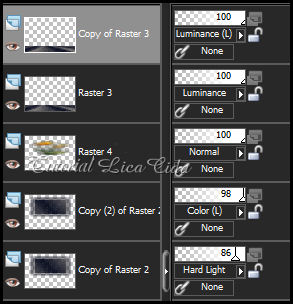
Faça as alterações necessárias.
22_.
Edit → Copy nos tubes escolhidos
Edit → Paste As New Layer.
Posicione e redimensione a gosto.
23_.
Image → Add Borders →
1 px, Symmetric marcado —
Color: #000000.
24_.
Image → Add Borders →
30 px, Symmetric marcado —
Color: #ffffff.
Selecione essa borda.
25_.
Pinte com o gradiente formado por cores do tutorial.
Configure:
Style: Linear —
Angle: 45 —
Repeats: 3 —
Invert desmarcado.
26_.
Plugin Mirror Rave →
Quadrant Flip →
Default.
27_.
Adjust → One Step Photo Fix.
28_.
Image → Add Borders →
1 px, Symmetric marcado —
Color: #000000.
Formate em JPG no tamanho 1024 x 700 px.
Aplique a Marca D'água.
Assine e salve.
Aparecida / LicaCida, outubro de 2012.
Rio de Janeiro - Brasil.

VOLTAR
Copyright ©2020/2025 -
Web Design -
Liriani Silva®

