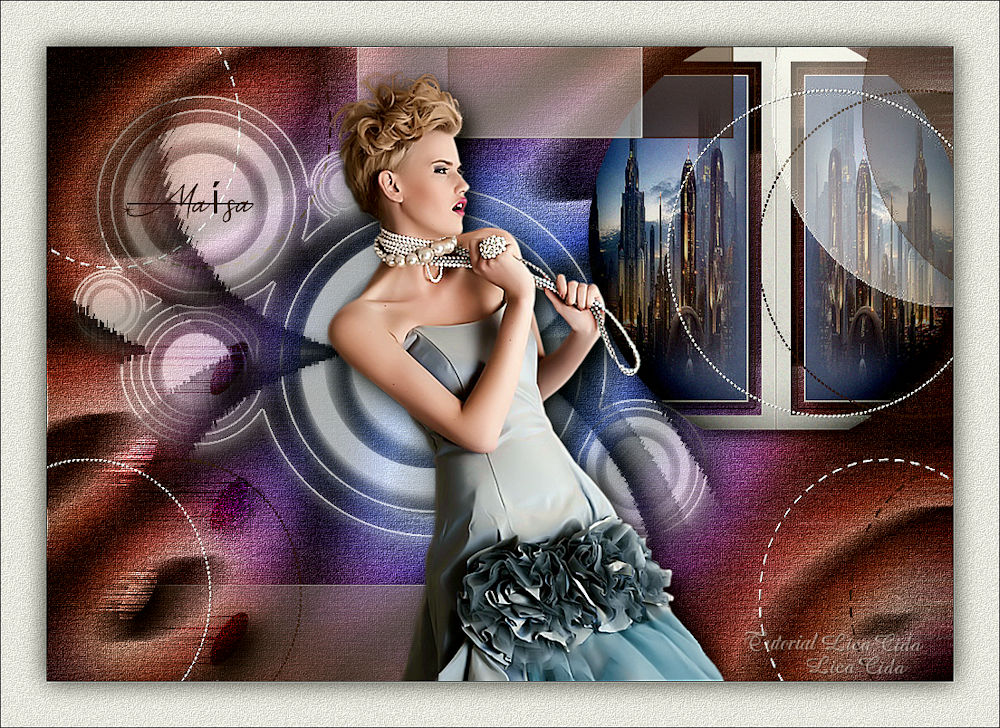
|
Maísa DEDICATÓRIA Com carinho! TRADUÇÕES
MATERIAL
Seleção: sel1_maisa_lc --
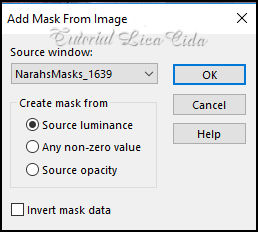
Mask: NarahsMasks_1639
Tubes: 2093 - woman - LB TUBES
Deco: decor_nmcriacoes_119
Marca-d'água.
Versão usada: PSP X9.
PLUGINS
Plugin Virtual Painter 4
TUTORIAL
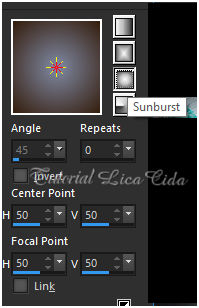
1_. Abra uma nova imagem transparente de 1000 x 700 px. Pinte com o gradiente formado pelas cores #7f89a3 e #341d0c. Configure: Style: Sunburst — Repeats: 0 — Invert desmarcado — Center Point: 50 / 50 — Focal Point: 50 / 50.
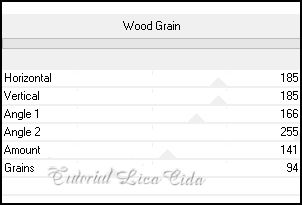
2_. Plugin Virtual Painter 4 — Filter: Pastel — Material: Canvas (fine). 3_. Plugin Filter Factory Gallery A → Wood Grain.
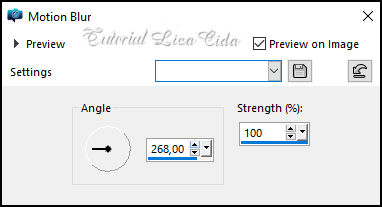
4_. Adjust → Blur → Motion Blur.
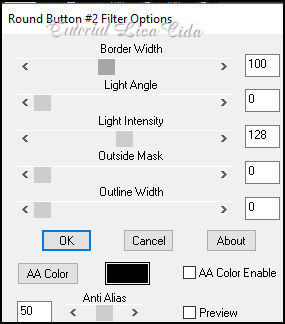
5_. Adjust → Add/Remove Noise → Add Noise: 15% — Uniform — Monochrome marcado. 6_. Plugin Paper Textures → Canvas, Fine — Default (156 / 87). 7_. Selections → Load/Save Selection → Load Selection From Disk → sel1_maisa_lc. Layers → New Raster Layer. Pinte com a cor #e9e9e9. Selections → Modify → Contract: 23 px. Pressione a tecla Delete. Selections → Modify → Contract: 10 px. Pinte com a cor #341d0c. Selections → Modify → Contract: 2 px. Pressione a tecla Delete. Selections → Modify → Contract: 10 px. Pinte com a cor #e9e9e9. Selections → Modify → Contract: 2 px. Pressione a tecla Delete. 8_. Edit → Copy no ketlandscape005 Edit → Paste Into Selection. Selections → Select None. Selecionei o misted e o seu back (opcional). Adjust → Sharpness → Sharpen More. 9_. Plugin BorderMania → Round Button #2.
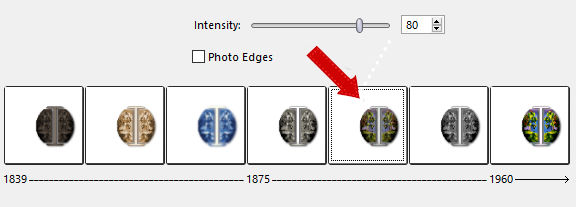
Layers → Duplicate. Image → Mirror → Mirror Horizontal. 10_. Effects → Image Effects → Offset: 89 / 0 — Custom e Transparent marcados. Layers → Merge → Merge Down. 11_. Effects → Photo Effects → Time Machine.
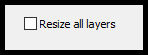
Plugin Alien Skin Eye Candy 5: Impact → Perspective Shadow — Settings: Drop Shadow, Blurry. Image → Resize: 68% — Resize all layers desmarcado.
12_. Effects → Image Effects → Offset: 274 / 138 — Custom e Transparent marcados. 13_. Layers → New Raster Layer. Pinte com a cor #ffffff. Layers → New Mask Layer → From Image: NarahsMasks_1639.
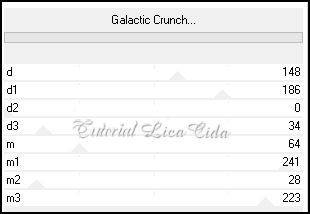
Effects → Edge Effects → Enhance. Layers → Merge → Merge Group. Plugin MuRa's Seamless → Emboss at Alpha — Default. Effects → 3D Effects → Drop Shadow: 0 / 100 / 100 / 0,00 — Color: #341d0c. 14_. Edit → Copy no decor_nmcriacoes_119 Edit → Paste As New Layer. 15_. Effects → Image Effects → Offset: -94 / 30 — Custom e Transparent marcados. Plugin Alien Skin Eye Candy 5: Impact → Perspective Shadow — Settings: Drop Shadow, Blurry. 16_. Plugin Unlimited 2.0 → Andrew's Filter Collection 58 → Galactic Crunch.
Plugin MuRa's Seamless → Emboss at Alpha — Default. Se necessário, mova o efeito. OBSERVAÇÃO Ao testar os efeitos, eles não saem iguais. Por isso, o efeito segue em anexo no material (efeito em anexo). Duplique a Raster 1. Blend Mode: Multiply. 17_. Edit → Copy no decobolaslc Edit → Paste As New Layer. 18_. Effects → Image Effects → Offset: -399 / -4 — Custom e Transparent marcados. 19_. Plugin Unlimited 2.0 → Andrew's Filter Collection 58 → Galactic Crunch (print do item 16).
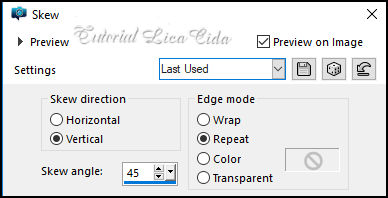
Effects → 3D Effects → Drop Shadow: 0 / 100 / 100 / 0,00 — Color: #341d0c. 20_. Effects → Geometric Effects → Skew.
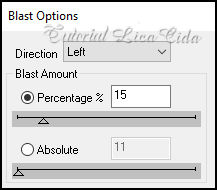
21_. Plugin dsb flux → Blast.
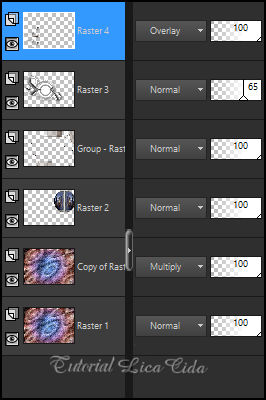
Blend Mode: Overlay. LAYERS Altere os Blend Modes e a Opacity das layers.
22_. Edit → Copy no tube 2093 - woman - LB TUBES Edit → Paste As New Layer. Posicione. Plugin Alien Skin Eye Candy 5: Impact → Perspective Shadow — Settings: Drop Shadow, Blurry. 23_. Edit → Copy no nomemaísa Edit → Paste As New Layer. Posicione a gosto. 24_. Image → Add Borders: 1 px, Symmetric marcado — Color: Background. Selections → Select All. Image → Add Borders: 50 px, Symmetric marcado — Color: #e9e9e9. Selections → Invert. Adjust → Add/Remove Noise → Add Noise: 10% — Uniform — Monochrome marcado. Plugin FM Tile Tools → Blend Emboss. Selections → Invert. Effects → 3D Effects → Drop Shadow: 0 / 0 / 80 / 40,00 — Color: #000000. Selections → Select None. Image → Resize: Width 1000 px. Aplique a marca-d'água. Assine e salve. Espero que gostem. Obrigada!
Aparecida / LicaCida, maio de 2021.
Copyright ©2026 - Web Design - Naise Minas |