|
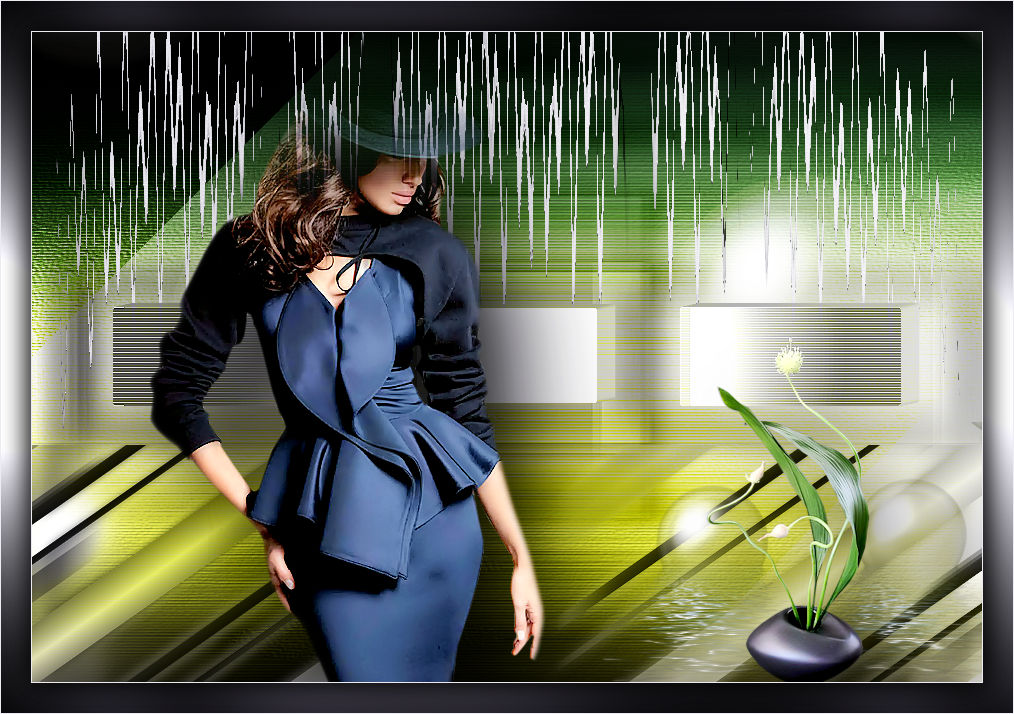
Karina
TRADUÇÕES

MATERIAL

Seleções: licasel1
selkarinalc --
Salvar na pasta Selections do PSP.
Mask: Narah_mask_Abstract131
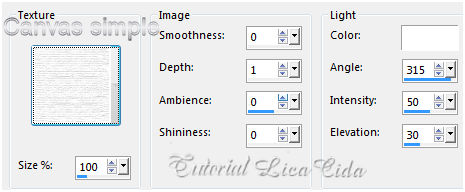
Textura: Canvas simple
Tubes: womanbyClo461
Gabry-fiori 83
Decoração: deco1lc
deco2lc
Back: cristallc
Marca-d'água.
Efeitos do PSP.
Versão usada: PSP X8.
PLUGINS
Plugin Alien Skin Eye Candy 5: Impact → Extrude
Plugin Carolaine and Sensibility → CS_Reflection
Plugin Carolaine and Sensibility → cs-texture
Plugin VM Toolbox → Motion Trail
Plugin Nik Software → Color Efex Pro 3.0 → Bi-Color Filters
TUTORIAL
|
Esta seta marca sua linha
Clique e arraste para movê-la
|
|
1_.
Abra uma nova imagem transparente de 950 x 650 px.
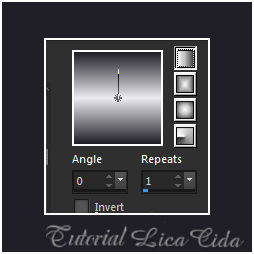
Pinte com o gradiente formado pelas cores #201e26 e #ecebf1, retiradas do tube.
Configure: Style: Linear — Angle: 0 — Repeats: 1 — Invert desmarcado.
2_.
Effects → Texture Effects → Texture.
3_.
Layers → New Raster Layer.
Pinte com a cor clara usada no Background (#ecebf1).
Layers → New Mask Layer → From Image: Narah_mask_Abstract131.
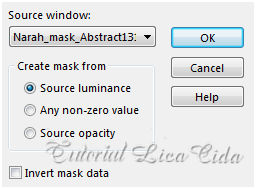
Layers → Merge → Merge Group.
Effects → Edge Effects → Enhance.
Effects → 3D Effects → Drop Shadow: 0 / 12 / 85 / 20,00 — Color: #000000.
Repita com os mesmos valores.
4_.
Selections → Load/Save Selection → Load Selection From Disk → licasel1.
Layers → New Raster Layer.
Pinte com a cor clara usada no Background (#ecebf1).
5_.
Plugin Carolaine and Sensibility → CS_Reflection.
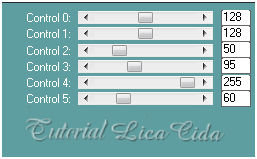
6_.
Plugin Carolaine and Sensibility → cs-texture.
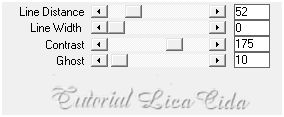
Effects → Edge Effects → Enhance.
7_.
Plugin Alien Skin Eye Candy 5: Impact → Extrude.
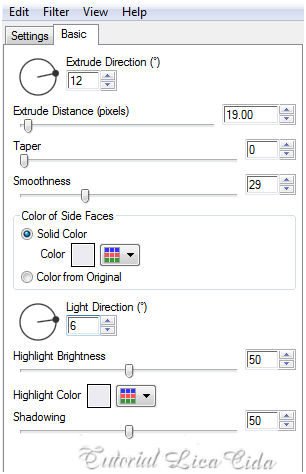
Selections → Select None.
8_.
Layers → New Raster Layer.
Effects → Artistic Effects → Balls and Bubbles.
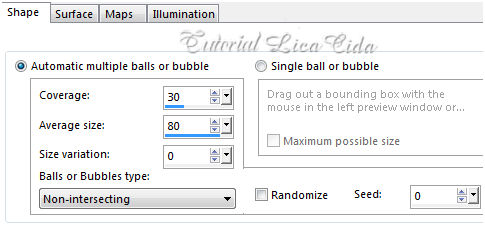
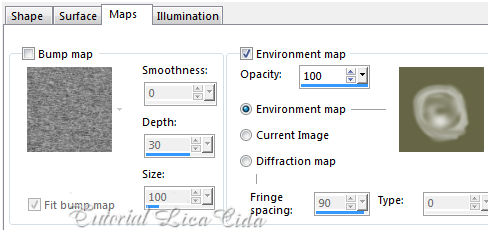
Layers → Arrange → Move Down.
9_.
Selections → Load/Save Selection → Load Selection From Disk → selkarinalc.
Layers → New Raster Layer.
Pinte com o gradiente formado no item 1.
Effects → 3D Effects → Drop Shadow: 0 / 12 / 85 / 20,00 — Color: #000000.
Selections → Select None.
Layers → Duplicate.
Image → Mirror.
Layers → Merge → Merge Down.
Objects → Align → Bottom.
10_.
Effects → Geometric Effects → Skew.
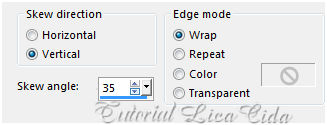
11_.
Edit → Copy no deco1lc
Edit → Paste As New Layer.
Objects → Align → Top.
12_.
Ative a Raster 1.
Layers → Duplicate.
Plugin Nik Software → Color Efex Pro 3.0 → Bi-Color Filters — Color Set: Moss 2.
13_.
Plugin VM Toolbox → Motion Trail — Default.
Effects → Edge Effects → Enhance.
14_.
Effects → Geometric Effects → Skew.
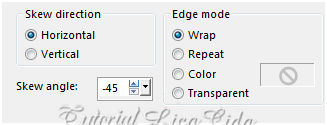
Image → Mirror.
15_.
Repita o item 13: Plugin VM Toolbox → Motion Trail — Default.
16_.
Repita o item 12: Plugin Nik Software → Color Efex Pro 3.0 → Bi-Color Filters — Color Set: Moss 2.
Layers → Duplicate.
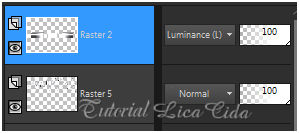
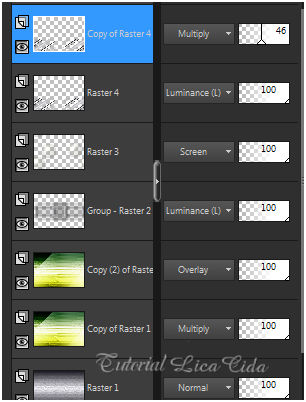
Ative a layer superior (Raster 2).
17_.
Edit → Copy no deco2lc
Edit → Paste As New Layer.
Objects → Align → Bottom.
Objects → Align → Right.
18_.
Edit → Copy no tube womanbyClo461
Edit → Paste As New Layer.
Posicione.
19_.
Edit → Copy no tube Gabry-fiori 83
Edit → Paste As New Layer.
Posicione.
20_.
Edit → Copy no cristallc
Edit → Paste As New Layer.
Faça o acabamento a gosto.
Aplique a marca-d'água.
Assine e salve.
Espero que gostem.
Aparecida / LicaCida, setembro de 2015.
Rio de Janeiro - Brasil.

VOLTAR
Copyright ©2026 - Web Design - Naise Minas
|

