|
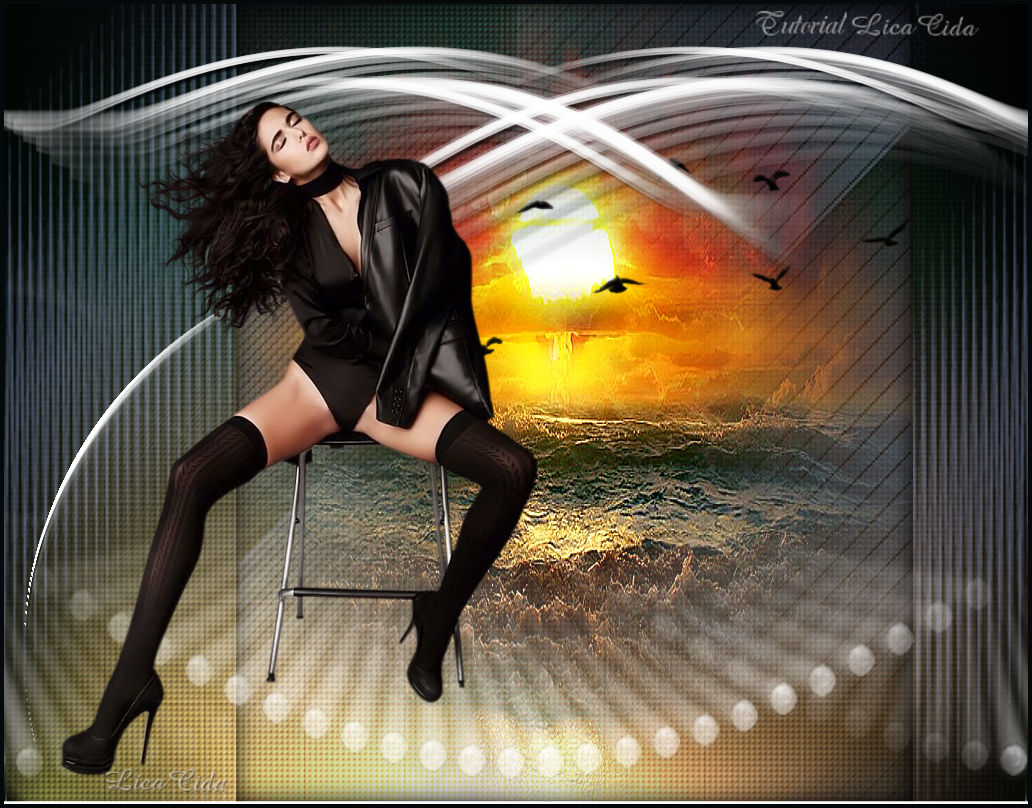
Intuition
TRADUÇÕES

MATERIAL

Script: circulo1 --
Salvar na pasta Scripts-Restricted do PSP.
Caso o script não rode, o efeito segue anexado (script circulo1).
Texture: Corel_15_005
Preset: Illumination → Lights → Preset_Lights_intuition --
Salvar na pasta Presets do PSP.
Masks: mask_zz
maske201_sigrid
Tubes: 2689 - woman - LB TUBES
lunapaisagem6329
Brush: bird_brushes_II_by_lpdragonfly_3
Deco: decolc1
Marca-d'água.
Efeitos do PSP.
Versão usada: PSP X8.
PLUGINS
Plugin MuRa's Meister → Copies
Plugin Nik Software → Color Efex Pro 3.0 → Bi-Color Filters
Plugin AAA Filters → Custom
TUTORIAL
|
Esta seta marca sua linha
Clique e arraste para movê-la
|
|
Configure: Foreground: #05090c — Background: #7b8eb8.
1_.
Abra uma nova imagem transparente de 1024 x 800 px.
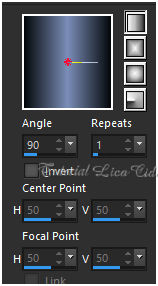
Pinte com o gradiente formado pelas cores acima.
Configure: Style: Linear — Angle: 90 — Repeats: 1 — Invert desmarcado.
2_.
Layers → New Raster Layer.
Pinte com a cor do Background: #7b8eb8.
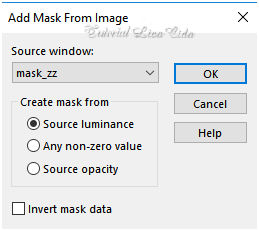
Layers → New Mask Layer → From Image: mask_zz.
Layers → Merge → Merge Group.
Adjust → Sharpness → Sharpen More.
3_.
Ative a ferramenta Selection Tool (tecla S) → Custom Selection.
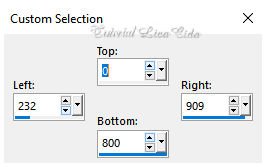
Layers → New Raster Layer.
Effects → 3D Effects → Cutout.
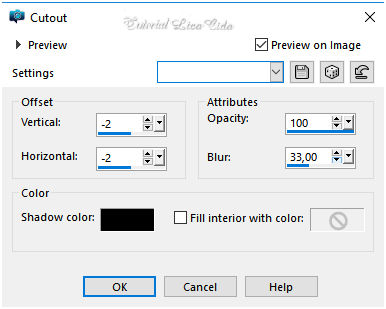
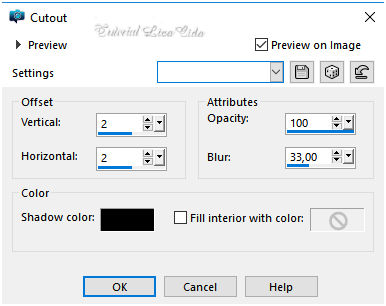
4_.
Layers → New Raster Layer.
Edit → Copy no tube lunapaisagem6329
Edit → Paste Into Selection.
Selections → Select None.
Adjust → Sharpness → Sharpen More.
Opcional: Plugin AAA Filters → Custom — Landscape (Default).
5_.
Edit → Copy no bird_brushes_II_by_lpdragonfly_3
Edit → Paste As New Layer.
Posicione (os pássaros ficarão integrados à paisagem).
Layers → Merge → Merge Down.
6_.
Layers → New Raster Layer.
Pinte com a cor #ffffff.
Layers → New Mask Layer → From Image: maske201_sigrid.
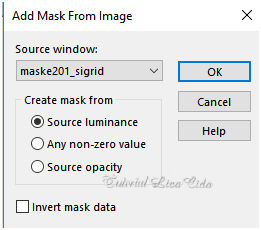
Layers → Merge → Merge Group.
7_.
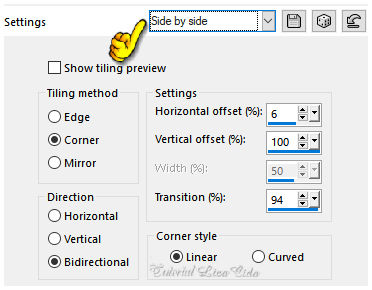
Effects → Image Effects → Seamless Tiling — Side by side.
Com a ferramenta Eraser (Size: 200), apague o efeito superior da mask, deixando como no modelo.
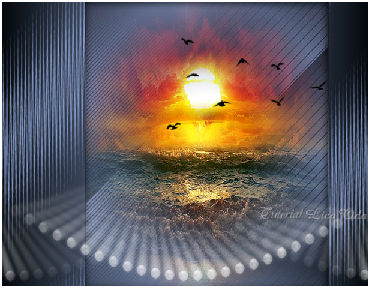
Adjust → Sharpness → Sharpen More.
8_.
Layers → New Raster Layer (Raster 4).
Rode o script circulo1:
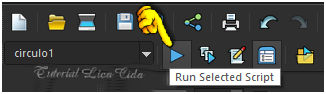
Procure o script circulo1 e clique em Run Selected Script.
Caso o script não rode, o efeito segue anexado no material.
Layers → Duplicate.
9_.
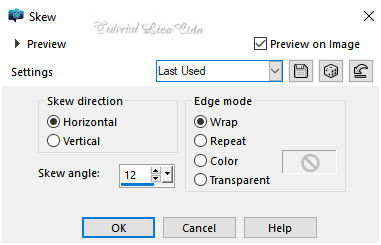
Effects → Geometric Effects → Skew.
10_.
Plugin MuRa's Meister → Copies.
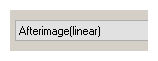
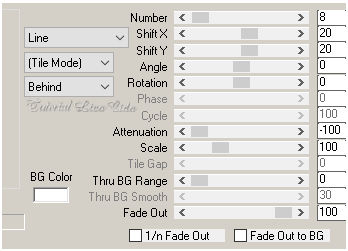
Layers → Merge → Merge Down.
Effects → 3D Effects → Drop Shadow: 3 / 3 / 85 / 3,00 — Color: #000000.
11_.
Ative a Raster 1.
Effects → Texture Effects → Texture.
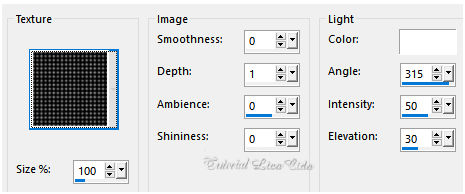
Layers → Duplicate.
12_.
Plugin Nik Software → Color Efex Pro 3.0 → Bi-Color Filters.
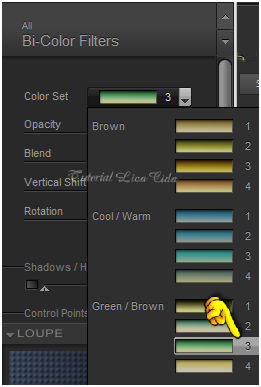
13_.
Effects → Illumination Effects → Lights → Preset_Lights_intuition.
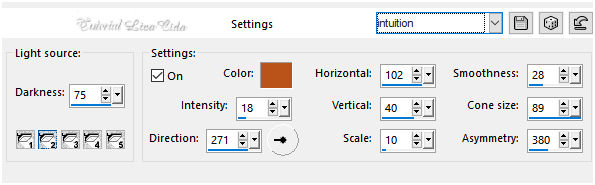
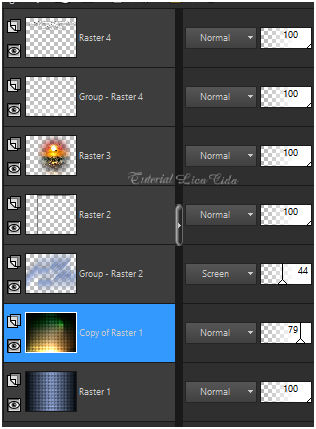
Altere os Blend Modes e a Opacity das layers.
14_.
Ative a layer superior (Raster 4).
Edit → Copy no tube 2689 - woman - LB TUBES
Edit → Paste As New Layer.
Posicione.
Opcional: use o decolc1.
Image → Add Borders: 4 px, Symmetric marcado — Color: #05090c (cor do Foreground).
Aplique a marca-d'água.
Assine e salve.
Espero que gostem.
Aparecida / LicaCida, abril de 2018.
Rio de Janeiro - Brasil.

VOLTAR
Copyright ©2026 - Web Design - Naise Minas
|


