|
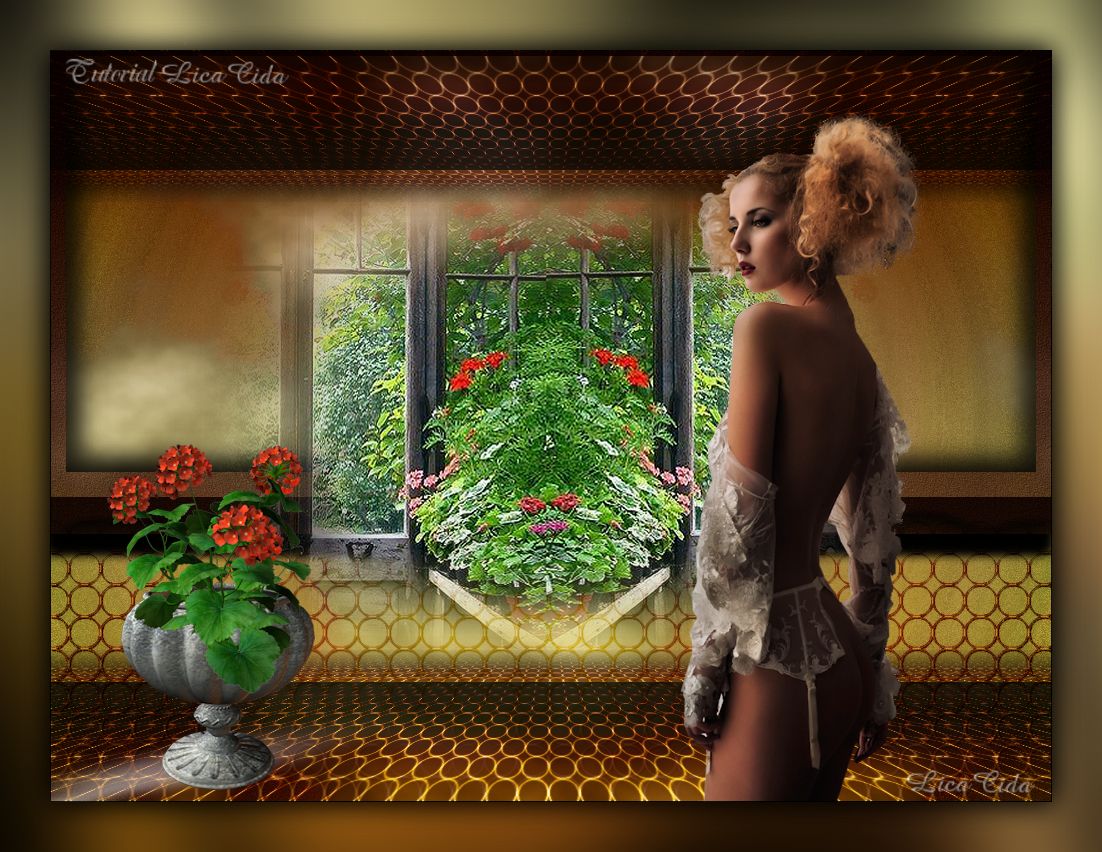
Innocence
DEDICATÓRIA
Marjo, parabéns! Setembro... nosso mês! Segue meu carinho: o tutorial é dedicado a você!
TRADUÇÕES

MATERIAL

Tubes: 3154-luzcristina
tube1933_mulher_mara_pontes
R11 - Garden Design 2011 - Flower - 071
R11 - Garden Design 2011 - Props - 005
Marca-d'água.
Efeitos do PSP.
Versão usada: PSP X6.
PLUGINS
Plugin FM Tile Tools → Blend Emboss
Plugin Andromeda → Designs
Plugin AlphaWorks → i-Photo BlackOut
Plugin MuRa's Meister → Perspective Tiling
Plugin Blur → Radial Blur
Plugin &<Background Designers IV>
Plugin Nik Software → Color Efex Pro 3.0 → Bi-Color Filters
TUTORIAL

|
Esta seta marca sua linha
Clique e arraste para movê-la
|
|
1_.
Abra uma nova imagem transparente de 1000 x 750 px.
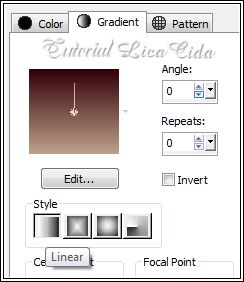
Pinte com o gradiente formado pelas cores #bda089 e #320008.
Configure: Style: Linear — Angle: 0 — Repeats: 0 — Invert desmarcado.
2_.
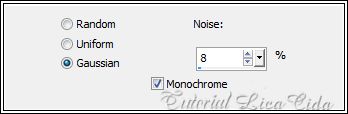
Adjust → Add/Remove Noise → Add Noise.
3_.
Plugin FM Tile Tools → Blend Emboss.
4_.
Tecle a letra S e ative a Custom Selection.
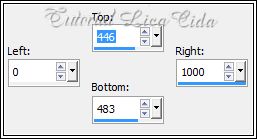
Selections → Promote Selection to Layer.
5_.
Effects → 3D Effects → Drop Shadow: 18 / -2 / 72 / 16,39 — Color: #000000.
Selections → Invert.
6_.
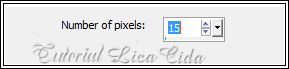
Selections → Modify → Contract.
Ative a Raster 1.
Edit → Clear.
Selections → Select None.
7_.
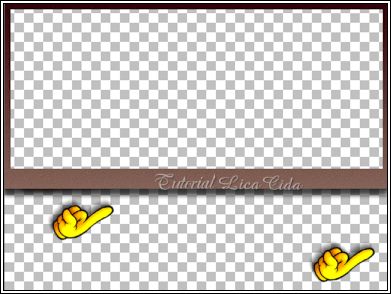
Apague cuidadosamente, como no print, com a ferramenta Eraser (Size: 50).
8_.
Tecle a letra S e ative a Custom Selection.
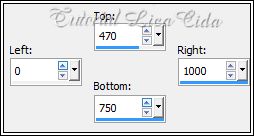
Layers → New Raster Layer.
Preencha com o mesmo gradiente formado no item 1.
Layers → Arrange → Move Down.
Selections → Select None.
9_.
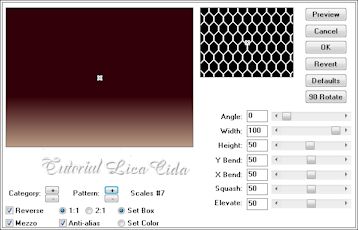
Plugin Andromeda → Designs.
Layers → Duplicate.
10_.
Plugin MuRa's Meister → Perspective Tiling.
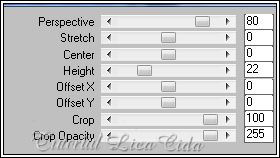
Com a ferramenta Magic Wand — Feather: 50, clique na parte transparente.
Veja a configuração:

Tecle Delete (cinco vezes).
Selections → Select None.
Layers → Duplicate.
Image → Flip.
Layers → Merge → Merge Down.
11_.
Ative a Raster 2.
Plugin AlphaWorks → i-Photo BlackOut.
Layers → Duplicate.
Layers → Merge → Merge Down.
12_.
Effects → 3D Effects → Drop Shadow: 1 / 1 / 100 / 1,00 — Color: #000000.
LAYERS
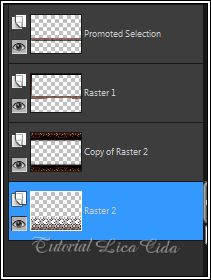
13_.
Ative a layer Promoted Selection.
Edit → Copy no tube 3154-luzcristina
Edit → Paste As New Layer.
Aplique a mask 20-20, se o tube usado deixar marca nas laterais.
14_.
Effects → Distortion Effects → Punch — Strength: 50.
15_.
Layers → New Raster Layer.
Layers → Arrange → Send to Bottom.
Pinte com o mesmo gradiente formado no item 1.
16_.
Selections → Select All.
O tube deverá estar na memória (Edit → Copy no tube 3154-luzcristina).
Edit → Paste Into Selection.
Selections → Select None.
Effects → Image Effects → Seamless Tiling: Default.
17_.
Plugin Blur → Radial Blur.
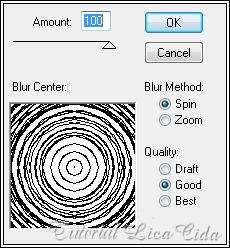
18_.
Plugin &<Background Designers IV>.
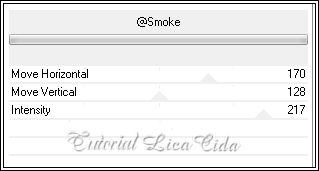
19_.
Plugin Nik Software → Color Efex Pro 3.0 → Bi-Color Filters — Color Set: Brown 1.
Use de acordo com as cores usadas.
20_.
Ative a Raster 1.
Effects → Image Effects → Offset: H: 0 / V: 10 — Custom e Transparent marcados.
Effects → 3D Effects → Drop Shadow: 0 / 0 / 80 / 40,00 — Color: #000000.
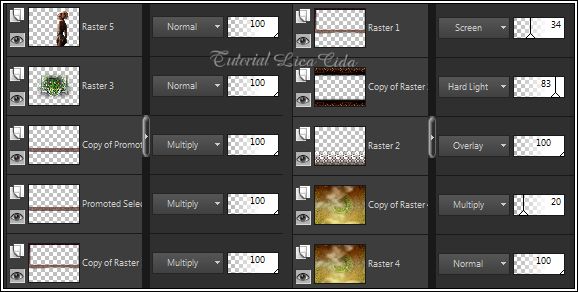
Altere os Blend Modes e a Opacity das layers a gosto.
21_.
Edit → Copy no tube tube1933_mulher_mara_pontes
Edit → Paste As New Layer.
Redimensione e posicione.
Formate e decore seu top a gosto.
Aplique a marca-d'água.
Assine e salve.
Espero que gostem.
Aparecida / LicaCida, setembro de 2014.
Rio de Janeiro - Brasil.

VOLTAR
Copyright ©2026 - Web Design - Naise Minas
|

