|
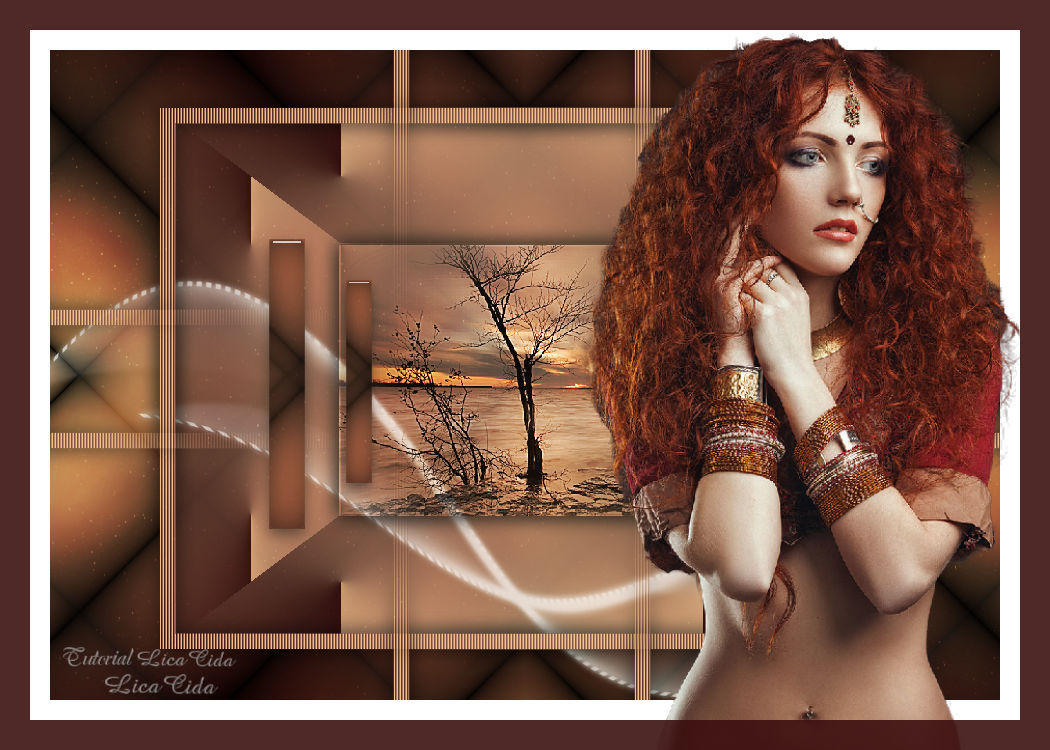
Illusion
TRADUÇÕES

MATERIAL

Canal Alfa: alphachanel --
Seleções #1, #2 e #3 guardadas no Alpha Channel da imagem.
Preset: katrina (Eye Candy 5: Impact → Glass) --
Dê um duplo clique sobre ele para importá-lo.
Tubes: tube3087_mulher_mara_pontes
1250147527_paysages
Deco: decolc
Marca-d'água.
Efeitos do PSP.
Versão usada: PSP X8.
PLUGINS
Plugin MuRa's Seamless → Stripe of Cylinder
Plugin Simple → Top Left Mirror
Plugin &<Bkg Designer sf10 III>
Plugin Alf's Border FX → Mirror Bevel
Plugin Alien Skin Eye Candy 5: Impact → Glass
Plugin Flaming Pear → Glitterato
Plugin Richard Rosenman → Solid Border
TUTORIAL
|
Esta seta marca sua linha
Clique e arraste para movê-la
|
|
1_.
Abra a imagem alphachanel, faça uma cópia e feche (minimize) a original.
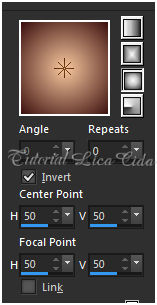
Pinte com o gradiente formado pelas cores #3b100f e #f8c79e.
Configure: Style: Sunburst — Repeats: 0 — Invert marcado — Center Point: H: 50 / V: 50 — Focal Point: H: 50 / V: 50.
2_.
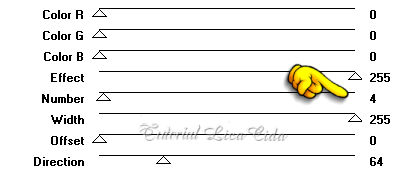
Plugin MuRa's Seamless → Stripe of Cylinder.
3_.
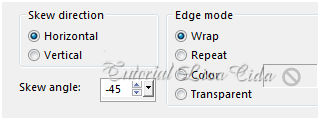
Effects → Geometric Effects → Skew.
Layers → Duplicate.
Image → Mirror.
Opacity: 50% — Blend Mode: Overlay.
Layers → Merge → Merge Down.
Effects → Image Effects → Seamless Tiling: Side by side.
4_.
Plugin Simple → Top Left Mirror.
5_.
Selections → Load/Save Selection → Load Selection From Alpha Channel → Seleção #1.
Layers → New Raster Layer.
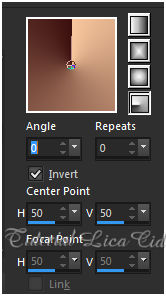
Pinte com o gradiente formado pelas cores acima.
Configure: Style: Radial — Angle: 0 — Repeats: 0 — Invert marcado — Center Point: H: 50 / V: 50.
6_.
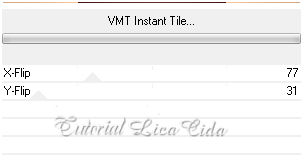
Plugin &<Bkg Designer sf10 III>.
7_.
Plugin Alf's Border FX → Mirror Bevel: 128 / 64.
8_.
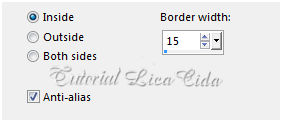
Selections → Modify → Select Selection Borders.
Layers → New Raster Layer.
Pinte com o gradiente formado no item 1.
9_.
Effects → Texture Effects → Blinds — Color: a do Background.
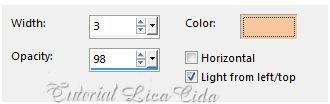
Effects → 3D Effects → Drop Shadow: 0 / 0 / 60 / 30,00 — Color: #000000.
Selections → Select None.
Layers → Duplicate.
Effects → Image Effects → Seamless Tiling: Default.
10_.
Selections → Load/Save Selection → Load Selection From Alpha Channel → Seleção #2.
Edit → Copy no tube 1250147527_paysages
Edit → Paste As New Layer.
Reduza em proporção, Selections → Invert, Delete, Selections → Invert.
Effects → 3D Effects → Drop Shadow: 0 / 0 / 60 / 30,00 — Color: #000000.
Selections → Select None.
Adjust → Sharpness → Sharpen More.
11_.
Ative a Raster 1.
Selections → Load/Save Selection → Load Selection From Alpha Channel → Seleção #3.
Selections → Promote Selection to Layer.
12_.
Plugin Alien Skin Eye Candy 5: Impact → Glass — Settings: katrina.
Layers → Arrange → Bring to Top.
Selections → Select None.
Layers → Duplicate.
Image → Resize: 70% — Resize all layers desmarcado.
Layers → Merge → Merge Down.
13_.
Ative a Raster 1.
Layers → New Raster Layer.
Plugin Flaming Pear → Glitterato.
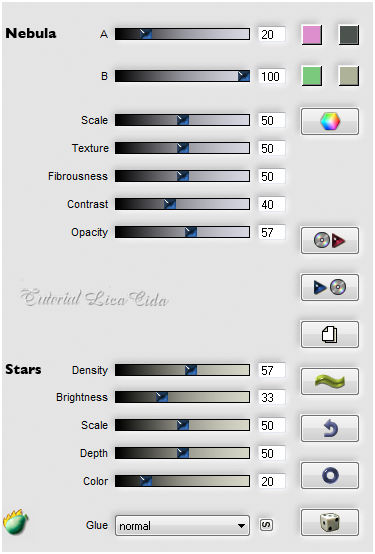
Blend Mode: Overlay — Opacity: 40%.
Layers → Duplicate.
Layers → Arrange → Bring to Top.
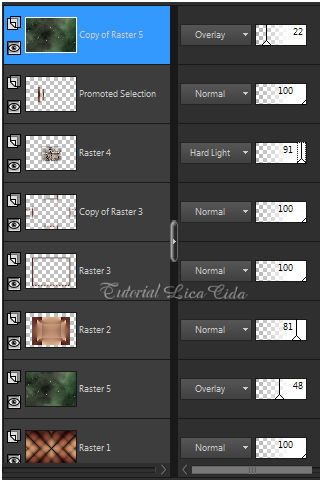
Mude a Opacity para 22%.
Altere os Blend Modes e a Opacity das layers.
14_.
Edit → Copy no decolc
Edit → Paste As New Layer.
Use acima da Raster 2 — Opacity: entre 70% e 75%.
15_.
Image → Add Borders: 50 px, Symmetric marcado — Color: #ffffff.
16_.
Edit → Copy no tube tube3087_mulher_mara_pontes
Edit → Paste As New Layer.
Posicione.
Layers → Merge → Merge All (Flatten).
17_.
Plugin Richard Rosenman → Solid Border.
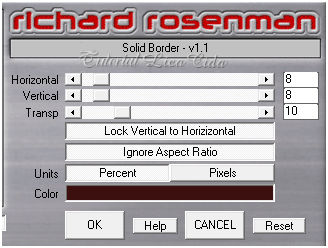
Aplique a marca-d'água.
Assine e salve.
Espero que gostem.
Aparecida / LicaCida, janeiro de 2017.
Rio de Janeiro - Brasil.

VOLTAR
Copyright ©2026 - Web Design - Naise Minas
|

