|
Hope TRADUÇÕES
MATERIAL
Tubes: castorke_tube_dames_219_032014_png
Fundo: fundo com formas abstratas
Elementos: aves element (27)
Mask: 002 gradientedworisch Deco: decohope
Marca-d'água.
Versão usada: PSP X8.
PLUGINS
Plugin Galaxy → Instant Mirror
TUTORIAL
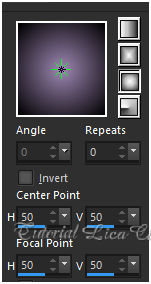
1_. Abra uma nova imagem transparente de 1000 x 700 px. Pinte com o gradiente formado pelas cores #9e87b3 (Foreground) e #000000 (Background). Configure: Style: Sunburst — Repeats: 0 — Invert desmarcado — Center Point: H: 50 / V: 50 — Focal Point: H: 50 / V: 50.
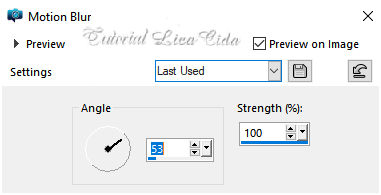
2_. Layers → New Raster Layer. Selections → Select All. Edit → Copy no tube castorke_tube_dames_219_032014_png Edit → Paste Into Selection. Selections → Select None. Effects → Image Effects → Seamless Tiling — Default — Transition: 100%. Adjust → Blur → Motion Blur (aplique duas vezes).
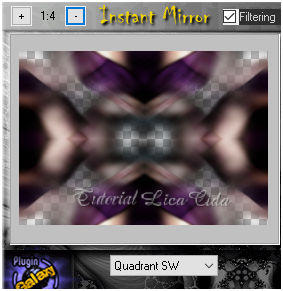
Layers → Duplicate. Image → Mirror → Mirror Horizontal. Blend Mode: Soft Light. Layers → Merge → Merge Down. 3_. Plugin Galaxy → Instant Mirror.
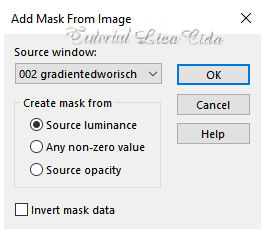
Layers → Duplicate. 4_. Layers → New Raster Layer. Selections → Select All. Edit → Copy no fundo com formas abstratas Edit → Paste Into Selection. Selections → Select None. Blend Mode: Screen. Effects → User Defined Filter → Emboss_3. 5_. Layers → New Mask Layer → From Image: 002 gradientedworisch. Layers → Duplicate.
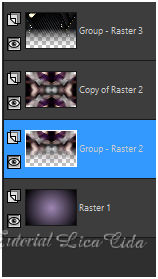
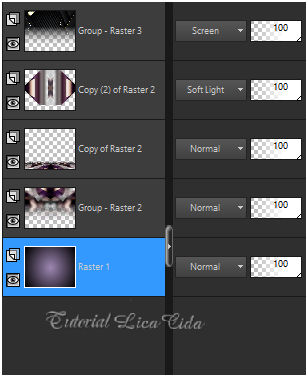
Layers → Merge → Merge Group. Aplique a mesma mask na Raster 2. LAYERS
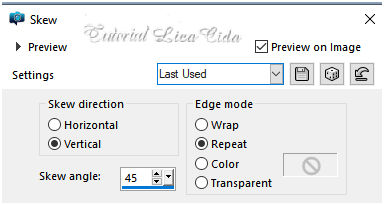
6_. Ative a Copy of Raster 2. Layers → Duplicate. Selections → Select All. Selections → Modify → Contract: 60 px. Pressione a tecla Delete. Selections → Select None. 7_. Effects → Geometric Effects → Skew.
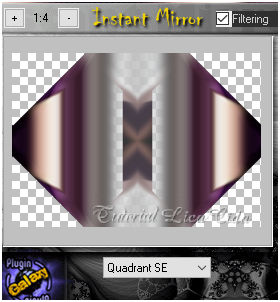
Layers → Duplicate. Image → Mirror → Mirror Horizontal. Layers → Merge → Merge Down. Layers → Duplicate. Image → Mirror → Mirror Vertical. Layers → Merge → Merge Down. 8_. Plugin Galaxy → Instant Mirror.
Blend Mode: Soft Light. 9_. Image → Canvas Size: 1000 x 800 — Bottom: 100. Ative a Copy of Raster 2. 10_. Plugin MuRa's Meister → Perspective Tiling.
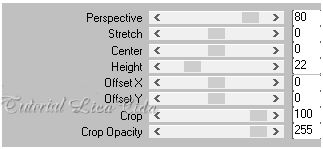
Com a ferramenta Magic Wand — Feather: 60, clique na parte transparente e pressione a tecla Delete (quatro ou cinco vezes). Selections → Select None. Effects → User Defined Filter → Emboss_3. 11_. Ative a Raster 1. Com a ferramenta Pick Tool (Default), traga o gradiente até o final do top. Altere os Blend Modes e a Opacity das layers.
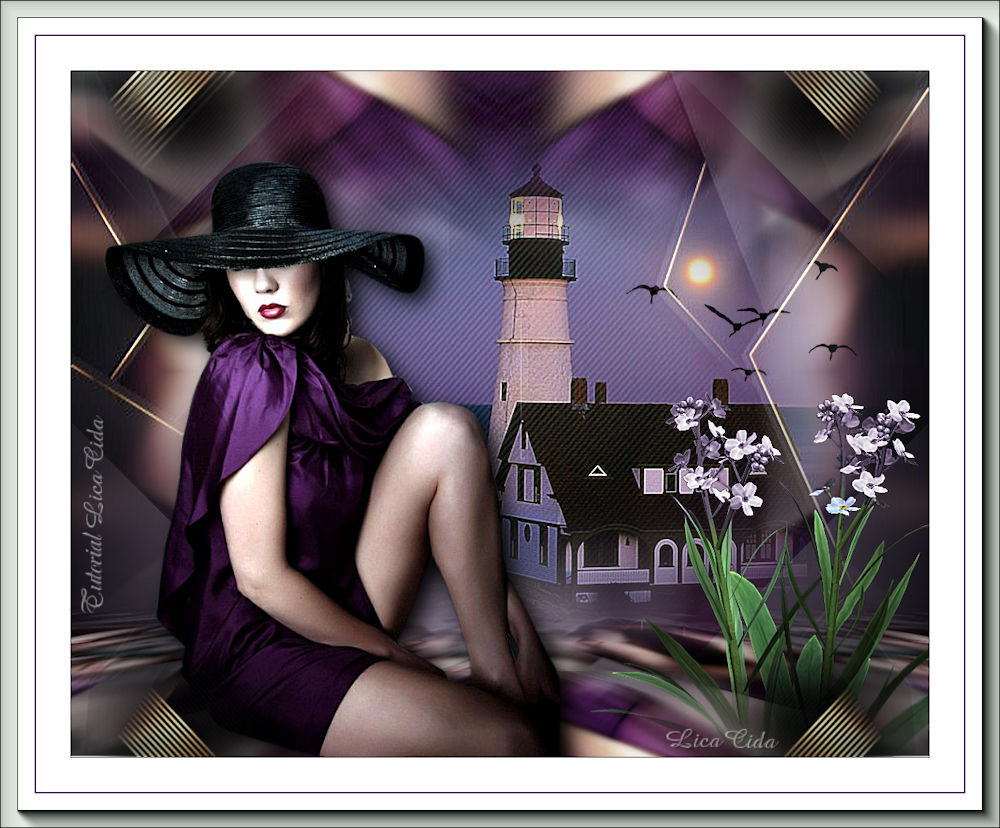
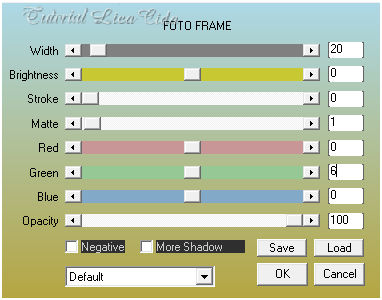
12_. Ative a layer superior. Edit → Copy no tube cas_tube_landschap_33_24082011 Edit → Paste As New Layer. Adjust → Sharpness → Sharpen More. Opcional: Plugin AAA Filters → Custom → Landscape (Default). Layers → Arrange → Move Down. 13_. Ative novamente a layer superior. Edit → Copy no decohope Edit → Paste As New Layer. 14_. Edit → Copy no tube castorke_tube_dames_219_032014_png Edit → Paste As New Layer. Adjust → Sharpness → Sharpen More. Posicione. 15_. Edit → Copy nos elementos aves element (27) e Stefairy_VictorianRomance_elements28 Edit → Paste As New Layer. Opcional: posicione a gosto. Image → Add Borders: 1 px, Symmetric marcado — Color: #000000. Image → Add Borders: 40 px, Symmetric marcado — Color: #ffffff. Image → Add Borders: 1 px, Symmetric marcado — Color: #000000. Image → Add Borders: 1 px, Symmetric marcado — Color: #9e87b3. Image → Add Borders: 40 px, Symmetric marcado — Color: #ffffff. 16_. Plugin AAA Frames → Foto Frame.
Image → Resize: Width 1000 px. Aplique a marca-d'água. Assine e salve. Espero que gostem.
Aparecida / LicaCida, maio de 2020.
Copyright ©2026 - Web Design - Naise Minas |