|
Grazielli TRADUÇÕES
MATERIAL
Preset: Illumination → Lights → Preset_Lights_3bllc --
Mask: !!!!.mask.ket-fadesuave
Tubes: 4234-luzcristina
Decoração: deco1lc
Marca-d'água.
Versão usada: PSP X8.
PLUGINS
Plugin Flaming Pear → Flexify 2
TUTORIAL
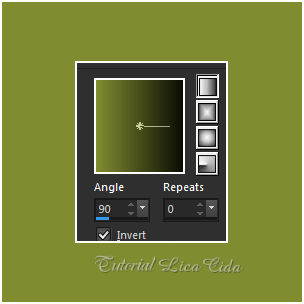
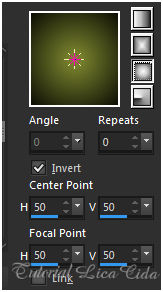
1_. Abra uma nova imagem transparente de 1000 x 800 px. Pinte com o gradiente formado pelas cores #0d0e05 e #818c31. Configure: Style: Linear — Angle: 90 — Repeats: 0 — Invert marcado.
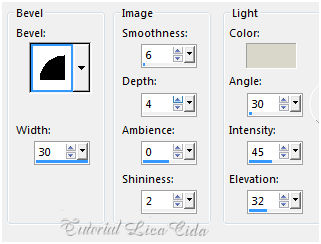
2_. Effects → Geometric Effects → Perspective - Horizontal: -98 — Transparent. Repita: Effects → Geometric Effects → Perspective - Horizontal: 98 — Transparent. 3_. Effects → 3D Effects → Inner Bevel.
4_. Effects → Distortion Effects → Warp.
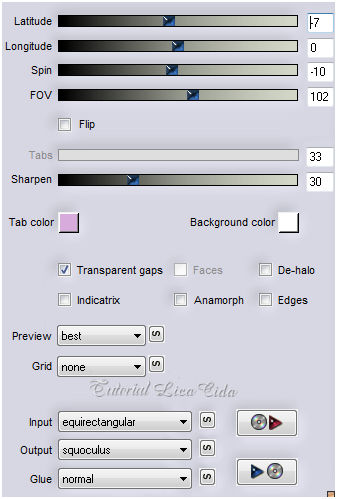
5_. Plugin Flaming Pear → Flexify 2.
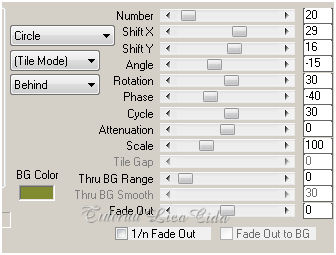
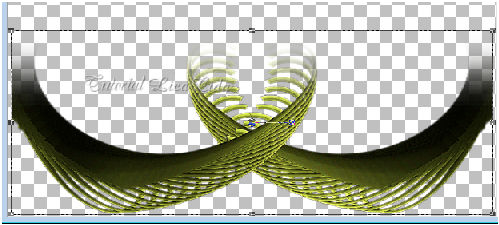
6_. Plugin MuRa's Meister → Copies — Cards.
Layers → Duplicate. Image → Mirror → Mirror Horizontal. Layers → Merge → Merge Down. Effects → Edge Effects → Enhance More. 7_. Plugin Graphics Plus → Cross Shadow → Default. 8_. Layers → New Mask Layer → From Image: !!!!.mask.ket-fadesuave. Duplique a mask duas vezes. Layers → Merge → Merge Group. Image → Mirror → Mirror Vertical. Image → Resize: 80% — Resize all layers desmarcado. Objects → Align → Bottom (final do top). Com a ferramenta Pick Tool, arrume o efeito nas laterais.
Effects → Geometric Effects → Spherize — Strength: 100 — Shape: Ellipse. 9_. Layers → New Raster Layer. Layers → Arrange → Send to Bottom. Pinte com o gradiente formado pelas cores acima. Configure: Style: Sunburst — Repeats: 0 — Invert marcado — Center Point: H: 50 / V: 50 — Focal Point: H: 50 / V: 50.
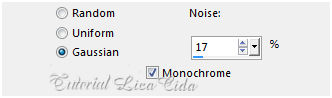
Repita o item 7: Plugin Graphics Plus → Cross Shadow → Default. Adjust → Add/Remove Noise → Add Noise.
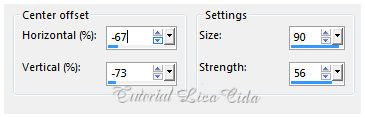
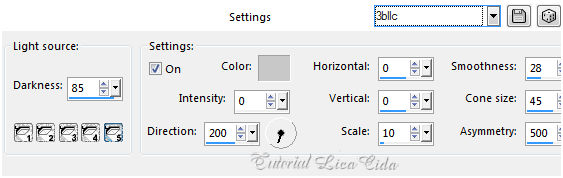
Plugin Graphics Plus → Emboss — Default. 10_. Selections → Select All. Edit → Copy no tube 4234-luzcristina Edit → Paste Into Selection. Selections → Select None. Plugin AAA Filters → Custom Landscape. 11_. Effects → Illumination Effects → Lights → Preset_Lights_3bllc.
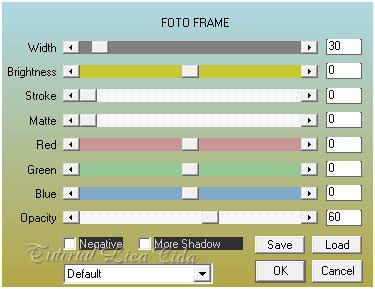
12_. Plugin AAA Frames → Foto Frame.
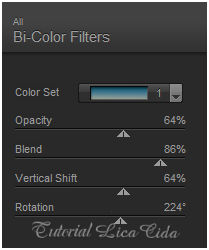
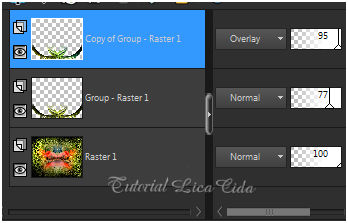
13_. Duplique a Group - Raster 1. Plugin Nik Software → Color Efex Pro 3.0 → Bi-Color Filters — Color Set: Cool/Warm 1.
Altere os Blend Modes e a Opacity das layers (use a gosto).
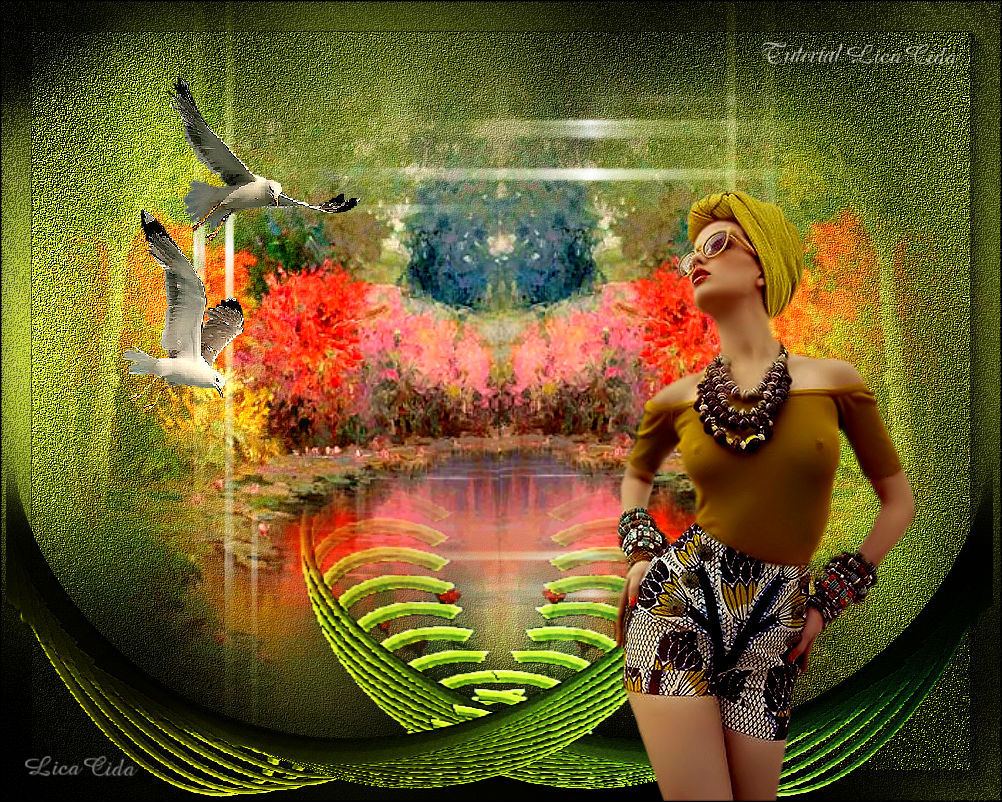
14_. Edit → Copy no tube 4292-luzcristina Edit → Paste As New Layer. Posicione de acordo. Edit → Copy no tube MR_Shorebirds Edit → Paste As New Layer. Redimensione e posicione a gosto. Edit → Copy no deco1lc Edit → Paste As New Layer. Use acima da Raster 1. Image → Add Borders: 1 px, Symmetric marcado — Color: #000000. Aplique a marca-d'água. Assine e salve. Espero que gostem. Obrigada!
Aparecida / LicaCida, julho de 2016.
Copyright ©2026 - Web Design - Naise Minas |