|
Glow
TRADUÇÕES

MATERIAL

Preset: Illumination → Lights → Preset_Lights_IRELANDLIGHT (DW) --
Salvar na pasta Presets do PSP.
Script: clemence --
Salvar na pasta Scripts Restricted do PSP.
Back: free_back_ildiko (4)
Mask: LF-Mask-91
Tubes: 2543 - woman - LB TUBES
Deco_Phylo_duo_CibiBijoux
Decos: @ildiko_create_text_017
@ildiko_create_deco_free_008
@ildiko_create_deco_free_006
Ildiko_Deco_free_009
waves1-sa_1
Marca-d'água.
Efeitos do PSP.
Versão usada: PSP X8.
PLUGINS
Plugin VM Toolbox → Trimosaic
Plugin Mehdi → Fur
Plugin FM Tile Tools → Saturation Emboss
Plugin Carolaine and Sensibility → CS-LDots
Plugin AFS Import → sqborder2
Plugin Transparency → Eliminate Black
Plugin MuRa's Meister → Perspective Tiling
Plugin AAA Filters → Custom
TUTORIAL
|
Esta seta marca sua linha
Clique e arraste para movê-la
|
|
1_.
Abra uma nova imagem transparente de 950 x 650 px.
Selections → Select All.
Edit → Copy no free_back_ildiko (4)
Edit → Paste Into Selection.
Selections → Select None.
Layers → Duplicate.
2_.
Plugin VM Toolbox → Trimosaic: 110 / 110.
Effects → Reflection Effects → Rotating Mirror: H: 0 / R: 180 — Repeat.
3_.
Plugin Mehdi → Fur: 50 / 20.
4_.
Plugin FM Tile Tools → Saturation Emboss — Default.
Effects → User Defined Filter → Emboss_3.
Retire duas cores do quadro formado: use a mais clara no Foreground (#987d29) e a mais escura no Background (#544261).
5_.
Layers → New Raster Layer.
Pinte com a cor mais escura: #544460.
Effects → Texture Effects → Blinds — Color: #000000.
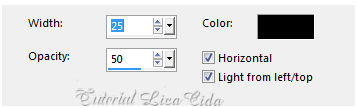
Effects → Geometric Effects → Skew: Vertical — Angle: 45 — Repeat.
6_.
Plugin Carolaine and Sensibility → CS-LDots — Default (50 / 3 / 2).
Effects → Reflection Effects → Rotating Mirror: H: 0 / R: 180 — Repeat.
Layers → Duplicate.
Image → Mirror → Mirror Vertical.
Opacity: 50%.
Layers → Merge → Merge Down.
Effects → User Defined Filter → Emboss_3.
Layers → Duplicate.
7_.
Layers → New Mask Layer → From Image: LF-Mask-91.
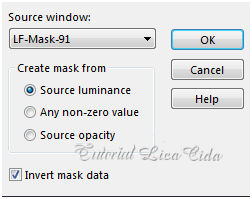
Layers → Merge → Merge Group.
Effects → 3D Effects → Drop Shadow: -27 / -27 / 100 / 0 — Color: #000000.
Blend Mode: Multiply.
Effects → User Defined Filter → Emboss_3.
8_.
Ative a Raster 2.
Plugin AFS Import → sqborder2.
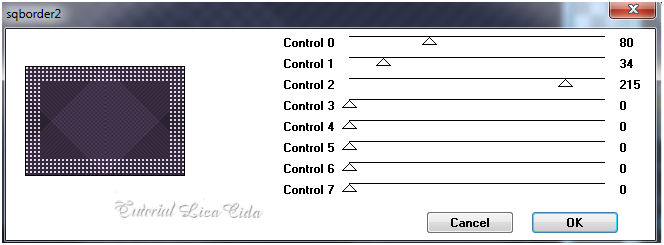
Plugin Transparency → Eliminate Black.
9_.
Ative a ferramenta Selection Tool (tecla S) → Custom Selection.
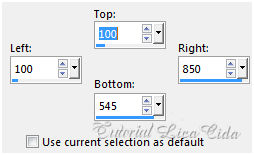
Selections → Promote Selection to Layer.
Effects → 3D Effects → Drop Shadow: -27 / -27 / 100 / 0 — Color: #544460 (a mais escura).
Blend Mode: Multiply.
Effects → User Defined Filter → Emboss_3.
Selections → Select None.
10_.
Ative a Raster 1.
Image → Canvas Size: 950 x 750 — Bottom: 100.
Edit → Copy.
Com a ferramenta Magic Wand (Default), selecione a parte transparente.
11_.
Layers → New Raster Layer.
Edit → Paste Into Selection.
Plugin MuRa's Meister → Perspective Tiling — Default.
Effects → User Defined Filter → Emboss_3.
Selections → Select None.
12_.
Layers → New Raster Layer.
Layers → Arrange → Send to Bottom.
Pinte com o gradiente formado pelas cores escolhidas acima.
Configure: Style: Sunburst — Repeats: 0 — Invert desmarcado — Center Point: H: 50 / V: 50 — Focal Point: H: 50 / V: 50.
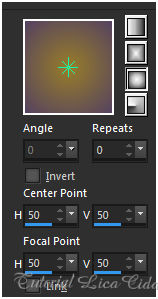
13_.
Ative a Copy of Raster 1.
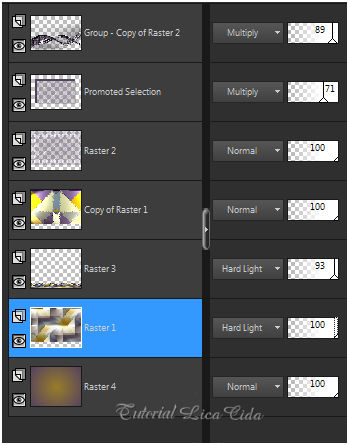
Effects → Illumination Effects → Lights → Preset_Lights_IRELANDLIGHT.
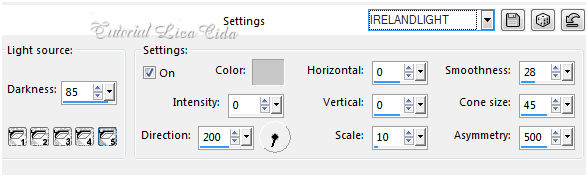
Altere os Blend Modes e a Opacity das layers.
14_.
Edit → Copy no tube 2543 - woman - LB TUBES
Edit → Paste As New Layer.
Posicione.
15_.
Edit → Copy no Deco_Phylo_duo_CibiBijoux
Edit → Paste As New Layer.
Redimensione e posicione.
16_.
Edit → Copy nos decos do material
Edit → Paste As New Layer.
Use a gosto.
17_.
Rode o script clemence usando cores a gosto: procure o script "clemence" e clique em Run Selected Script para executá-lo.
Ou use uma borda a gosto.
18_.
Plugin AAA Filters → Custom — Landscape.
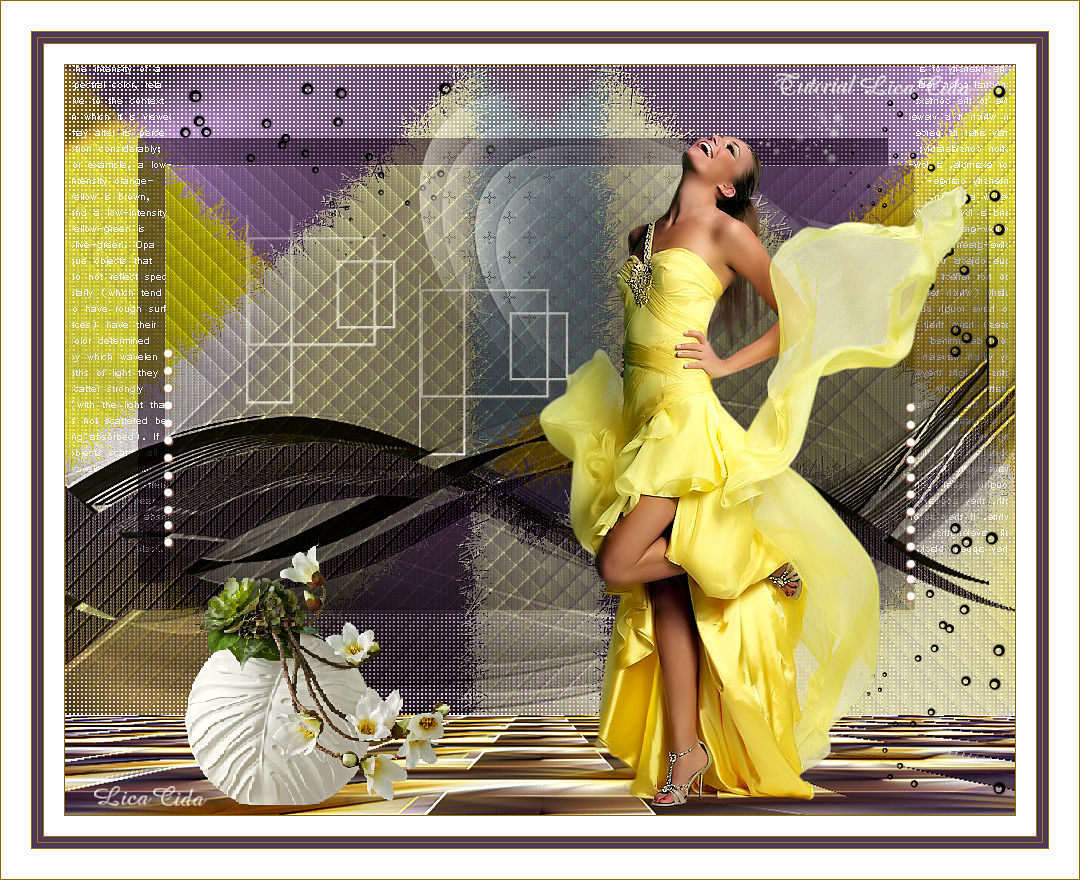
Aplique a marca-d'água.
Assine e salve.
Espero que gostem.
Aparecida / LicaCida, janeiro de 2017.
Rio de Janeiro - Brasil.


VOLTAR
Copyright ©2026 - Web Design - Naise Minas
|

