|
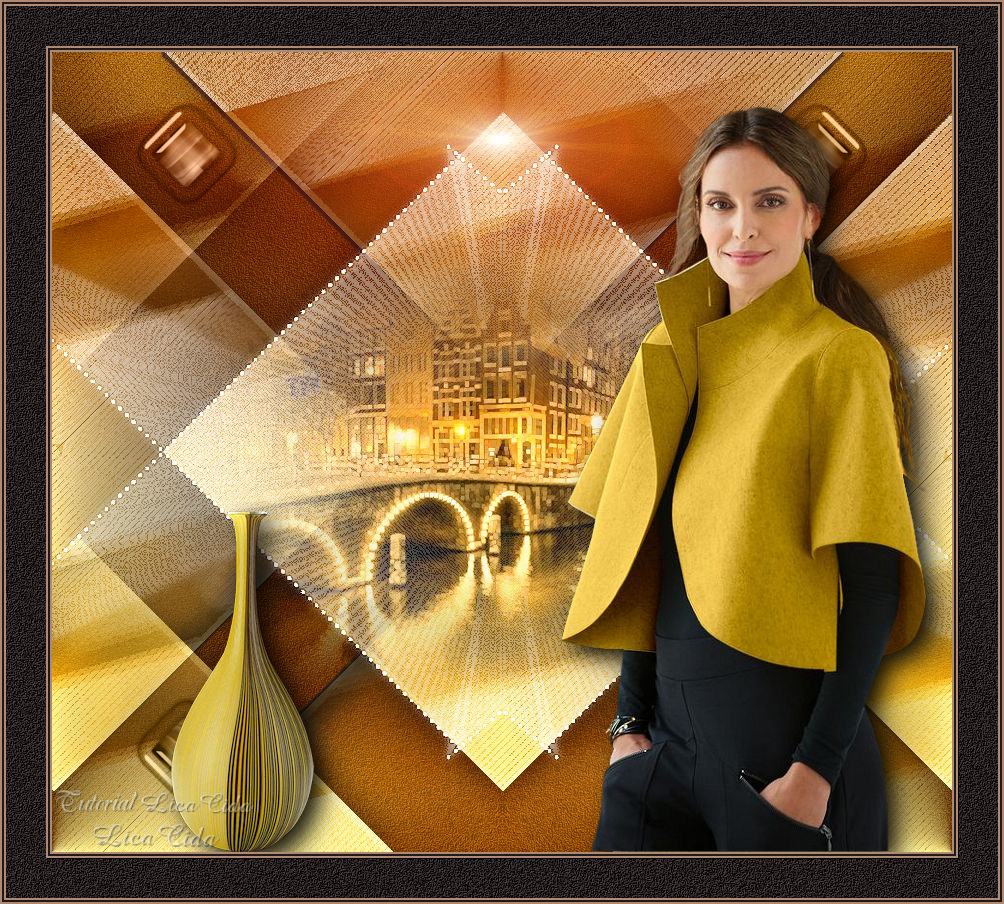
Flare
TRADUÇÕES

MATERIAL

Tubes: Jeanne_Woman_28_10_2020
3606-luzcristina
Decos: Jeanne_Deko_Gele_Vase_05_10_2018
Ildiko_create_deco (138)
decoflare1_lc
decoflare2_lc
Plugin: Knoll Light Factory 2
Marca-d'água.
Efeitos do PSP.
Versão usada: PSP X9.
PLUGINS
Plugin FM Tile Tools → Blend Emboss
Plugin Filters Unlimited 2 → Andrew's Filters 3 → Radial Shoved
Plugin Simple → Diamonds
Plugin Nik Software → Color Efex Pro 3.0 → Bi-Color Filters
Plugin Nik Software → Color Efex Pro 3.0 → Bi-Color User Defined
Plugin Galaxy → Instant Mirror
Plugin Mehdi → Edges FX
Opcional: Plugin Knoll Light Factory → Lens Flare Pro
Caso não conheça o plugin: instale a primeira pasta (Knoll Light Factory 2) nos plugins não executáveis.
Pegue o registro (registratienummer.txt), copie, minimize e instale (Knoll LF2.0.1 Photoshop Only.exe).
Feche o PSP; ao abrir novamente, ele vai reconhecer o plugin. Espero ter ajudado.
TUTORIAL
|
Esta seta marca sua linha
Clique e arraste para movê-la
|
|
1_.
Abra uma nova imagem de 900 x 800 px.
Pinte com o gradiente formado pelas cores #20191a (Foreground) e #b08972 (Background).
Configure: Style: Linear — Angle: 0 — Repeats: 1 — Invert desmarcado.
2_.
Selections → Select All.
Edit → Copy no 3606-luzcristina
Edit → Paste Into Selection.
Selections → Select None.
Effects → Image Effects → Seamless Tiling: Default.
Adjust → Blur → Gaussian Blur — Radius: 38,00.
3_.
Adjust → Add/Remove Noise → Add Noise: 15% — Uniform e Monochrome marcados.
Plugin FM Tile Tools → Blend Emboss.
Layers → Duplicate.
Image → Resize: 80% — Resize all layers desmarcado.
Com a ferramenta Magic Wand (Default), selecione a parte externa da imagem.
Selections → Invert.
Layers → New Raster Layer.
4_.
Edit → Copy no Ildiko_create_deco (138)
Edit → Paste Into Selection.
Blend Mode: Luminance.
Selections → Select None.
Layers → Merge → Merge Down.
5_.
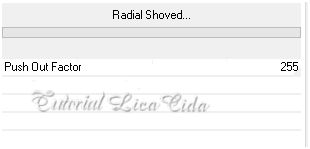
Plugin Filters Unlimited 2 → Andrew's Filters 3 → Radial Shoved: 255.
6_.
Plugin Simple → Diamonds.
7_.
Com a ferramenta Magic Wand (Default), selecione a parte interna do efeito.
Ative a layer inferior (Raster 1).
Selections → Float.
Selections → Defloat.
Effects → 3D Effects → Drop Shadow: -2 / -22 / 80 / 30,00 — Color: #000000.
Repita com os valores positivos: Vertical: 2 / Horizontal: 22.
Selections → Select None.
8_.
Ative a layer superior.
Layers → Duplicate.
Ative a layer duplicada.
9_.
Plugin Nik Software → Color Efex Pro 3.0 → Bi-Color Filters — Color Set: Brown 1 — Default.
10_.
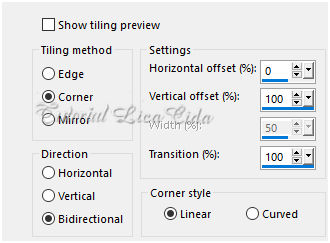
Effects → Image Effects → Seamless Tiling.
Effects → 3D Effects → Drop Shadow: 0 / 0 / 60 / 60,00 — Color: #000000.
11_.
Ative a Raster 1.
Plugin Nik Software → Color Efex Pro 3.0 → Bi-Color User Defined — Default.
Layers → Duplicate.
12_.
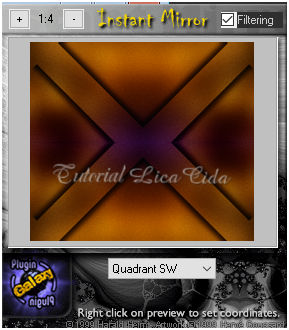
Plugin Galaxy → Instant Mirror.
13_.
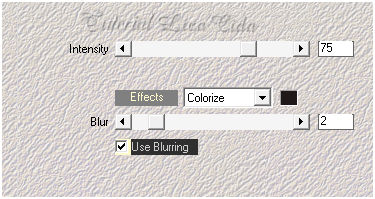
Plugin Mehdi → Edges FX — Color: #000000 (use o efeito também na Raster 1).
14_.
Edit → Copy no 3606-luzcristina
Edit → Paste As New Layer.
Layers → Arrange → Bring to Top.
Adjust → Sharpness → Sharpen.
Posicione.
15_.
Edit → Copy no decoflare1_lc
Edit → Paste As New Layer.
Effects → Edge Effects → Enhance.
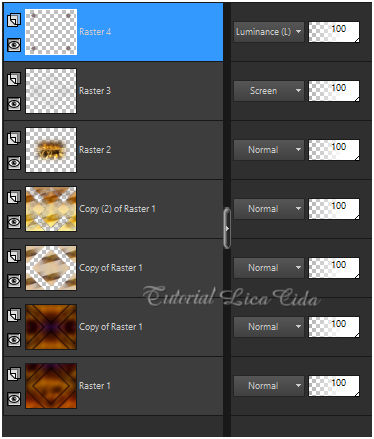
Blend Mode: Screen.
16_.
Edit → Copy no decoflare2_lc
Edit → Paste As New Layer.
Blend Mode: Luminance (L).
Altere os Blend Modes e a Opacity das layers.
17_.
Edit → Copy no Jeanne_Woman_28_10_2020
Edit → Paste As New Layer.
Adjust → Sharpness → Sharpen.
Posicione.
18_.
Edit → Copy no Jeanne_Deko_Gele_Vase_05_10_2018
Edit → Paste As New Layer.
Adjust → Sharpness → Sharpen.
Posicione e redimensione a gosto.
Retire a visibilidade das layers dos tubes (Raster 5 e Raster 6).
Layers → Merge → Merge Visible.
19_.
Opcional: Plugin Knoll Light Factory → Lens Flare Pro.
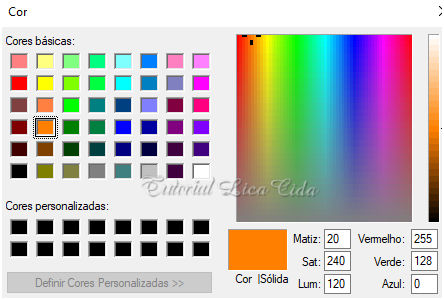
Clique em Color para escolher a cor.
Clique em Flare Style para posicionar o flare.
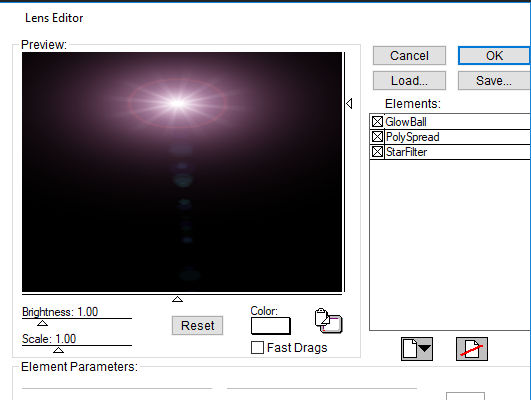
Pouse o mouse sobre o efeito e use onde desejar.
Ative novamente a visibilidade das layers dos tubes (Raster 5 e Raster 6).
20_.
Image → Add Borders: 2 px, Symmetric marcado — Color: cor clara.
Image → Add Borders: 2 px, Symmetric marcado — Color: cor escura.
Image → Add Borders: 2 px, Symmetric marcado — Color: cor clara.
Image → Add Borders: 40 px, Symmetric marcado — Color: cor escura.
Selecione a borda.
Adjust → Add/Remove Noise → Add Noise: 15% — Uniform e Monochrome marcados.
Plugin FM Tile Tools → Blend Emboss.
Image → Add Borders: 2 px, Symmetric marcado — Color: cor clara.
Image → Add Borders: 2 px, Symmetric marcado — Color: cor escura.
Image → Add Borders: 2 px, Symmetric marcado — Color: cor clara.
Aplique a marca-d'água.
Assine e salve.
Espero que gostem.
Obrigada!
Aparecida / LicaCida, abril de 2021.
Rio de Janeiro - Brasil.

VOLTAR
Copyright ©2026 - Web Design - Naise Minas
|


