|
Espera
TRADUÇÕES

MATERIAL

Canal Alfa: Alpha Channel (seleções de Aliciar) --
Não é permitido o uso das seleções em outros tutoriais, sem exceção.
Preset: motionlc (Eye Candy 5: Impact → Motion Trail) --
Dê um duplo clique sobre ele para importá-lo.
Preset: Illumination → Lights → Preset_Lights_palco --
Salvar na pasta Presets do PSP.
Preset: New Adjustment Layer → White Balance → Preset_NewAdjustmentLayerWhiteBalance_alfhalc --
Salvar na pasta Presets do PSP.
Tubes: calguismisted10710
tube2749_mulher_mara_pontes
Arquivos: arquivonuvenslc1
arquivocristal1lc
Marca-d'água.
Efeitos do PSP.
Versão usada: PSP X8.
PLUGINS
Plugin dsb flux → Linear Transmission
Plugin MuRa's Seamless → Shift at Wave
Plugin MuRa's Meister → Copies
Plugin Alien Skin Eye Candy 5: Impact → Motion Trail
Plugin Filter Factory Gallery M → Ambrosia
Plugin Nik Software → Color Efex Pro 3.0 → Bi-Color Filters
Plugin AAA Filters → Custom
TUTORIAL
|
Esta seta marca sua linha
Clique e arraste para movê-la
|
|
1_.
Abra no PSP o Alpha Channel.
Duplique e feche (ou minimize) o original. Trabalhe na cópia.
Pinte com qualquer cor (pintei com um tom escuro, #04080c, para visualizar melhor os efeitos).
2_.
Layers → New Raster Layer.
Selections → Load/Save Selection → Load Selection From Alpha Channel → Selection #1.
Pinte com a cor #ffffff.
3_.
Effects → 3D Effects → Inner Bevel.
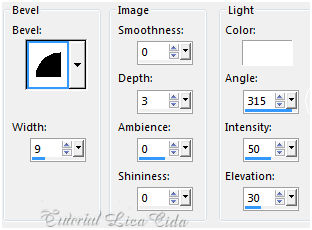
Selections → Select None.
Layers → Duplicate.
Image → Flip.
Layers → Merge → Merge Down.
4_.
Plugin dsb flux → Linear Transmission.
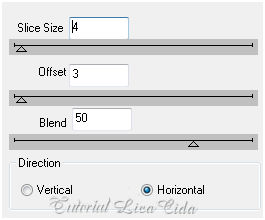
5_.
Effects → Distortion Effects → Polar Coordinates.
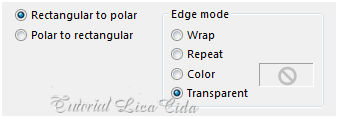
Image → Resize: 80% — Resize all layers desmarcado.
6_.
Plugin MuRa's Seamless → Shift at Wave.
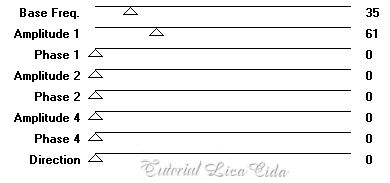
7_.
Effects → Geometric Effects → Circle — Transparent.
Image → Flip.
Effects → 3D Effects → Drop Shadow: 2 / 2 / 50 / 2,00 — Color: #000000.
8_.
Layers → New Raster Layer.
Selections → Load/Save Selection → Load Selection From Alpha Channel → Selection #2.
Pinte com a cor #ffffff.
9_.
Effects → 3D Effects → Inner Bevel (valores iguais aos do item 3).
Selections → Select None.
Layers → Duplicate.
Image → Flip.
Layers → Merge → Merge Down.
10_.
Plugin MuRa's Meister → Copies — Line.
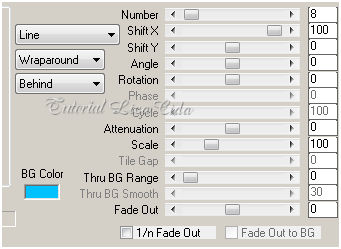
11_.
Effects → Distortion Effects → Polar Coordinates — Polar to rectangular.
Selecione o efeito central e pressione a tecla Delete.
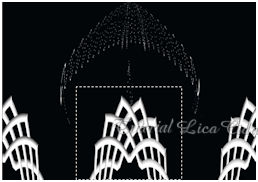
Selections → Select None.
Layers → Duplicate.
Image → Flip.
Layers → Merge → Merge Down.
12_.
Plugin Alien Skin Eye Candy 5: Impact → Motion Trail — Preset: motionlc.
13_.
Ative a Raster 1.
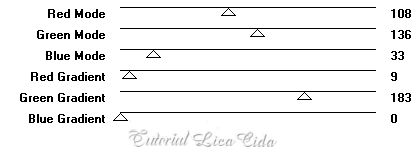
Plugin Filter Factory Gallery M → Ambrosia.
14_.
Edit → Copy no tube calguismisted10710
Edit → Paste As New Layer.
Posicione.
15_.
Edit → Copy no tube tube2749_mulher_mara_pontes
Edit → Paste As New Layer.
Redimensione e posicione a gosto.
16_.
Ative novamente a Raster 1.
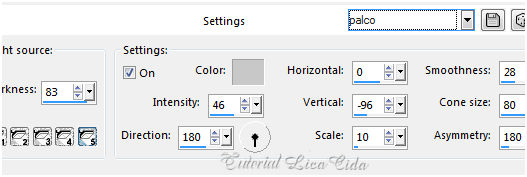
Effects → Illumination Effects → Lights → Preset_Lights_palco.
Layers → Duplicate.
17_.
Plugin Nik Software → Color Efex Pro 3.0 → Bi-Color Filters — Color Set: Violet/Pink 4.
18_.
Edit → Copy no arquivonuvenslc1
Edit → Paste As New Layer.
Objects → Align → Top.
Blend Mode: Multiply.
19_.
Ative novamente a Copy of Raster 1.
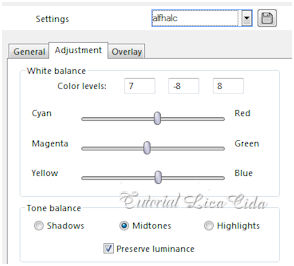
Layers → New Adjustment Layer → White Balance — Preset: alfhalc (7 / -8 / 8).
Layers → Merge → Merge Down.
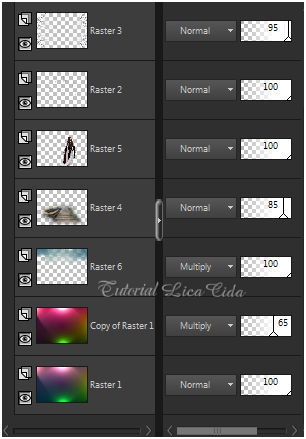
Altere os Blend Modes e a Opacity das layers.
20_.
Ative a layer superior (Raster 3).
Edit → Copy no arquivocristal1lc
Edit → Paste As New Layer.
Blend Mode: Overlay.
Image → Add Borders: 1 px, Symmetric marcado — Color: #ffffff.
21_.
Plugin AAA Filters → Custom — Landscape.
Faça o acabamento a gosto.
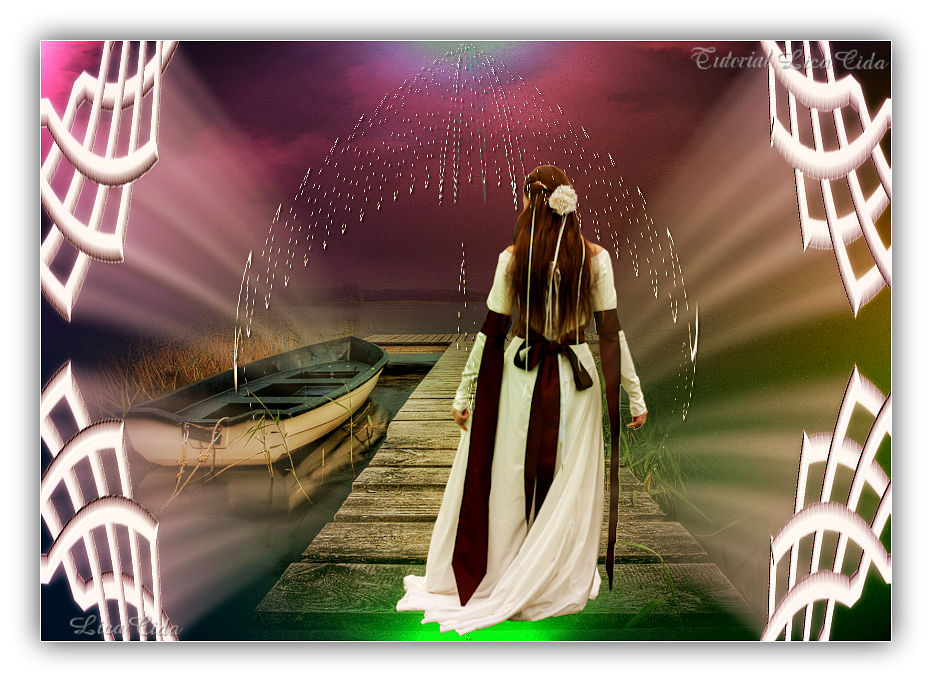
Aplique a marca-d'água.
Assine e salve.
Espero que gostem.
OBSERVAÇÃO
Não é permitido o uso das seleções em outros tutoriais, sem exceção.
Aparecida / LicaCida, setembro de 2015.
Rio de Janeiro - Brasil.

VOLTAR
Copyright ©2026 - Web Design - Naise Minas
|

