|
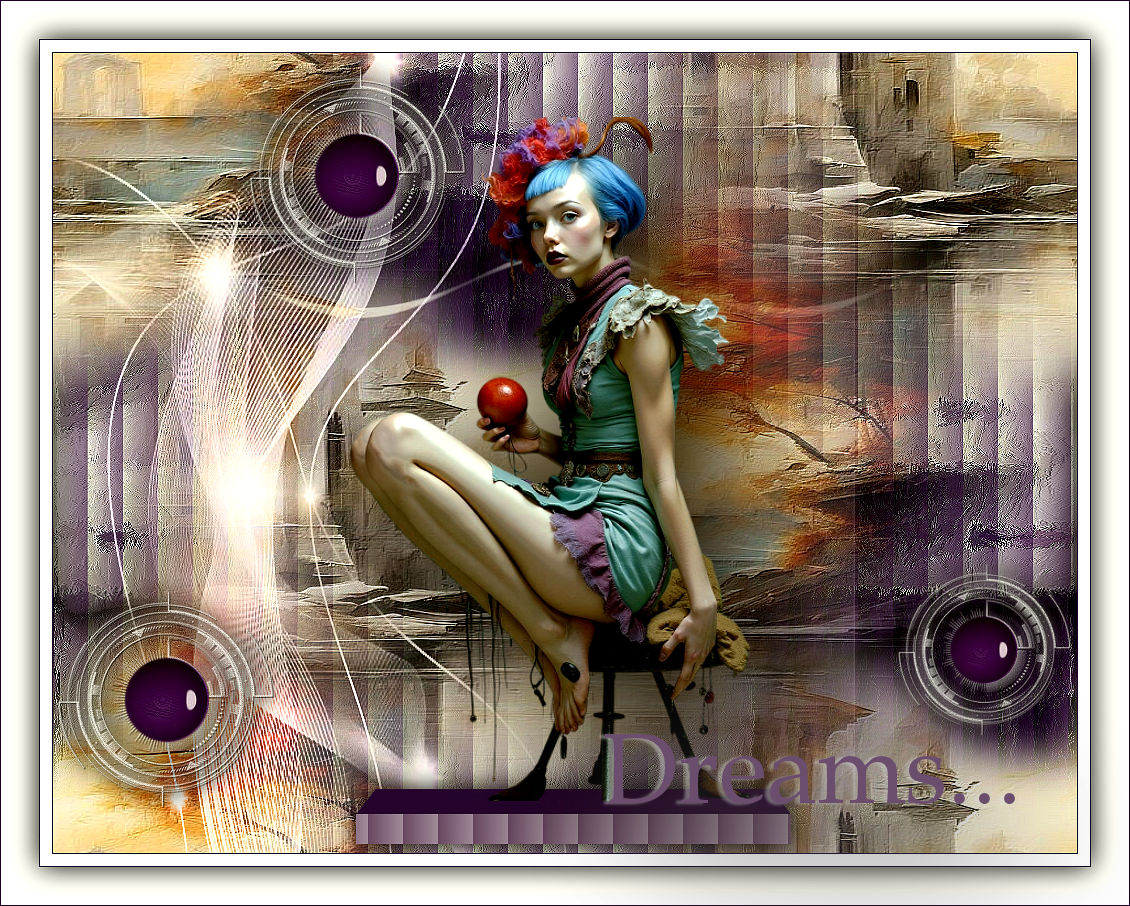
Dreams...
TRADUÇÕES

MATERIAL

Back: backbylc
Tubes: 179PaisagemByPqnaAlice (1)
MULHERES_NAISEM-2263
Seleção: dreamssel1bylc --
Salvar na pasta Selections do PSP.
Decor: 004DecorByPqnaAlice
circuloacabamentobylc
Golden_Deco87J_Silvie_13.08.2024
Título: titulobylc
Marca-d'água.
Efeitos do PSP.
Versão usada: PSP 2022.
PLUGINS
Plugin Alien Skin Eye Candy 5: Impact → Glass
Plugin Alien Skin Eye Candy 5: Impact → Extrude
Plugin Graphics Plus → Emboss
TUTORIAL

|
Esta seta marca sua linha
Clique e arraste para movê-la
|
|
1_.
Abra o material no PSP, duplique e feche o original.
2_.
Abra o arquivo backbylc.
3_.
Effects → Texture Effects → Blinds.
Escolha uma cor usada no back (usei #3a144d).
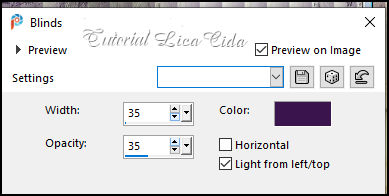
Adjust → Sharpness → Sharpen.
4_.
Selections → Load/Save Selection → Load Selection From Disk → dreamssel1bylc.
Selections → Promote Selection to Layer.
Selections → Select None.
Layers → Duplicate.
Na layer duplicada (Copy of Promoted Selection):
5_.
Plugin Alien Skin Eye Candy 5: Impact → Glass.
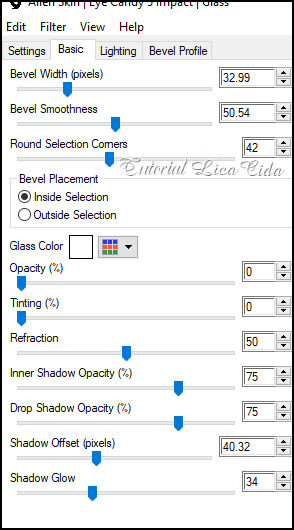
6_.
Effects → 3D Effects → Drop Shadow: 0 / 0 / 100 / 40,00 — Color: #000000.
Aplique nas duas layers do efeito.
7_.
Delete a layer Promoted Selection.
8_.
Ative a layer do topo.
Layers → New Raster Layer.
9_.
Selections → Select All.
Edit → Copy no misted 179PaisagemByPqnaAlice (1)
Edit → Paste Into Selection.
Selections → Select None.
Adjust → Sharpness → Sharpen.
10_.
Effects → Image Effects → Seamless Tiling — Default.
11_.
Plugin Graphics Plus → Emboss.
12_.
Edit → Copy no Golden_Deco87J_Silvie_13.08.2024
Edit → Paste As New Layer.
13_.
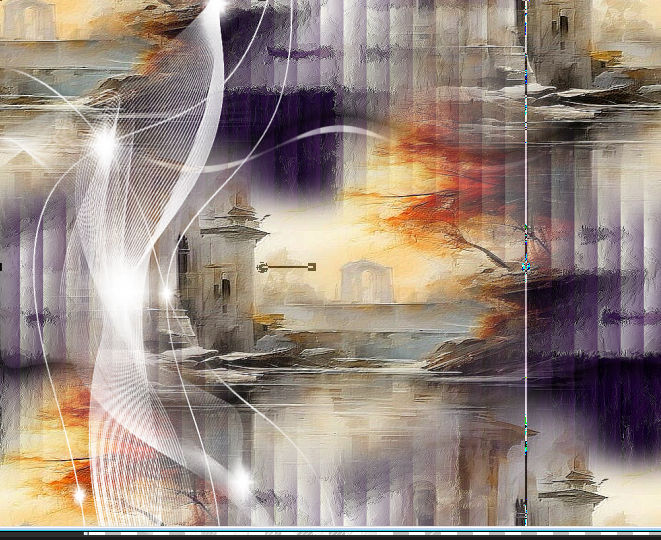
Com a ferramenta Pick Tool: Position X: 2 — Position Y: 100.
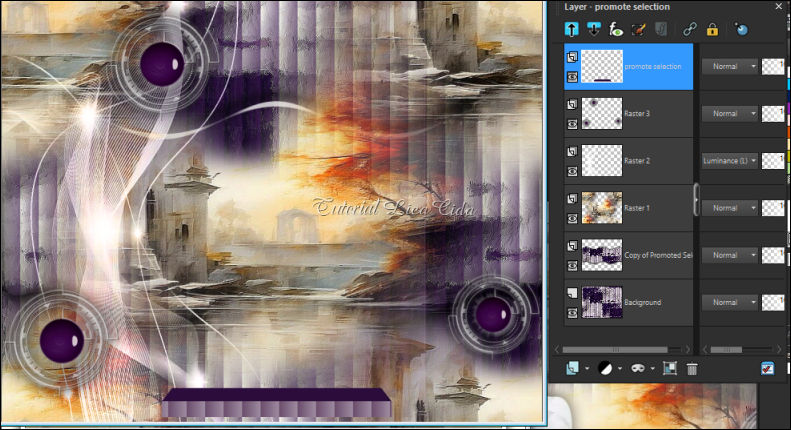
Ficará como no print abaixo.
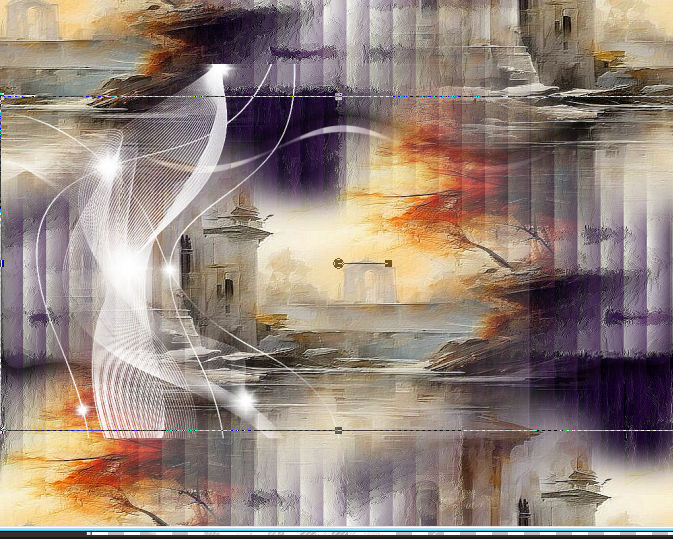
Com a mesma ferramenta Pick Tool, estique o efeito como no modelo: suba até o topo e desça até o final do back.
14_.
Plugin Graphics Plus → Emboss.
Blend Mode: Luminance (L) — Opacity: 100%.
15_.
Edit → Copy no 004DecorByPqnaAlice
Edit → Paste As New Layer (Raster 3).
Com a ferramenta Pick Tool: Position X: 154 — Position Y: -28.
16_.
Layers → Duplicate.
Com a ferramenta Pick Tool: Position X: -38 — Position Y: 496.
17_.
Layers → Duplicate.
Image → Resize: 80% — Resize all layers desmarcado.
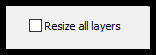
Com a ferramenta Pick Tool: Position X: 811 — Position Y: 477.
Opcional: Effects → 3D Effects → Drop Shadow: 0 / 0 / 100 / 30,00 — Color: #000000.
Se usar, aplique nos outros decors.
18_.
Edit → Copy no circuloacabamentobylc
Edit → Paste As New Layer.
Acomode no centro de cada decor.
Effects → 3D Effects → Drop Shadow a gosto.
Layers → Merge → Merge Down (aplique em todos os decors).
No decor menor, aplique Image → Resize: 80% — Resize all layers desmarcado.
19_.
Ative a layer Background.
Ative a ferramenta Selection Tool (tecla S) → Custom Selection.
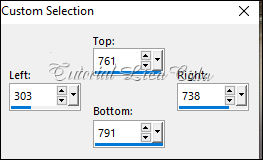
Selections → Promote Selection to Layer.
Pinte com a cor #6b4e6d.
Layers → Arrange → Bring to Top.
20_.
Effects → Texture Effects → Blinds: repita o item 3, mudando a cor para #ffffff (branco).
Selections → Select None.
21_.
Plugin Alien Skin Eye Candy 5: Impact → Extrude — Color: #3a144d.
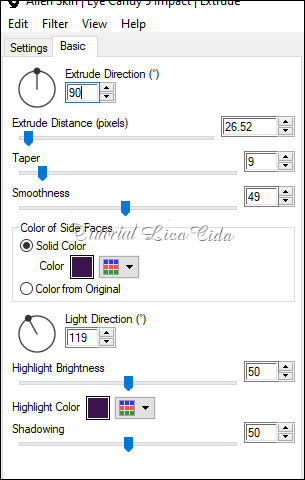
Selections → Select None.
22_.
Edit → Copy no tube MULHERES_NAISEM-2263
Edit → Paste As New Layer.
Posicione sobre o efeito Extrude (use a gosto).
Image → Add Borders: 1 px, Symmetric marcado — Color: #3a144d.
Image → Add Borders: 12 px, Symmetric marcado — Color: #ffffff (Background).
Image → Add Borders: 1 px, Symmetric marcado — Color: #3a144d (Foreground).
Selections → Select All.
Image → Add Borders: 38 px, Symmetric marcado — Color: #ffffff.
Effects → 3D Effects → Drop Shadow: 0 / 0 / 100 / 40,00 — Color: #000000.
Selections → Select None.
Image → Add Borders: 1 px, Symmetric marcado — Color: #3a144d.
Aplique a sua marca-d'água ou assinatura.
File → Export → JPEG Optimizer.
Espero que gostem.
Aparecida / LicaCida, setembro de 2025.
Rio de Janeiro - Brasil.

VOLTAR
Copyright ©2026 - Web Design - Naise Minas
|
