|
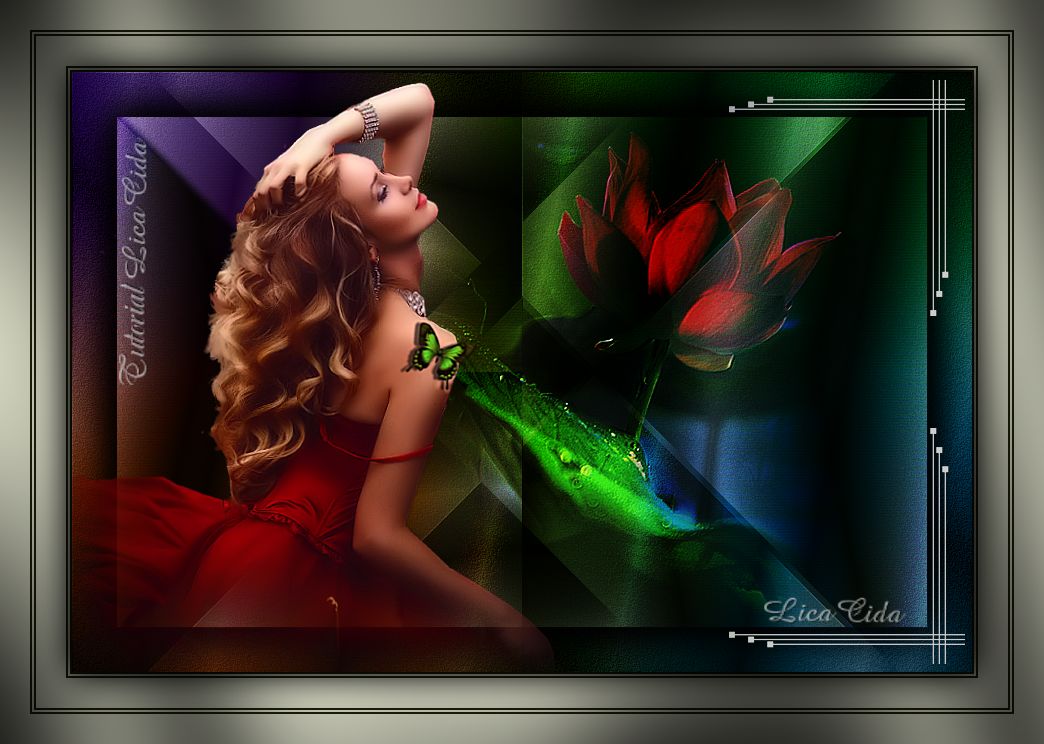
Desvenda-me
DEDICATÓRIA
Dedico carinhosamente à querida amiga Marcinha!
TRADUÇÕES

MATERIAL

Tubes: tube1113_mulher_mara_pontes
calguismistlotus03102011
Back: back 5-rb (Regina Barbeiro)
Corners: pixelcorners03-st-mel
Marca-d'água.
Efeitos do PSP.
Versão usada: PSP X6.
PLUGINS
Plugin Simple → Diamonds
Plugin Simple → Left Right Wrap
Plugin Simple → Horizontal Grain
Plugin Simple → Pizza Slice Mirror
Plugin FM Tile Tools → Blend Emboss
Plugin Greg's Factory Output Vol. II → Pool Shadow
TUTORIAL
|
Esta seta marca sua linha
Clique e arraste para movê-la
|
|
1_.
Abra uma nova imagem transparente de 900 x 600 px.
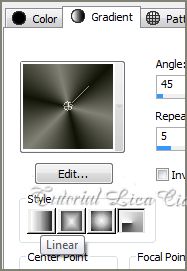
Pinte com o gradiente formado pelas cores #111306 e #8e8f81.
Configure: Style: Radial — Angle: 45 — Repeats: 5 — Invert desmarcado.
2_.
Plugin Simple → Diamonds.
3_.
Plugin Simple → Left Right Wrap.
Layers → Duplicate.
4_.
Plugin Simple → Horizontal Grain.
Blend Mode: Hard Light.
Adjust → Add/Remove Noise → JPEG Artifact Removal — Maximum: 82.
Plugin FM Tile Tools → Blend Emboss.
Layers → Merge → Merge Down.
5_.
Layers → Duplicate.
Image → Resize: 90% — Resize all layers desmarcado.
Plugin Simple → Pizza Slice Mirror.
Effects → 3D Effects → Drop Shadow: 10 / 5 / 65 / 10,00 — Color: #000000.
Repita com H e V negativos.
6_.
Ative a Raster 1.
Selections → Select All.
Selections → Modify → Contract: 45.
Selections → Promote Selection to Layer.
Selections → Invert.
7_.
Layers → New Raster Layer.
Pinte com o mesmo gradiente formado no item 1.
Adjust → Add/Remove Noise → Add Noise: Uniform e Monochrome marcados — Noise: 12.
Plugin FM Tile Tools → Blend Emboss.
8_.
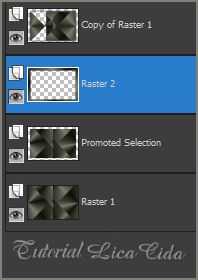
Ative a layer Copy of Raster 1.
Pressione a tecla Delete.
Selections → Invert.
Effects → 3D Effects → Drop Shadow: 0 / 0 / 80 / 50 — Color: #000000.
Selections → Select None.
9_.
Ative a layer Promoted Selection.
Layers → Merge → Merge Down.
10_.
Layers → New Raster Layer.
Layers → Arrange → Send to Bottom.
Selections → Select All.
Edit → Copy no back 5-rb
Edit → Paste Into Selection.
Selections → Select None.
11_.
Ative a Raster superior (Copy of Raster 1).
Edit → Copy no tube calguismistlotus03102011
Edit → Paste As New Layer.
Image → Resize: 90% — Resize all layers desmarcado.
Posicione.
12_.
Edit → Copy no tube1113_mulher_mara_pontes
Edit → Paste As New Layer.
Posicione à esquerda da sua tag e use a gosto.
Altere os Blend Modes e a Opacity das layers.
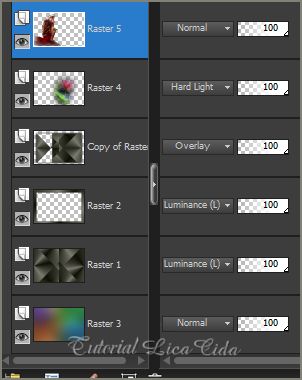
Use os Blend Modes e a Opacity a gosto. A intenção foi deixar cores quentes para realçar o back e os tubes usados. Se necessário, abaixe a Opacity da Raster 2.
13_.
Edit → Copy no pixelcorners03-st-mel
Edit → Paste As New Layer.
Image → Resize: 120% — Resize all layers desmarcado.
Image → Mirror.
Use a gosto.
Duplique cada corner e use o Blend Mode: Screen na layer duplicada.
14_.
Image → Add Borders: 2 px, Symmetric marcado — Color: #111306 (cor escura).
Image → Add Borders: 2 px, Symmetric marcado — Color: #8e8f81 (cor clara).
Image → Add Borders: 2 px, Symmetric marcado — Color: #111306 (cor escura).
15_.
Image → Add Borders: 30 px, Symmetric marcado — Color: #8e8f81 (cor clara).
16_.
Image → Add Borders: 2 px, Symmetric marcado — Color: #111306 (cor escura).
Image → Add Borders: 2 px, Symmetric marcado — Color: #8e8f81 (cor clara).
Image → Add Borders: 2 px, Symmetric marcado — Color: #111306 (cor escura).
17_.
Image → Add Borders: 30 px, Symmetric marcado — Color: #8e8f81 (cor clara).
18_.
Selections → Select All.
Selections → Modify → Contract: 72.
Selections → Invert.
19_.
Plugin Greg's Factory Output Vol. II → Pool Shadow — Default.
Selections → Invert.
Effects → 3D Effects → Drop Shadow: 0 / 0 / 80 / 50 — Color: #000000.
Aplique a marca-d'água.
Assine e salve como JPG.
Espero que gostem.
Aparecida / LicaCida, novembro de 2013.
Rio de Janeiro - Brasil.

VOLTAR
Copyright ©2026 - Web Design - Naise Minas
|

