|
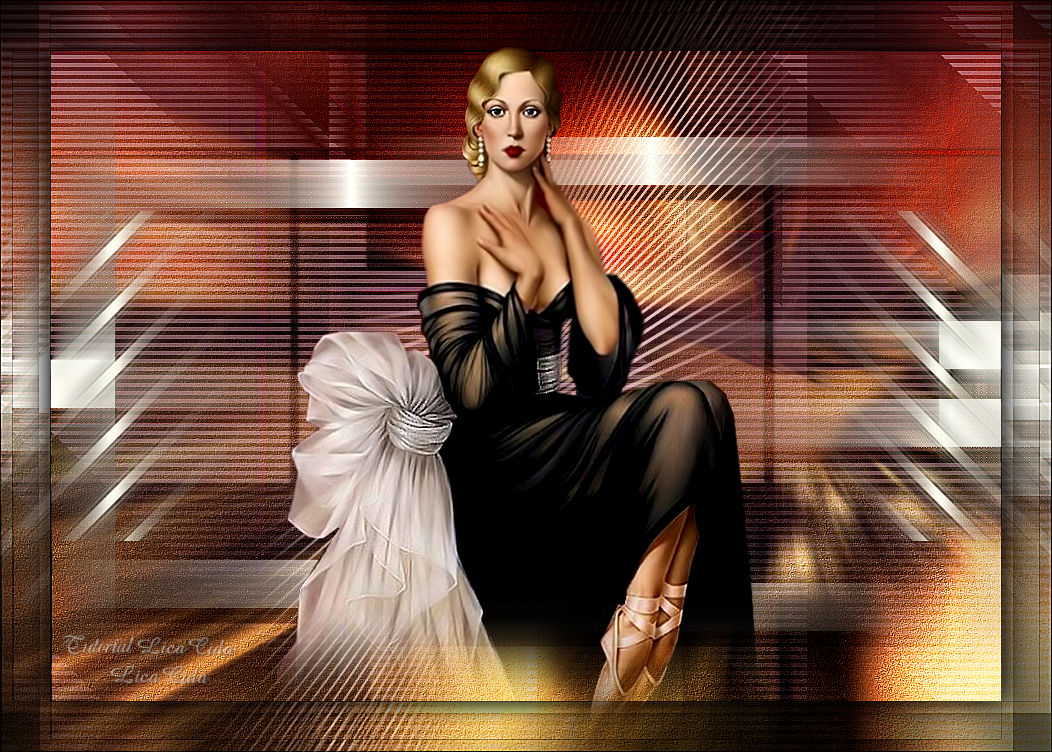
Dance
TRADUÇÕES

MATERIAL

Background: back
Mask: Narah_mask_0808
Tube: 3859-luzcristina
Decorações: decoAlc
decoBlc
decoClc
decoDlc
Marca-d'água.
Efeitos do PSP.
Versão usada: PSP X8.
PLUGINS
Plugin Galaxy → Instant Mirror
Plugin VM Extravaganza → Transmission
Plugin Mehdi → Weaver
Plugin Nik Software → Color Efex Pro 3.0 → Bi-Color Filters
Plugin AAA Filters → Custom Landscape
Plugin VanDerLee → UnPlugged-X → Defocus
Plugin Graphics Plus → Cross Shadow
TUTORIAL
|
Esta seta marca sua linha
Clique e arraste para movê-la
|
|
1_.
Abra a imagem back (background), do material.
2_.
Layers → New Raster Layer.
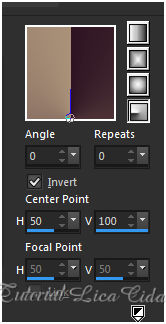
Pinte com o gradiente formado pelas cores #aa9179 e #2f1523 (use a gosto).
Configure: Style: Radial — Angle: 0 — Repeats: 0 — Invert marcado — Center Point: H: 50 / V: 100.
3_.
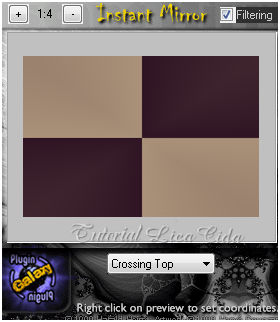
Plugin Galaxy → Instant Mirror.
4_.
Ative a ferramenta Selection Tool (tecla S) → Custom Selection.
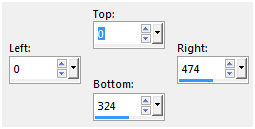
Selections → Promote Selection to Layer.
Selections → Select None.
Layers → Duplicate.
Image → Mirror → Mirror Horizontal.
Image → Mirror → Mirror Vertical.
Layers → Merge → Merge Down.
Ative a Raster 1 e pressione a tecla Delete.
Volte para a layer Promoted Selection.
5_.
Plugin Mehdi → Weaver.
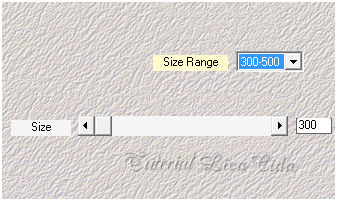
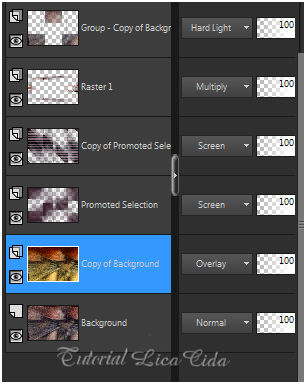
Blend Mode: Screen.
6_.
Effects → Geometric Effects → Skew.
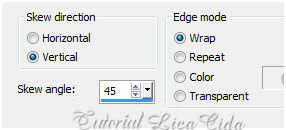
7_.
Effects → Distortion Effects → Pinch — Strength: 100.
8_.
Plugin Mehdi → Weaver (mesmos valores do item 5).
Layers → Duplicate.
9_.
Effects → Geometric Effects → Skew (valor negativo).
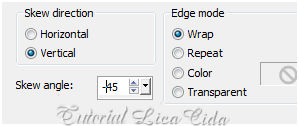
10_.
Plugin VM Extravaganza → Transmission.
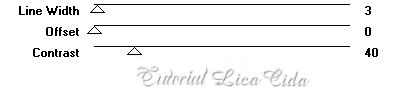
Adjust → Sharpness → Sharpen More.
11_.
Edit → Copy no decoAlc
Edit → Paste As New Layer.
Blend Mode: Multiply.
12_.
Duplique a layer Background.
Layers → Arrange → Bring to Top.
13_.
Layers → New Mask Layer → From Image: Narah_mask_0808.
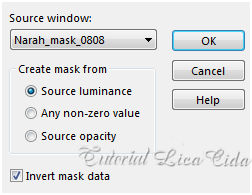
Layers → Merge → Merge Group.
Effects → 3D Effects → Drop Shadow: 0 / 0 / 50 / 5,00 — Color: #000000.
Blend Mode: Hard Light.
14_.
Edit → Copy no decoBlc
Edit → Paste As New Layer.
Effects → Image Effects → Offset.
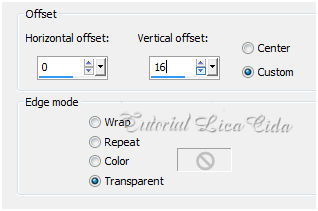
15_.
Edit → Copy no decoClc
Edit → Paste As New Layer.
Blend Mode: Luminance (L).
16_.
Edit → Copy no decoDlc
Edit → Paste As New Layer.
17_.
Duplique novamente a layer Background.
Plugin Nik Software → Color Efex Pro 3.0 → Bi-Color Filters — Color Set: Brown 1.
Altere os Blend Modes e a Opacity das layers.
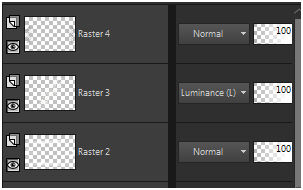
18_.
Image → Add Borders: 1 px, Symmetric marcado — Color: #000000.
19_.
Plugin AAA Filters → Custom Landscape.
Edit → Copy.
20_.
Image → Add Borders: 50 px, Symmetric marcado — Color: #ffffff.
Selecione a borda.
Edit → Paste Into Selection.
21_.
Plugin VanDerLee → UnPlugged-X → Defocus — Defocus: 6.
Adjust → Sharpness → Sharpen More.
22_.
Plugin Graphics Plus → Cross Shadow → Default.
Selections → Invert.
Effects → 3D Effects → Drop Shadow: 0 / 0 / 80 / 40,00 — Color: #000000.
Selections → Select None.
23_.
Edit → Copy no tube 3859-luzcristina
Edit → Paste As New Layer.
Adjust → Sharpness → Sharpen More.
Aplique a marca-d'água.
Assine e salve.
Espero que gostem.
Aparecida / LicaCida, janeiro de 2016.
Rio de Janeiro - Brasil.

VOLTAR
Copyright ©2026 - Web Design - Naise Minas
|

