|
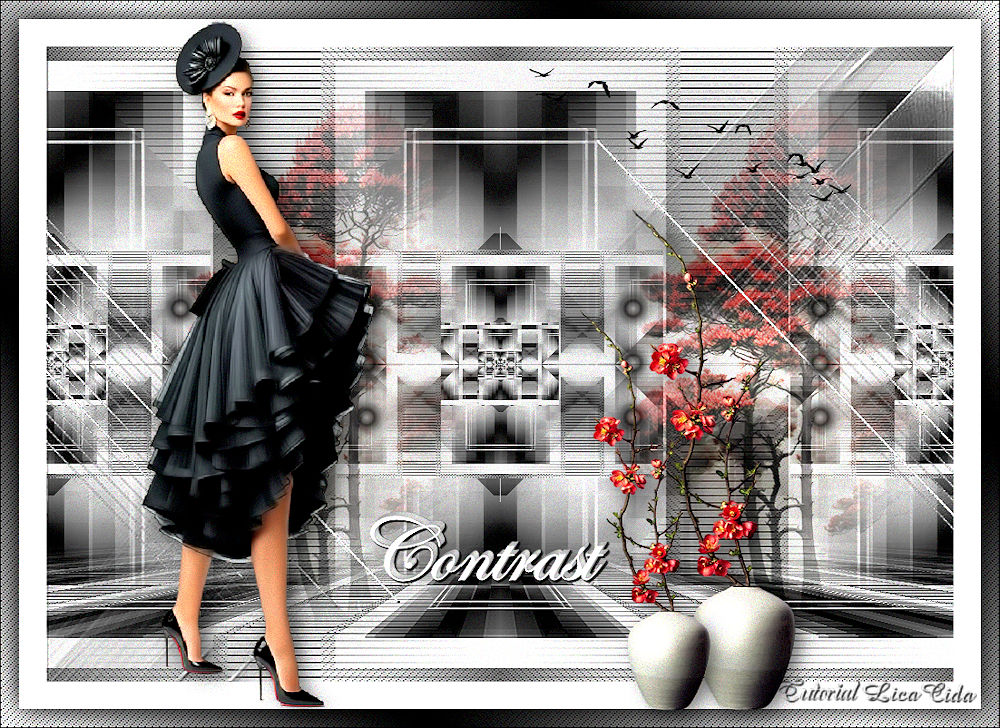
Contrast
TRADUÇÕES

MATERIAL

Tubes: Callitubes-4558mulheres
Callitubes-29paisagens
Callitubes-820flores
Aves: bird_brushes_II_by_lpdragonfly_5
Mask: creation.tine_masque334
Decor: deco1lc
titulocontrastbylc
Marca-d'água.
Efeitos do PSP.
PLUGINS
Plugin Richard Rosenman → Solid Border
Plugin Filters Unlimited 2.0 → FunHouse → Emission Mirror
Plugin Filters Unlimited 2.0 → &<Bkg Designer sf10 I> → Cruncher
Plugin MuRa's Seamless → Emboss at Alpha
Plugin Simple → Pizza Slice Mirror
Plugin Graphics Plus → Vertical Mirror
Plugin Nik Software → Color Efex Pro 3.0 → Pro Contrast
Plugin MuRa's Meister → Perspective Tiling
Plugin AAA Filters → Custom
TUTORIAL
|
Esta seta marca sua linha
Clique e arraste para movê-la
|
|
1_.
Abra o material no PSP, duplique e feche o original.
Escolha duas cores para trabalhar: Foreground: #000000 — Background: #ffffff.
2_.
Abra uma nova imagem transparente de 900 x 600 px.
3_.
Pinte com o gradiente Linear formado pelas cores em uso.
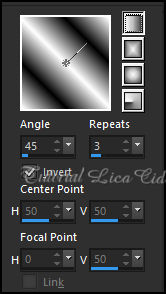
Layers → Duplicate.
Image → Mirror.
Blend Mode: Soft Light — Opacity: 100%.
Layers → Merge → Merge Down.
4_.
Image → Add Borders: 50 px, Symmetric marcado — Color: #ffffff.
5_.
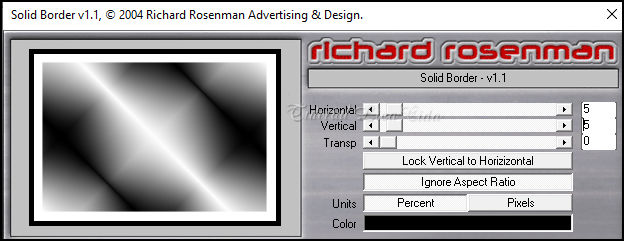
Plugin Richard Rosenman → Solid Border — Color: #000000.
6_.
Com a ferramenta Magic Wand (Default), selecione esta borda (cor #000000).
7_.
Pinte com o gradiente em uso.
8_.
Effects → Texture Effects → Weave — Color: #000000.
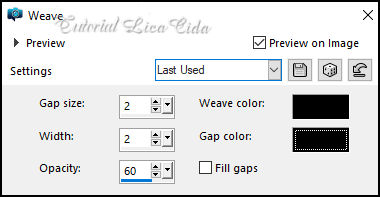
Adjust → Sharpness → Sharpen.
Selections → Select None.
9_.
Selections → Select All.
Selections → Modify → Contract: 50 px.
Selections → Promote Selection to Layer.
10_.
Plugin Filters Unlimited 2.0 → FunHouse → Emission Mirror — Default.
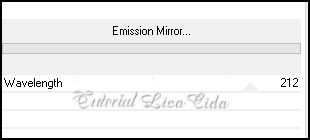
11_.
Selections → Select All.
Selections → Modify → Contract: 100 px.
12_.
Selections → Modify → Select Selection Borders.
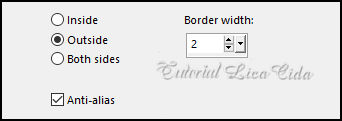
13_.
Layers → New Raster Layer.
Pinte com a cor #ffffff.
Selections → Select None.
14_.
Plugin Filters Unlimited 2.0 → &<Bkg Designer sf10 I> → Cruncher.
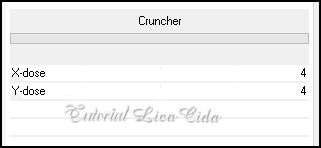
Blend Mode: Screen — Opacity: 100%.
Plugin MuRa's Seamless → Emboss at Alpha — Default.
LAYERS

Layers → Merge → Merge Visible.
15_.
Plugin Simple → Pizza Slice Mirror.
16_.
Effects → Reflection Effects → Rotating Mirror: 0 / 180.
17_.
Plugin Graphics Plus → Vertical Mirror — Default (128 / 0).
18_.
Effects → Image Effects → Seamless Tiling.
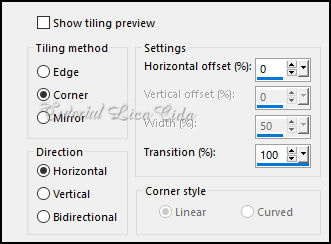
19_.
Effects → Reflection Effects → Feedback.
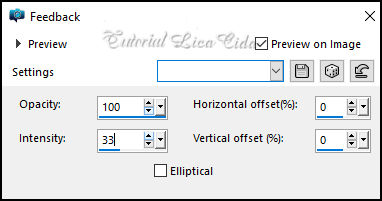
20_.
Edit → Repeat: Effects → Image Effects → Seamless Tiling (item 18).
21_.
Plugin Nik Software → Color Efex Pro 3.0 → Pro Contrast — Default.
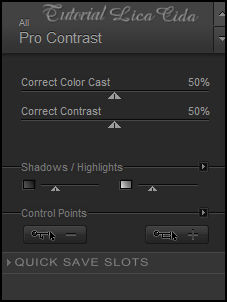
22_.
Layers → New Raster Layer.
Pinte com a cor #ffffff.
Layers → New Mask Layer → From Image: creation.tine_masque334.
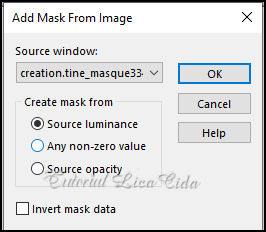
Effects → Edge Effects → Enhance.
Layers → Merge → Merge Group.
Plugin MuRa's Seamless → Emboss at Alpha — Default.
Effects → 3D Effects → Drop Shadow: 1 / 1 / 100 / 1,00 — Color: #000000.
23_.
Ative a layer inferior.
Ative a ferramenta Selection Tool (tecla S) → Custom Selection.
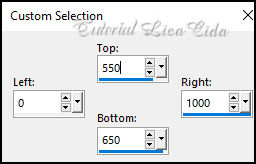
Selections → Promote Selection to Layer.
24_.
Plugin MuRa's Meister → Perspective Tiling — Default.
Com a ferramenta Magic Wand (Feather: 60), clique na parte transparente.
Aperte a tecla Delete quatro ou cinco vezes.
Selections → Select None.
Adjust → Sharpness → Sharpen More.
25_.
Edit → Copy no tube Callitubes-29paisagens
Edit → Paste As New Layer.
Image → Resize: 80% — Resize all layers desmarcado (aplique duas vezes).
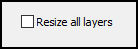
Objects → Align → Right.
26_.
Layers → Duplicate.
Edit → Repeat: Effects → Image Effects → Seamless Tiling (item 18).
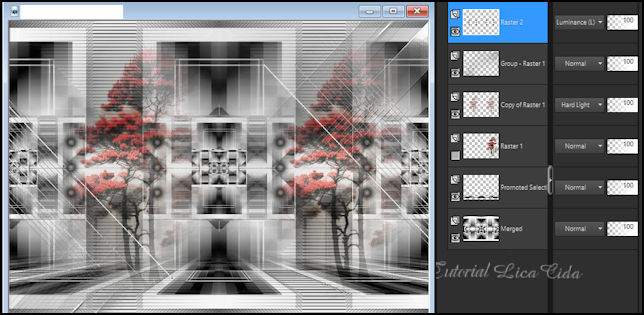
Blend Mode: Hard Light — Opacity: 100%.
Retire a visibilidade da layer inferior.
27_.
Edit → Copy no deco1lc
Edit → Paste As New Layer.
Blend Mode: Luminance (L) — Opacity: 100%.
Edit → Repeat: Effects → Image Effects → Seamless Tiling (item 18).
Layers → Arrange → Bring to Top.
Altere os Blend Modes e a Opacity das layers.
28_.
Image → Add Borders: 50 px, Symmetric marcado — Color: #ffffff.
29_.
Plugin Richard Rosenman → Solid Border — Color: #000000 (mesmos valores do item 5).
30_.
Com a ferramenta Magic Wand (Default), selecione esta borda (cor #000000).
31_.
Pinte com o gradiente em uso.
32_.
Effects → Texture Effects → Weave (mesmos valores do item 8).
Adjust → Sharpness → Sharpen.
Selections → Invert.
Effects → 3D Effects → Drop Shadow: 0 / 0 / 100 / 40,00 — Color: #000000.
Selections → Select None.
33_.
Edit → Copy no tube Callitubes-4558mulheres
Edit → Paste As New Layer.
Use a gosto. Posicione.
34_.
Edit → Copy no tube Callitubes-820flores
Edit → Paste As New Layer.
Use a gosto. Posicione.
35_.
Edit → Copy no bird_brushes_II_by_lpdragonfly_5
Edit → Paste As New Layer.
Use a gosto. Posicione.
36_.
Edit → Copy no titulocontrastbylc
Edit → Paste As New Layer.
Use a gosto. Posicione.
Image → Add Borders: 1 px, Symmetric marcado — Color: #000000.
Plugin AAA Filters → Custom → Grain (opcional).
Image → Resize: Width 1000 px.
Aplique a marca-d'água.
Assine e salve.
File → Export → JPEG Optimizer.
Aparecida / LicaCida, junho de 2024.
Rio de Janeiro - Brasil.

VOLTAR
Copyright ©2026 - Web Design - Naise Minas
|


