|
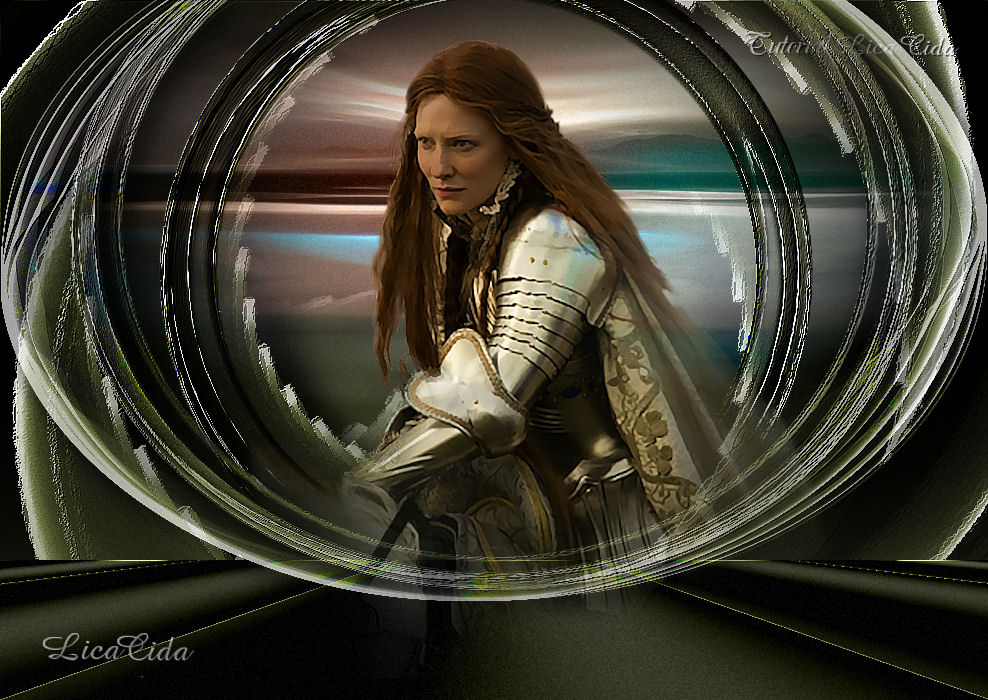
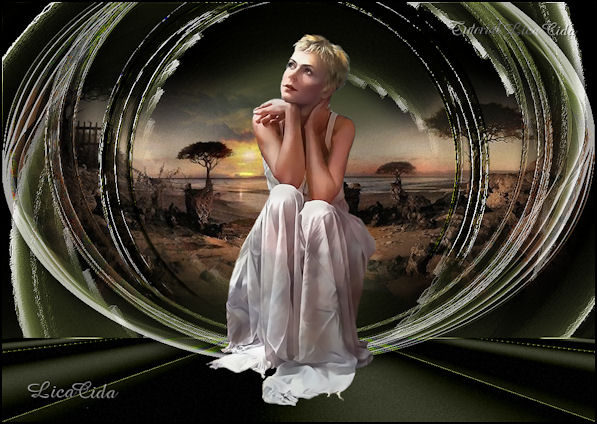
Cavalgada
TRADUÇÕES

MATERIAL

Tubes: DW 2012PSPCYBERTUBES-027
landscape tubes 5-HaZaL
Mask (opcional): Mask Gradiente (!!!!gradientedworisch)
Marca-d'água.
Efeitos do PSP.
Versão PSP X3.
Refeito no PSP X5.

PLUGINS
Plugin Filters Factory Gallery B → Spinner
Plugin Filters Factory Gallery B → James Bondage
Plugin Filters Factory Gallery B → Fluttering Flag
Plugin Filters Factory Gallery C → Buble-Cross Waves
Plugin FM Tile Tools → Blend Emboss
Plugin MuRa's Meister → Perspective Tiling
Plugin MuRa's Meister → Pole Transform
Plugin Dragonfly → Sinedots
TUTORIAL

|
Esta seta marca sua linha
Clique e arraste para movê-la
|
|
1_.
Abra uma nova imagem transparente de 988 x 600 px.
Pinte com a cor #2e3120.
2_.
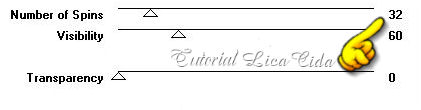
Plugin Filters Factory Gallery B → Spinner:
32 / 60 / 0.
3_.
Plugin Filters Factory Gallery B →
James Bondage: 186 / 111 / 68.

4_.
Com a ferramenta Magic Wand,
selecione o círculo formado.
Selections → Modify →
Feather: 120 px.
Pressione Delete até chegar próximo à seleção.
Selections → Select None.
5_.
Plugin Filters Factory Gallery C →
Buble-Cross Waves: 91 / 0 / 0 / 0 / 0.
6_.
Plugin FM Tile Tools →
Blend Emboss → Default.
Repita o efeito.
7_.
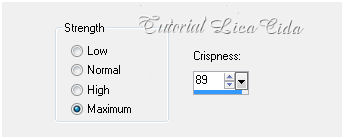
Adjust → Add/Remove Noise →
JPEG Artifact Removal — Maximum: 89.
8_.
Layers → Duplicate.
Effects → Distortion Effects →
Polar Coordinates.
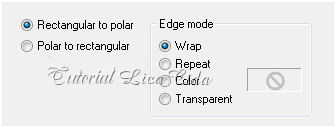
Image → Flip.
Layers → Arrange → Move Down.
9_.
Image → Canvas Size:
988 x 700 — Bottom: 100.
10_.
Layers → New Raster Layer.
Layers → Arrange → Move Up.
Pinte com a mesma cor.
11_.
Plugin Filters Factory Gallery B →
Fluttering Flag → Default.
12_.
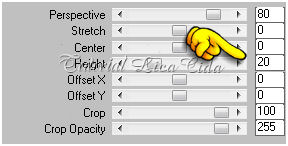
Plugin MuRa's Meister →
Perspective Tiling.
13_.
Plugin FM Tile Tools →
Blend Emboss → Default.
Effects → Edge Effects →
Enhance More.
Adjust → Add/Remove Noise →
JPEG Artifact Removal — Maximum: 89.
Veja o print do item 7.
14_.
Ative a Copy of Raster 1.
Layers → Duplicate.
Layers → Arrange → Bring to Top.
15_.
Effects → Geometric Effects →
Perspective - Horizontal: 90 —
Transparent marcado.
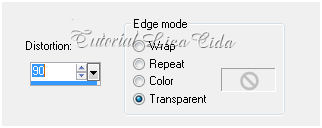
Image → Mirror.
Repita:
Effects → Geometric Effects →
Perspective - Horizontal: 90 —
Transparent marcado.
16_.
Plugin MuRa's Meister →
Pole Transform → Default.
Effects → Image Effects →
Offset: 0 / 34.
17_.
Plugin FM Tile Tools →
Blend Emboss → Default.
Repita o efeito.
18_.
Layers → Duplicate.
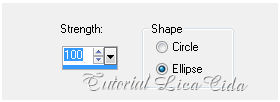
Effects → Geometric Effects →
Spherize.
19_.
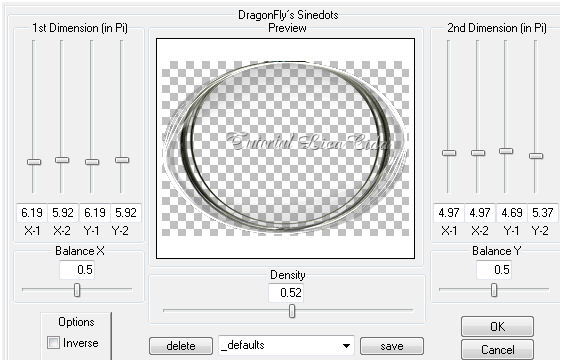
Plugin Dragonfly → Sinedots.
20_.
Plugin FM Tile Tools →
Blend Emboss → Default.
Repita o efeito.
Opacity a gosto.
Effects → Image Effects →
Offset: 0 / 79.
Ative a Copy (2) of Raster 1.
Acerte na parte superior.
Com a ferramenta Eraser Tool,
apague o efeito aparente do círculo abaixo.
Ative a Raster 1.
Opcional: aplique uma Mask Gradiente.
21_.
Edit → Copy no tube paisagem
landscape tubes 5-HaZaL
Edit → Paste As New Layer.
Posicione sem redimensionar.
Duplique as layers e altere os Blend Modes
e as Opacities a gosto.
Na layer superior:
Effects → 3D Effects →
Drop Shadow a gosto.
22_.
Edit → Copy no tube
2012PSPCYBERTUBES-027
Edit → Paste As New Layer.
Posicione e redimensione, se necessário.
23_.
Layers → New Raster Layer.
Layers → Arrange → Send to Bottom.
Pinte com a mesma cor.
Aplique a marca-d'água.
Assine e salve.
Espero que gostem.
Aparecida / LicaCida, em julho de 2012.
Refeito em janeiro de 2013.
Rio de Janeiro - Brasil.
OUTRO MODELO

VOLTAR
Copyright ©2020/2025 -
Web Design - Liriani Silva®
|

