|
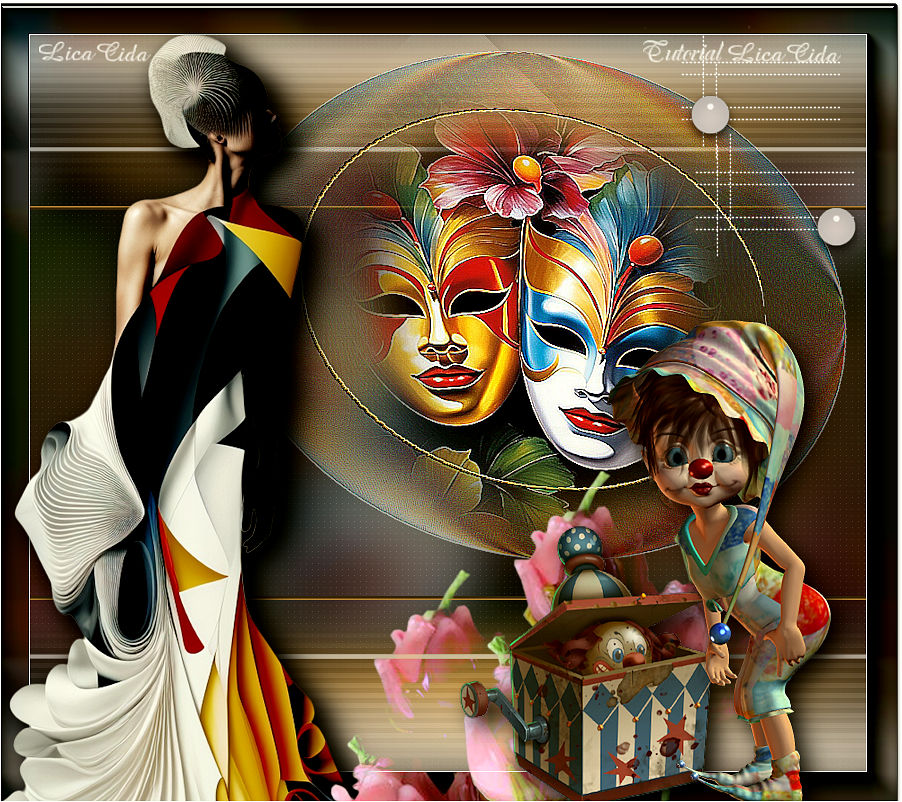
Carnival Style
TRADUÇÕES

MATERIAL

Seleções: carnival1
carnival2 --
Salvar na pasta Selections do PSP.
Tubes: SuizaBella_Ref_AG-003755
mentali-misted2963
Renee-TUBES-Carnaval-46
Renee-TUBES-Carnaval2023-36
Callitubes-45flores
Decor: bolinha brancalc
decor1-lc
Marca-d'água.
Efeitos do PSP.
PLUGINS
Plugin Caroline and Sensibility → CS-HLines
Plugin Caroline and Sensibility → CS-LDots
Plugin AAA Filters → Custom
Plugin AAA Frames → Foto Frame
TUTORIAL

|
Esta seta marca sua linha
Clique e arraste para movê-la
|
|
1_.
Abra o material no PSP, duplique e feche o original.
Escolha duas cores para trabalhar: Foreground: #e5ad59 — Background: #1f2229.
2_.
Abra uma nova imagem transparente de 900 x 800 px.
3_.
Selections → Load/Save Selection → Load Selection From Disk → carnival1.
4_.
Pinte com o gradiente Sunburst formado pelas cores em uso.
Clique uma única vez.

Selections → Select None.
5_.
Plugin Caroline and Sensibility → CS-HLines — Default.

6_.
Edit → Repeat: Selections → Load/Save Selection → Load Selection From Disk → carnival1.
7_.
Effects → 3D Effects → Chisel — Color: #e5ad59 (Foreground).
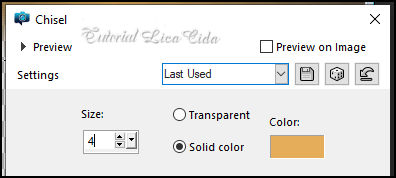
Selections → Select None.
Layers → Duplicate.
Image → Mirror → Mirror Vertical.
Layers → Merge → Merge Down.
8_.
Layers → Duplicate.
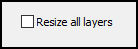
Image → Resize: 90% — Resize all layers desmarcado.
9_.
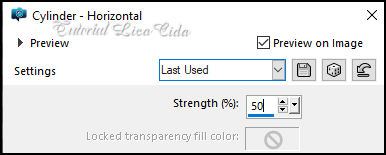
Effects → Geometric Effects → Cylinder - Horizontal.
10_.
Effects → Geometric Effects → Skew.

11_.
Adjust → Hue and Saturation → Hue Map.
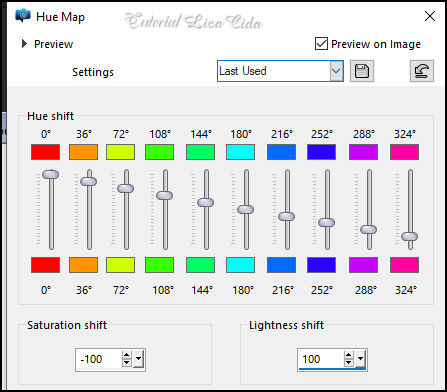
Layers → Duplicate.
Image → Mirror → Mirror Horizontal.
Layers → Merge → Merge Down.
Opacity: 50%.
12_.
Layers → New Raster Layer.
Pinte com o gradiente em uso (item 4).
13_.
Selections → Select All.
Edit → Copy no mentali-misted2963
Edit → Paste Into Selection.
Selections → Select None.
14_.
Effects → Image Effects → Seamless Tiling — Default.
15_.
Adjust → Blur → Gaussian Blur.
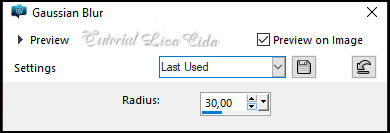
Adjust → Sharpness → Sharpen.
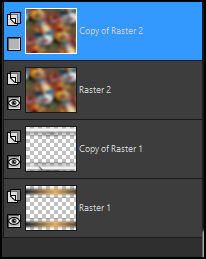
Layers → Duplicate.
Feche a visibilidade da layer da cópia.
16_.
Ative a Raster 2.
Effects → Geometric Effects → Circle.
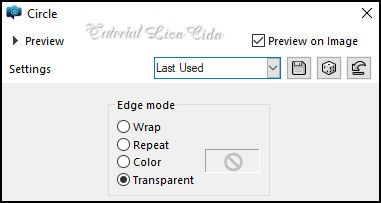
Image → Resize: 90% — Resize all layers desmarcado.

17_.
Ative a ferramenta Magic Wand e configure:

Selecione a parte externa do círculo (observe que fica um pequeno círculo no centro da esfera; não há problema).
Selections → Invert.
Pressione a tecla Delete uma única vez.
Selections → Select None.
Effects → Edge Effects → Enhance More.
18_.
Selections → Load/Save Selection → Load Selection From Disk → carnival2.
19_.
Edit → Copy no mentali-misted2963
Edit → Paste As New Layer.
Posicione no centro da seleção.

20_.
Effects → 3D Effects → Chisel (print do item 7).
Selections → Select None.
21_.
Effects → Distortion Effects → Lens Distortion.
Repita na Raster 2.

22_.
Posicione a imagem sobre o efeito.
Effects → Edge Effects → Enhance More.

Effects → Image Effects → Offset.

Image → Resize: 90% — Resize all layers desmarcado.

Image → Mirror → Mirror Horizontal.
23_.
Ative a layer do topo e abra a sua visibilidade.
Layers → Arrange → Send to Bottom.
24_.
Layers → Duplicate.
Blend Mode: Difference — Opacity: 51%.
25_.
Plugin Caroline and Sensibility → CS-LDots — Default (50 / 3 / 2).
Layers → Merge → Merge Visible.
26_.
Plugin AAA Filters → Custom → Landscape, Grain — Default.
27_.
Plugin AAA Frames → Foto Frame: Width: 25 — Matte: 1 — demais valores Default.
28_.
Edit → Copy no decor1-lc
Edit → Paste As New Layer.
Use a gosto ou como no modelo.
29_.
Edit → Copy na bolinha brancalc
Edit → Paste As New Layer.
Use a gosto ou como no modelo.
30_.
Edit → Copy nos tubes SuizaBella_Ref_AG-003755, Callitubes-45flores (opcional), Renee-TUBES-Carnaval-46 e Renee-TUBES-Carnaval2023-36
Edit → Paste As New Layer.
Use a gosto ou como no modelo.
Aplique a marca-d'água.
Assine e salve.
File → Export → JPEG Optimizer.
Aparecida / LicaCida.
Rio de Janeiro - Brasil.

VOLTAR
Copyright ©2026 - Web Design - Naise Minas
|


