|
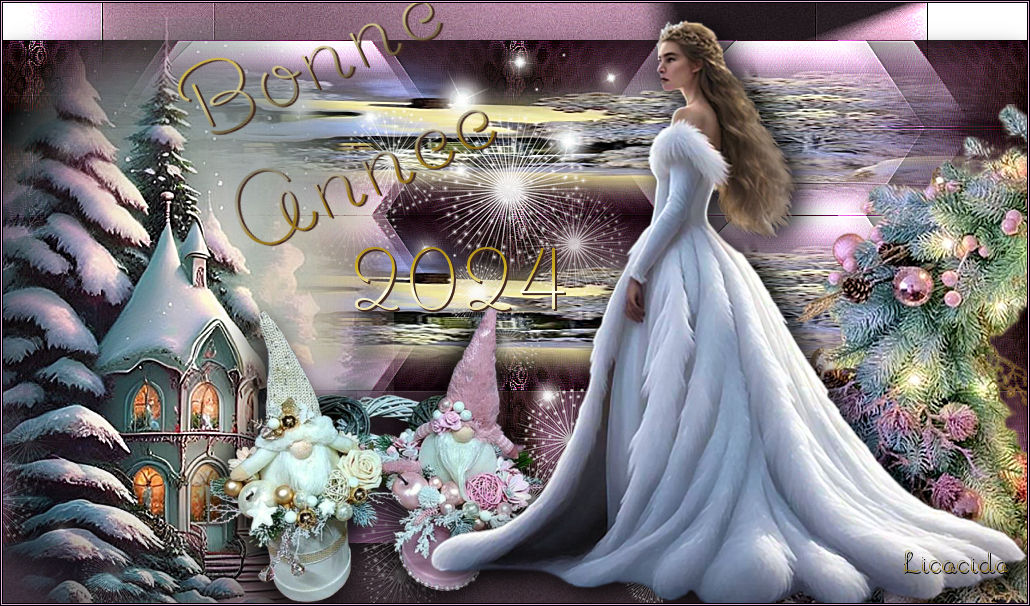
Bonne Annee 2024
TRADUÇÕES

MATERIAL

Preset: Illumination → Lights → Preset_Lights_lihgtlc6 --
Salvar na pasta Presets do PSP (My PSP Files).
Tubes: femme901-coly
nicole_paysage15_2023
Callitubes-310natal
Callitubes-132natal
Callitubes-145natal
Back: backbylc
Fireworks: fireworks_arquivonet
Título: titulo-ano-bylc
Marca-d'água.
Efeitos do PSP.
PLUGINS
Plugin VM Distortion → Smallpox
Plugin BorderMania → Frame #2
Plugin Simple → Top Bottom Wrap
Plugin AAA Frames → Foto Frame
TUTORIAL

|
Esta seta marca sua linha
Clique e arraste para movê-la
|
|
Configure: Foreground: #42271e — Background: #e3b6e1.
1_.
Abra o material no PSP, duplique e feche o original.
2_.
Abra uma nova imagem transparente de 1024 x 600 px.
Pinte com o gradiente formado pelas cores em uso.
Configure: Style: Radial — Angle: 0 — Repeats: 5 — Invert marcado.
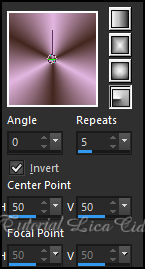
Layers → Duplicate.
3_.
Plugin VM Distortion → Smallpox.
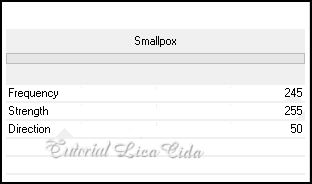
Effects → Edge Effects → Enhance More.
4_.
Effects → Geometric Effects → Perspective - Vertical.
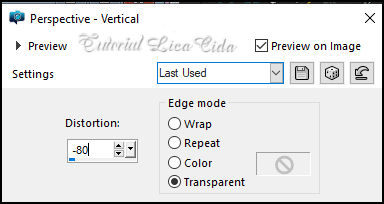
5_.
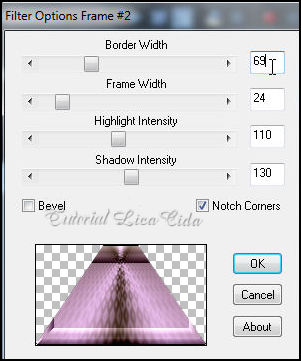
Plugin BorderMania → Frame #2.
6_.
Plugin Simple → Top Bottom Wrap.
Effects → Edge Effects → Enhance More.
7_.
Layers → Duplicate.
Image → Flip.
Blend Mode: Multiply.
Layers → Merge → Merge Down.
8_.
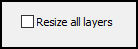
Image → Resize: 80% — Resize all layers desmarcado.
9_.
Effects → Image Effects → Seamless Tiling: Side by Side.
10_.
Effects → 3D Effects → Drop Shadow: 0 / 0 / 80 / 40,00 — Color: #000000.
Edit → Repeat Drop Shadow.
11_.
Ative a ferramenta Selection Tool (tecla S) → Custom Selection.
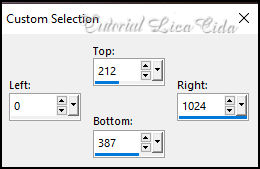
Selections → Promote Selection to Layer.
12_.
Edit → Copy no nicole_paysage15_2023
Edit → Paste Into Selection.
Selections → Select None.
Adjust → Sharpness → Sharpen More.
Layers → Duplicate.
13_.
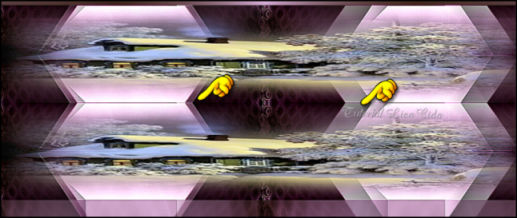
Com a ferramenta Move Tool (tecla M), suba a layer. Observe o modelo.
14_.
Edit → Copy no fireworks_arquivonet
Edit → Paste As New Layer.
15_.
Com a ferramenta Pick Tool:
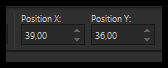
Position X: 39 — Position Y: 36.
Layers → Duplicate.
16_.
Use a gosto, de acordo com o seu material.
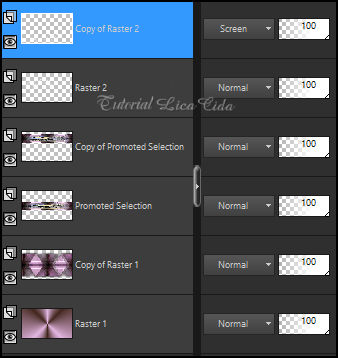
Blend Mode: Screen.
Veja o tutorial até o item 16:
17_.
Ative a layer do topo.
Edit → Copy no tube femme901-coly
Edit → Paste As New Layer.
Posicione. Drop Shadow a gosto.
18_.
Edit → Copy no tube Callitubes-310natal
Edit → Paste As New Layer.
Posicione. Drop Shadow a gosto.
19_.
Edit → Copy no tube Callitubes-132natal
Edit → Paste As New Layer.
Posicione. Drop Shadow a gosto.
20_.
Edit → Copy no tube Callitubes-145natal
Edit → Paste As New Layer.
Posicione. Drop Shadow a gosto.
21_.
Ative a Raster 1.
Edit → Copy no backbylc
Edit → Paste As New Layer.
22_.
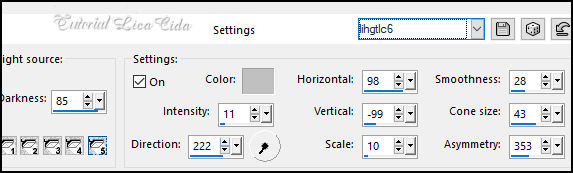
Effects → Illumination Effects → Lights → Preset_Lights_lihgtlc6.
23_.
Edit → Copy no titulo-ano-bylc
Edit → Paste As New Layer.
Posicione a gosto.
Não fiz borda específica:
Image → Add Borders: 1 px, Symmetric marcado, em três cores do tutorial: escura / clara / escura.
Aplique a marca-d'água.
Assine e salve.
File → Export → JPEG Optimizer.
Aparecida / LicaCida.
Rio de Janeiro - Brasil.

VOLTAR
Copyright ©2026 - Web Design - Naise Minas
|


