|
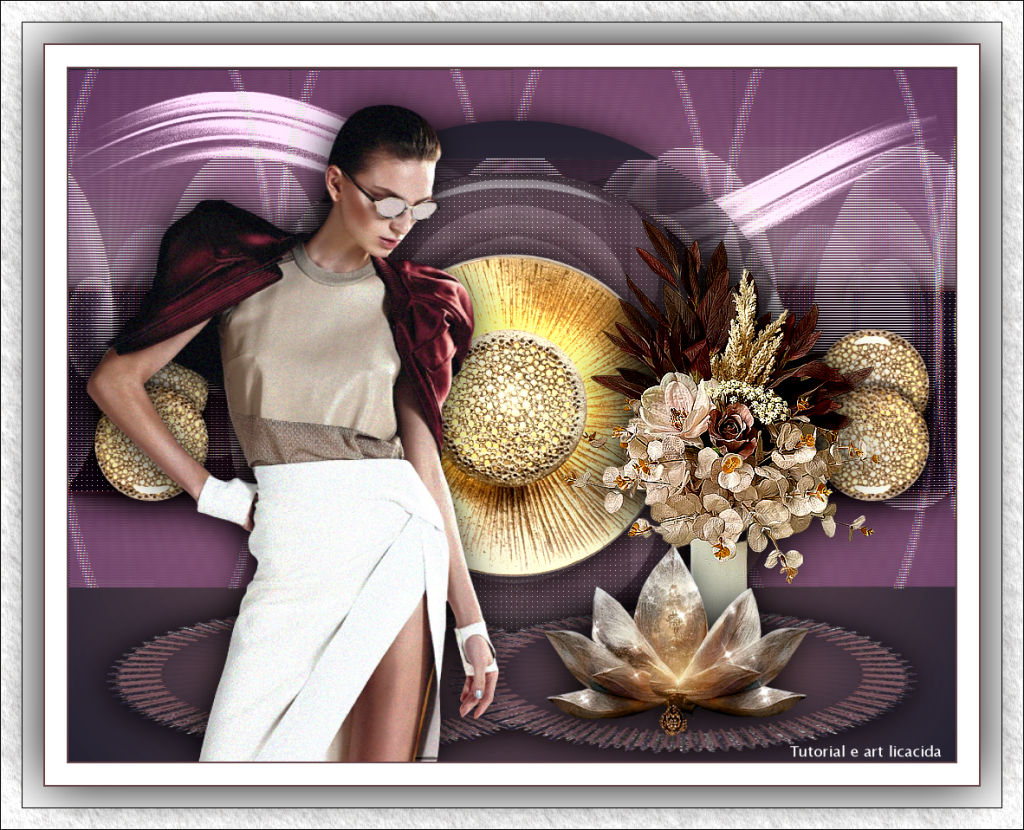
Axion
TRADUÇÕES

MATERIAL

Plugin: axion (axion.zip)
Seleções: Selection #1 e Selection #2, guardadas no canal alfa da imagem alfhachanel_axion.
Tube: 889MulherByPqnaAlice
Decor: Callitubes-246decor
Callitubes-360decor
decoraxion_lc
decoaxion2_lc
Callitubes-277flores
Efeito: Efeito_FFG_Q _Gravity Blossom....lc
Marca-d'água.
Efeitos do PSP.
PLUGINS
Plugin Axion → Lens Flare
Plugin Carolaine and Sensibility → CS-LDots
Plugin FFG_Q → Gravity Blossom
Plugin Alien Skin Eye Candy 5: Impact → Glass
Plugin Alien Skin Eye Candy 5: Impact → Perspective Shadow
Plugin Andromeda → Perspective
Plugin Nik Software → Color Efex Pro 3.0 → Contrast Only (opcional)
Plugin AAA Frames → Texture Frame
TUTORIAL
|
Esta seta marca sua linha
Clique e arraste para movê-la
|
|
Configure: Foreground: #1d1b26 — Background: #654549.
1_.
Abra o arquivo alfhachanel_axion.
Selections → Load/Save Selection → Load Selection From Alpha Channel → Selection #1.
2_.
Pinte com o gradiente formado pelas cores configuradas acima.
Configure: Style: Linear — Angle: 0 — Repeats: 0 — Invert marcado.
3_.
Plugin Axion → Lens Flare.
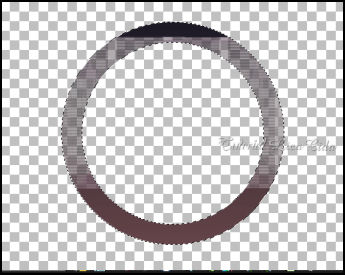
Selections → Select None.
4_.
Com a ferramenta Magic Wand (Tolerance e Feather: 0), selecione o centro do círculo.
Layers → New Raster Layer.
Layers → Arrange → Move Down.
5_.
Com o Flood Fill em Opacity: 50%, pinte com o gradiente formado pelas cores configuradas acima.
Configure: Style: Sunburst — Repeats: 0 — Center Point e Focal Point: 50.
6_.
Plugin Carolaine and Sensibility → CS-LDots: 255 / 3 / 2.
Volte a Opacity do Flood Fill para 100%.
Mantenha a seleção.
ATENÇÃO
Vamos preparar o fundo para o círculo!
Deixe essa imagem reservada e minimize.
A. Abra uma nova imagem transparente de 1024 x 800 px.
Pinte com o gradiente Sunburst formado pelas cores configuradas acima (igual ao item 5).
B. Plugin Axion → Lens Flare (mesmos valores usados no item 3).
C. Image → Resize: 80% — Resize all layers desmarcado.
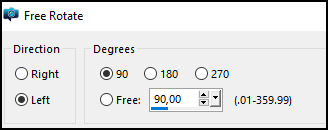
D. Image → Free Rotate.
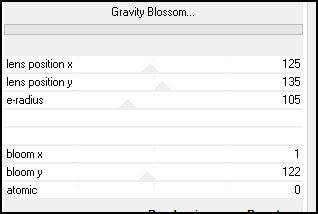
E. Plugin FFG_Q → Gravity Blossom.
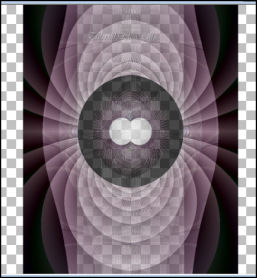
Effects → Reflection Effects → Rotating Mirror: 0 / 0 — Reflect.
A imagem deverá estar assim:
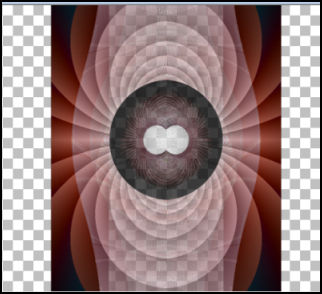
Teste em outra cor:
Edit → Copy.
Maximize a imagem reservada.
7_.
Layers → New Raster Layer.
Layers → Arrange → Move Down.
Edit → Paste Into Selection.
8_.
Effects → 3D Effects → Chisel — Size: 7 — Transparent — Color: cor do Background.
Selections → Select None.
9_.
Plugin Alien Skin Eye Candy 5: Impact → Glass — Clear ou outro a gosto.
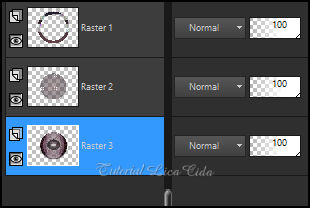
Retire a visibilidade da Raster 1.
Layers → Merge → Merge Visible.
Ative a visibilidade da Raster 1 e ative essa layer.
Layers → Duplicate.
10_.
Com a ferramenta Magic Wand (Tolerance e Feather: 0), selecione o centro do círculo.
Com o Flood Fill em Opacity: 100%, pinte com o gradiente Sunburst (como no item 5).
Selections → Select None.
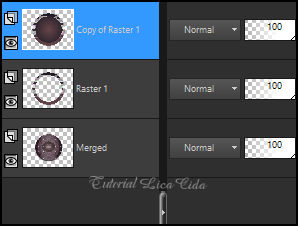
11_.
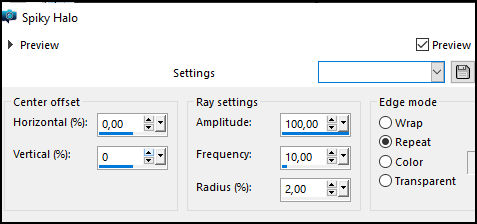
Effects → Distortion Effects → Spiky Halo.
12_.
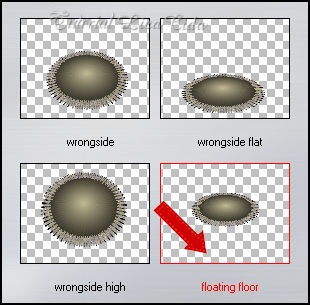
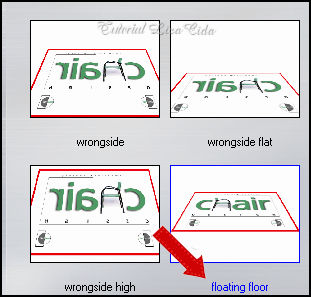
Plugin Andromeda → Perspective.
13_.
Effects → Image Effects → Offset: H: -200 / V: -284 — Custom e Transparent marcados.
Com a ferramenta Pick Tool (tecla K), desça o efeito como no print.
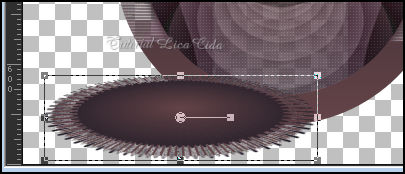
Layers → Duplicate.
Image → Mirror → Mirror Horizontal.
Layers → Merge → Merge Down.
14_.
Layers → New Raster Layer.
Layers → Arrange → Send to Bottom.
Selections → Load/Save Selection → Load Selection From Alpha Channel → Selection #2.
15_.
Pinte com o gradiente Sunburst (como no item 5).
16_.
Plugin Carolaine and Sensibility → CS-LDots: 255 / 3 / 2.
17_.
Effects → 3D Effects → Chisel (como no item 8).
Selections → Select None.
18_.
Layers → New Raster Layer.
Layers → Arrange → Send to Bottom.
Pinte com o mesmo gradiente Sunburst.
Layers → Duplicate.
19_.
Plugin Axion → Lens Flare (mesmos valores do item 3).
LAYERS
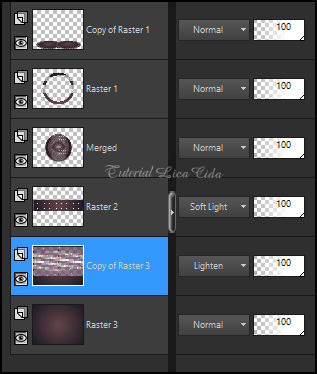
Altere os Blend Modes e a Opacity das layers a gosto.
Plugin Alien Skin Eye Candy 5: Impact → Perspective Shadow, a gosto.
Aplique nas quatro primeiras layers (efeitos) acima.
20_.
Ative a layer Merged.
Edit → Copy no Callitubes-246decor
Edit → Paste As New Layer.
Image → Resize: 80% — Resize all layers desmarcado.
Posicione. Aplique sombra a gosto.
21_.
Edit → Copy no decoaxion2_lc
Edit → Paste As New Layer.
Posicione. Aplique sombra a gosto.
22_.
Edit → Copy no decoraxion_lc
Edit → Paste As New Layer.
Com a ferramenta Pick Tool: Position X: -22 / Position Y: 27.
Tecle M para desativar a ferramenta.
Use abaixo da Raster 2.
Duplique a layer (Raster 2).
Layers → Merge → Merge Visible.
23_.
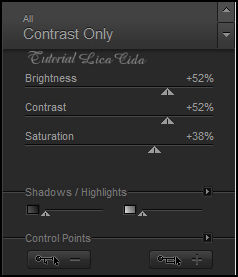
Opcional: Plugin Nik Software → Color Efex Pro 3.0 → Contrast Only, ou outro.
24_.
Edit → Copy no tube 889MulherByPqnaAlice
Edit → Paste As New Layer.
Posicione a gosto. Aplique Drop Shadow como preferir.
25_.
Edit → Copy no tube Callitubes-277flores
Edit → Paste As New Layer.
Posicione a gosto. Aplique Drop Shadow como preferir.
26_.
Edit → Copy no tube Callitubes-360decor
Edit → Paste As New Layer.
Posicione a gosto. Aplique Drop Shadow como preferir.
BORDAS
Image → Add Borders: 2 px, Symmetric marcado — Color: cor do Background.
Image → Add Borders: 25 px, Symmetric marcado — Color: #ffffff.
Image → Add Borders: 2 px, Symmetric marcado — Color: cor do Background.
Selections → Select All.
Image → Add Borders: 50 px, Symmetric marcado — Color: #ffffff.
Effects → 3D Effects → Drop Shadow: 0 / 0 / 100 / 100,00 — Color: #000000.
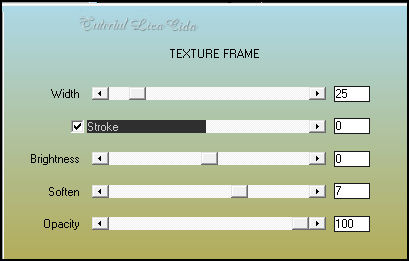
Plugin AAA Frames → Texture Frame.
Aplique a marca-d'água.
Assine e salve.
Image → Resize: Width 1024 px.
Espero que apreciem.
Aparecida / LicaCida, janeiro de 2023.
Rio de Janeiro - Brasil.

VOLTAR
Copyright ©2026 - Web Design - Naise Minas
|


