|
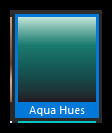
Aqua Hues
TRADUÇÕES

MATERIAL

Tubes: cora-femmes-240
cora-nature-06
(Agradeço)
Gradiente: agua-hues
Decor: strass
Marca-d'água.
Efeitos do PSP.
PLUGINS
Plugin Convolution Filter → Emboss Strong
Plugin Flaming Pear → Flexify 2
Plugin AAA Frames → Foto Frame
TUTORIAL

|
Esta seta marca sua linha
Clique e arraste para movê-la
|
|
1_.
Abra o material no PSP, duplique e feche o original.
2_.
Escolha um gradiente a gosto no seu PSP. Escolhi o Aqua Hues, que se encontra no PSP 2020 (segue anexo no material).
3_.
Abra uma nova imagem transparente de 1024 x 700 px.
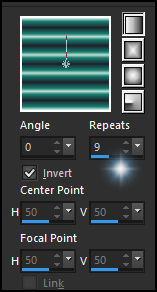
Pinte com o gradiente Linear formado pelo gradiente em uso.
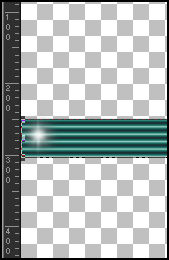
Ative a régua (Rulers).
4_.
Com a ferramenta Pick Tool, reduza como no print.
Desative a régua.
5_.
Effects → Distortion Effects → Warp.
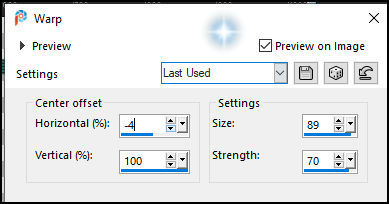
6_.
Layers → Duplicate.
Image → Mirror → Mirror Vertical.
Layers → Merge → Merge Down.
7_.
Com a ferramenta Magic Wand, selecione a parte superior.
Layers → New Raster Layer.
Pinte com o gradiente em uso.
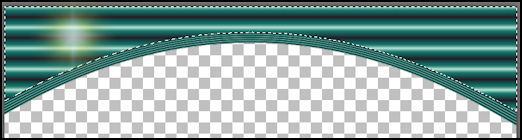
8_.
Adjust → Blur → Radial Blur.
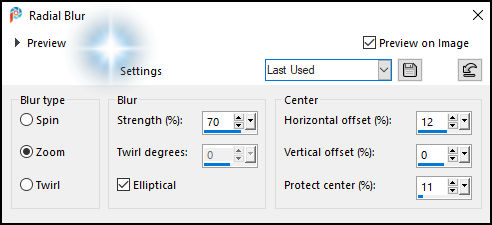
9_.
Effects → Artistic Effects → Enamel.
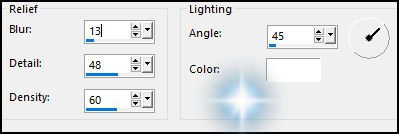
Selections → Select None.
10_.
Image → Canvas Size: 1024 x 750 — Bottom: 50.
11_.
Ative a Raster 1.
Com a ferramenta Magic Wand (Default), selecione o centro do efeito.
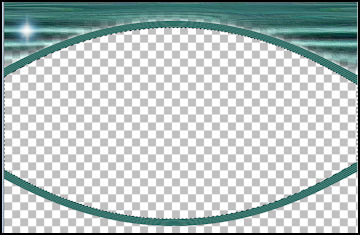
12_.
Layers → New Raster Layer (Raster 3).
Com o Flood Fill em Opacity 50%, pinte com o mesmo gradiente Linear, mudando:
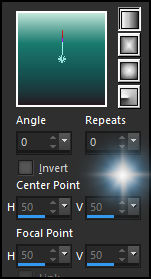
Volte a Opacity do Flood Fill para 100%.
13_.
Effects → Texture Effects → Weave (ainda selecionado) — Color: #000000.
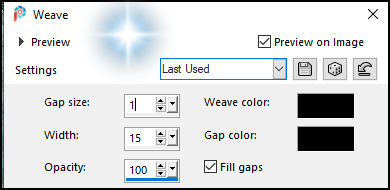
14_.
Layers → New Raster Layer (Raster 4).
Edit → Copy no cora-nature-06
Edit → Paste Into Selection.
Selections → Select None.
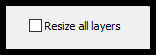
Image → Resize: 120% — Resize all layers desmarcado.
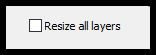
Adjust → Sharpness → Sharpen.
Layers → Merge → Merge Down.
15_.
Ative a Raster 1.
Effects → 3D Effects → Drop Shadow: 10 / 10 / 100 / 30,00 — Color: #000000.
16_.
Layers → New Raster Layer.
Layers → Arrange → Send to Bottom.
Pinte com o mesmo gradiente do item 12 (Opacity: 100%).
17_.
Selections → Select All.
Edit → Copy no cora-nature-06
Edit → Paste Into Selection.
Selections → Select None.
18_.
Effects → Image Effects → Seamless Tiling.
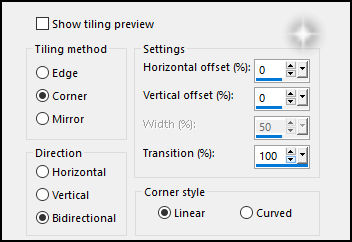
19_.
Adjust → Blur → Radial Blur (print do item 8).
20_.
Effects → Artistic Effects → Halftone.
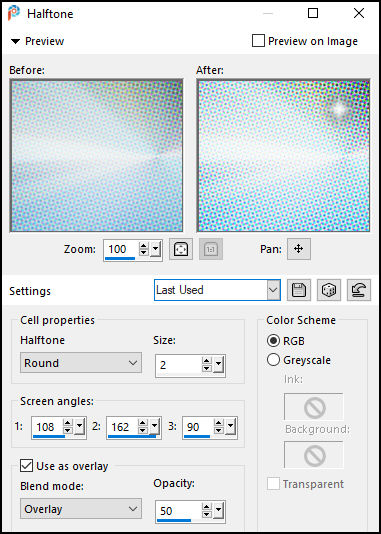
21_.
Plugin Convolution Filter → Emboss Strong → Emboss Strong 206.
Pode substituir por Effects → User Defined Filter → Emboss_3.
Layers → Duplicate.
22_.
Effects → Geometric Effects → Perspective - Vertical.
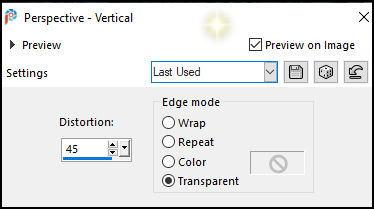
Use o efeito como no print.
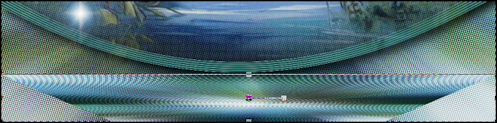
23_.
Plugin Flaming Pear → Flexify 2.
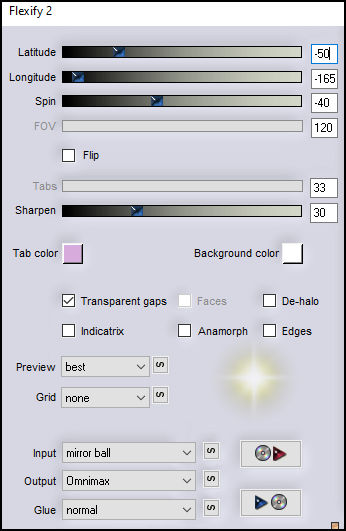
Layers → Arrange → Bring to Top.
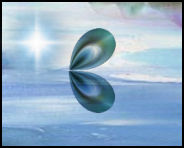
Image → Resize: 30% — Resize all layers desmarcado (use no tamanho desejado).
Layers → Duplicate.
Image → Mirror → Mirror Vertical.
24_.
Una as pétalas como no modelo.
Layers → Merge → Merge Down.
Layers → Duplicate.
Image → Mirror → Mirror Horizontal.
25_.
Una as pétalas como no modelo.
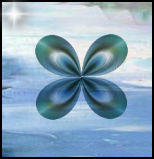
Duplique a original e aplique Image → Resize: 80% — Resize all layers desmarcado.
26_.
Una as layers.
27_.
Edit → Copy no strass
Edit → Paste As New Layer.
Duplique e use no centro de cada flor.
Una as layers.
28_.
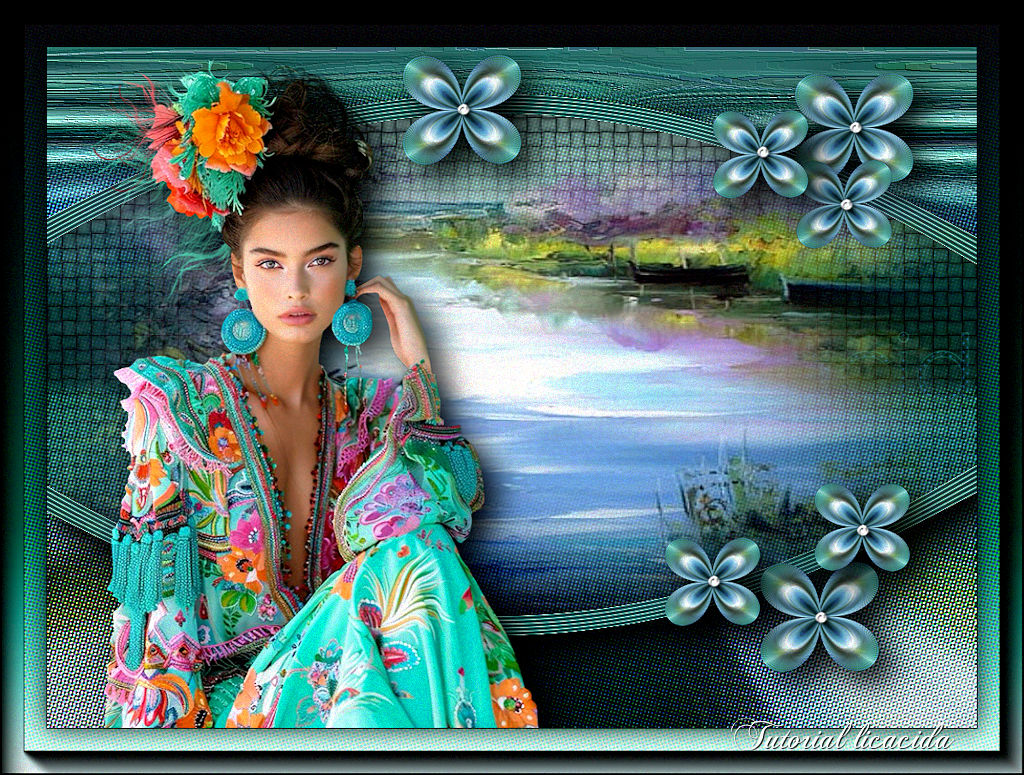
Edit → Copy no tube cora-femmes-240
Edit → Paste As New Layer.
Posicione e use a gosto.
29_.
Image → Add Borders: 1 px, Symmetric marcado — Color: #000000.
Selections → Select All.
Image → Add Borders: 50 px, Symmetric marcado — Color: #ffffff.
Selections → Invert.
Pinte com o mesmo gradiente Linear, mudando para Invert marcado (item 12).
Effects → Artistic Effects → Halftone (mesmos valores).
Plugin AAA Frames → Foto Frame — Width: 25, demais valores Default.
Edit → Repeat.
Selections → Invert.
Effects → 3D Effects → Drop Shadow: 0 / 0 / 80 / 40,00 — Color: #000000.
Selections → Select None.
Image → Add Borders: 1 px, Symmetric marcado — Color: #000000.
Image → Resize: Width 1024 px.
Aplique a marca-d'água.
Assine e salve.
File → Export → JPEG Optimizer.
Espero que gostem.
Aparecida / LicaCida, outubro de 2024.
Rio de Janeiro - Brasil.


VOLTAR
Copyright ©2026 - Web Design - Naise Minas
|


